How to Flash Mercedes HU5 Headunit with DTS Monaco?
DoIP is needed for flashing headunits. DoIP stands for
Diagnostic over Internet Protocol, and is the newest standard for offering
diagnostic and firmware flashing.
The main benefit is that it is way faster
than the older CAN protocol. So instead of firmware flashing taking several
hours, sometimes days, with this, the procedure is reduced to a few minutes!
Starting with HU5 and newer, and now, on the newest w223, the flashing and diagnostic is carried out by DoIP.
Here is a useful guide on flashing headunits by DoIP, using DTS Monaco.
How to flash a HU5es2 control unit with DTS Monaco over DoIP?
These newer units can ONLY be flashed over DoIP. Trying to flash them via CAN, will very likely brick your control unit, so that should not be attempted, under any circumstances! A DoIP hardware is required to flash these newer units. Such a hardware can be an SDConnect C4 DoIP, ECOM, VXDIAG Benz C6 or VXDIAG VCX SE Benz. DoIP brings signifficant advantage versus CAN, by that it is much faster (eg. flashing times take a few minutes, instead of several hours, telematics disks are not needed anymore, etc etc). Once you own the equipment, it will need to be correctly set up.

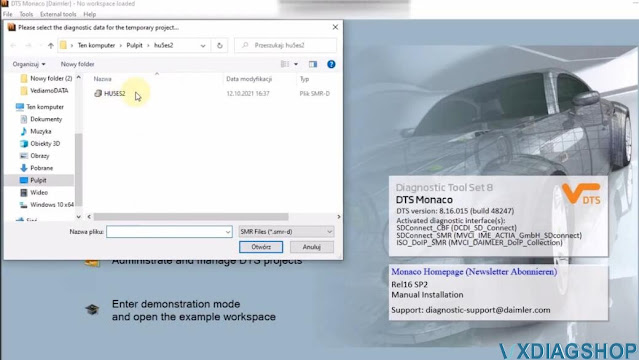

First, we'll need to select the relevant SMR-D file of the control unit which we'll be interacting with.
Once interfacing with the control unit, before flashing, it is always a good idea to have a backup of all the variant coding, which can be lost during the procedure.

Once that is out of the way, begin the search for DoIP control units.
If everything is properly set up, then you will see both the UDS_CAN and UDS_Ethernet options available.
Begin by activating the Ethernet communication, from the Execution menu.
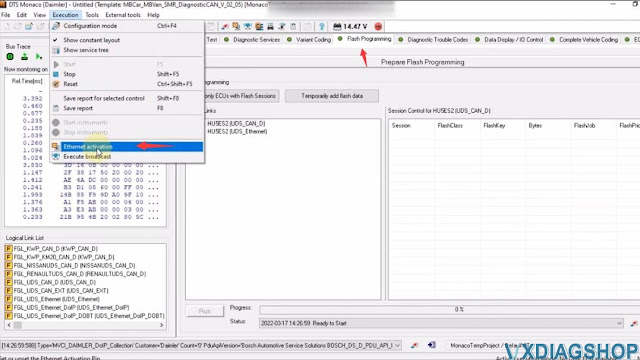
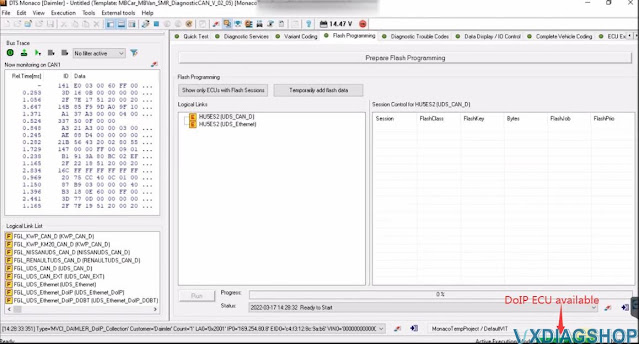
If Ethernet activation was successful, you should see the "DOIP ECU Available" message, in green, in the bottom right side of the screen.
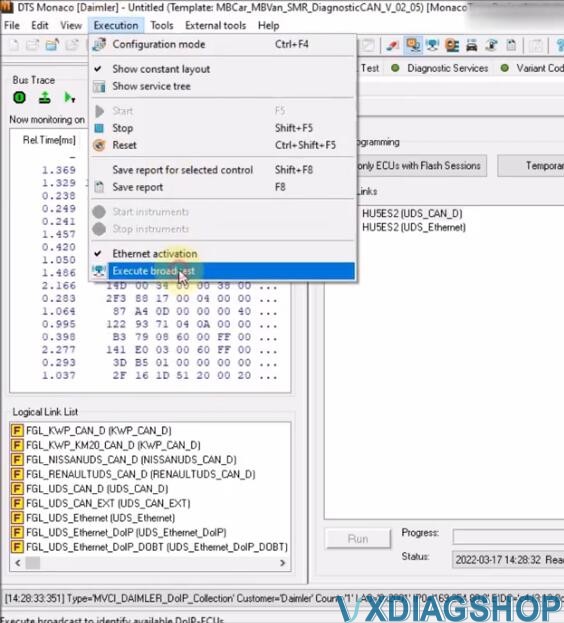
If that is not the case, attempt to send a network bradcast "Execute broadcast", to try and wake up the control units.
Once that is out of the way, you can begin to establish the DoIP (UDS_Ethernet) connection.
Go to Execution- Execute broadcast
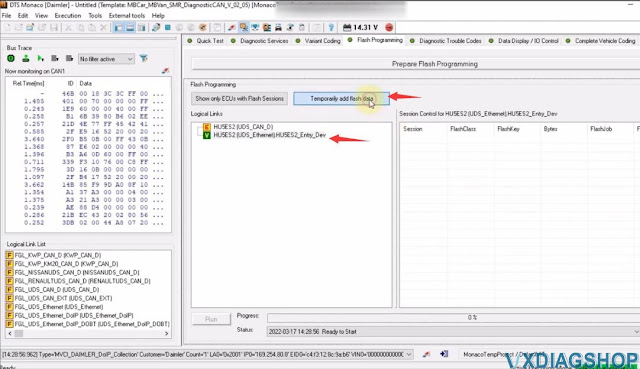
Continue by adding one or more flash files.
You need to get yourself possible flash files.
The only important thing is for the bin file to be in the same folder as
the SMR-F file.
No need to interact with it in any other way.
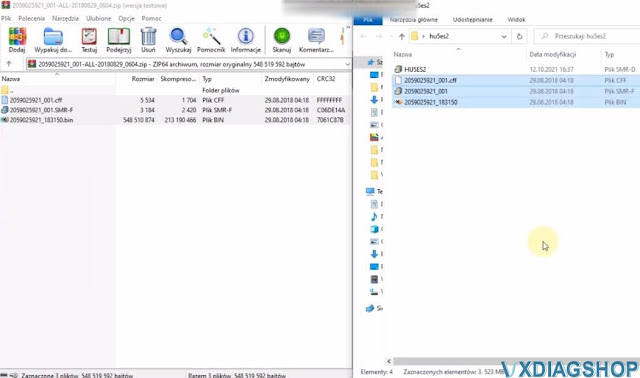

Unpack the downloaded flash files, then open them in DTS Monaco, to add them to the console.
Notice how the archive contains multiple files. Simply leave them all in the same folder. Then in DTS Monaco, you will have the option to select the SMR-F file.
Once the flash file(s) have been opened, you have the option to select one or more, for flashing purposes.

Once everything is set, press on "Prepare Flash Programming", to put the car in this special mode.
When everything is ready, car, and laptop are connected to the external power source, press the RUN button.
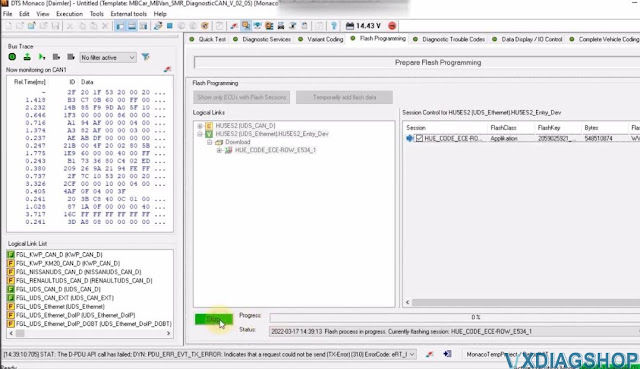
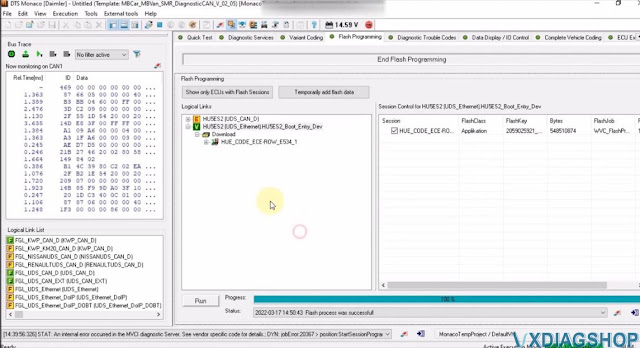
Should the process ever fail, during the flashing process, you should NOT perform a Hard Reset. Instead, simply retry, for as many times as needed. It should normally work from the first or second try.
The whole procedure can take between 10 minutes and a few hours, depending on
the size of the file you will be flashing.
The advantage of DoIP flashing,
versus CAN, is that the required time is significantly reduced.
If after flashing, the headunit is Antitheft locked, simply wait a bit, then perform a hard reset. This will fix it.
https://www.vxdiagshop.com/service/flash-benz-headunit-with-vxdiag-dts-monaco.html
How to Set up VXDIAG VCX SE with Latest ISTA 4.35?
Sometimes you may get firmware error when running ISTA 4.34 4.35 or later version with vxdiag vcx se bmw because the BMW driver is not update-to-date to support the latest ISTA.
Here is the customer solution to this issue. You are at your own risk.
'I found the solution
now VCX SE can work with latest ISTA version 4.35.18 or any ISTA version
below link to download 2 ICOM firmware just install them on PC and VCX will work.'
https://mega.nz/file/rf4hBJrD#qdcDMoRlFVwKs-MU7Cfy73HdNB0BaEaIawjPoPnB1oQ


VXDIAG VCX SE Configuration DTS Monaco 8.16 Guide
VXDIAG VCX SE Benz and C6 HDD come with DTS Monaco 8.13 version in default. DTS 8.16 has been tested by many without issue. Here’s the tips to set up DTS 8.16 for vxdiag scanners.
We don’t provide DTS 8.16 software download nor activation service.
DTS 8.13 does not require activation and special setting. Direct run and go.
How to configure DTS Monaco 8.16 with VXDIAG?
First of all, let’s connect vcx.
Connect vcx se or c6 vci with laptop
Get your DTS 8.16 installed and activated
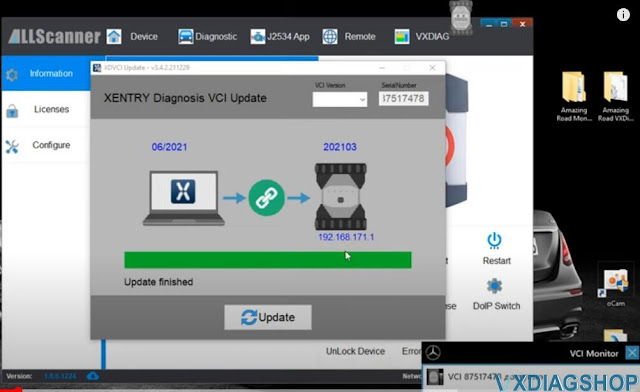
Run vx manager
Update Xentry VCI driver


Select Xentry VCI version according to your xentry version
if cannot find
correct VCI version, leave it blank

Device
is connected
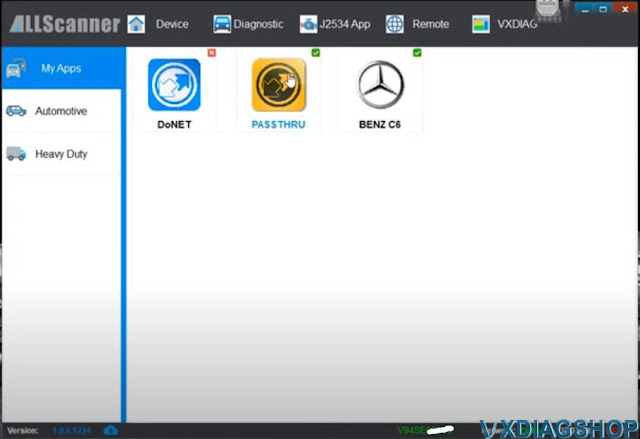
Make sure you have Passthru and C6 driver well installed.
Go to the folder you downloaded and copy this file (slave)
Copy and paste slave file to "C:/Program Files (x86)/Softing/Diagnostic Tool Set 8/8.16/Interfaces/DCDI30" folder

Run DTS Monaco 8.16

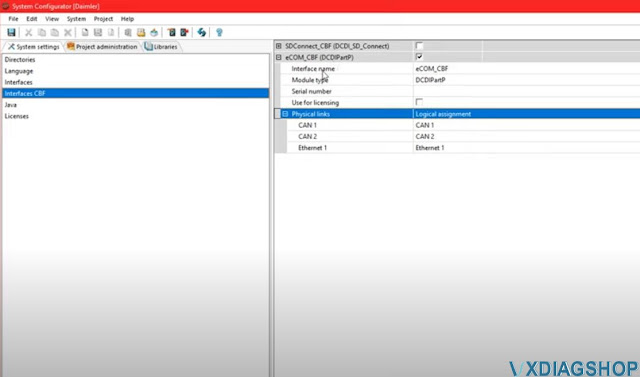
Open Adminisrate and manage DTS projects
Go to System settings- Interface CBF
Tick eCOM_CBF (DCDiPartP)
In Interface section, selectVXDIAG (J2534)interface

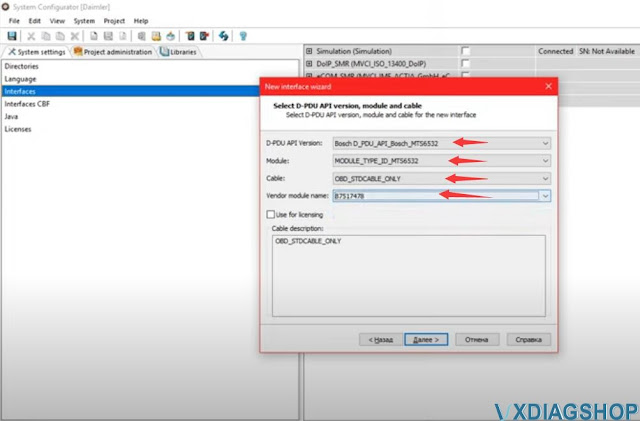
Add new interface: VXDIAG
and select D-PDU API

Press Next
Complete following information
D-PDU API version: Bosch D_PDU_API_Bosch_MTS6532
Module:
Module_Type_ID_MTS6532
Cable: OBD_STDCABLE_ONLY
Vendor module name:
87517478
Tick Use for licensing
Save setting

VXDIAG will work in C6 mode.
VXDIAG or Mini VCI for Toyota Lexus Hybrid?
After reading this review, I decided to get the vxdiag vcx nano Toyota WiFi cable. I received it and I configured it.
Now they are links to get GTS 17.00.020.
For information, the software (VCX Manager) works very well with Windows 7 64bit.
VX Manager 1.8.7
Firmware 1.9.1
I downloaded version 17 from Techstream.
Shortly before purchasing the VCX, I was sent a version from Techstream that was newer than the one I had.
The patch is valid until version 18 if I understood correctly.
I tried
this patch with Techstream version 17 and it works.
I ran TIS on my Prius IV to do a health check, it reads 41 control
modules.
I was able to do what I wanted, the Mini VCI I had didn't allow me
to do it. As soon as it exceeds a certain number of units, I get an error
message.
We have access to an incredible amount of data (particularly the
hybrid part).
With the Mini VCI, it was limited.
With the VCX NANO, it
works very well.
Another little test on the 2014 Lexus Rx 450h F Sport. That works well.
For each system there is a screen giving the possible fault codes, a screen giving the state of the system with the parameters then an "active test" screen.
For example, for the "air conditioning" system, I chose a simple command:

For the air conditioning, there is an interesting function, which varies the maximum speed of the compressor (probably "Target Speed").
As regards the active tests of the hybrid system, they are to be used in a
particular context.
The only ones that can be launched without any particular
procedure (apart from the ventilation control) are the "Inspection Mode" (used
for example for pollution control).
You can set to "ON" or "OFF" from the PC and see the status on the control screen:
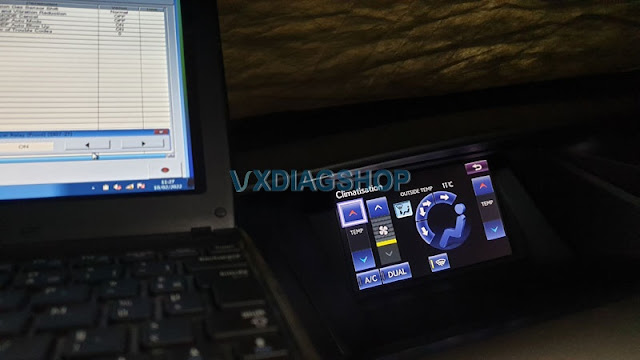
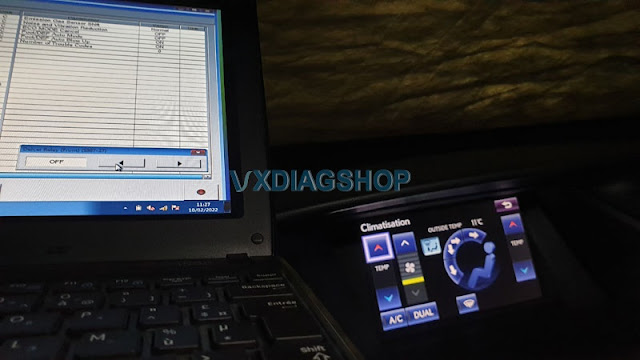
The hybrid function is copious (6 pages)
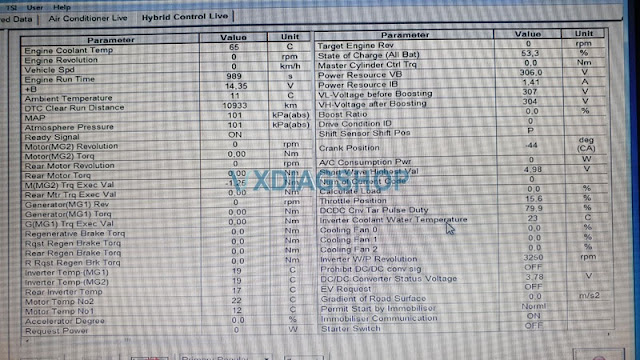
with interesting commands:

and others that seem risky.

I am really happy with this vxdiag vcx nano toyota techstream cable, and again a big thank you to all those who contributed.
VXDIAG VX Manager 1.8.8: update information and download
Allscanner VXDIAG VX Manager driver released a new version 1.8.8 on May 11th, 2022.
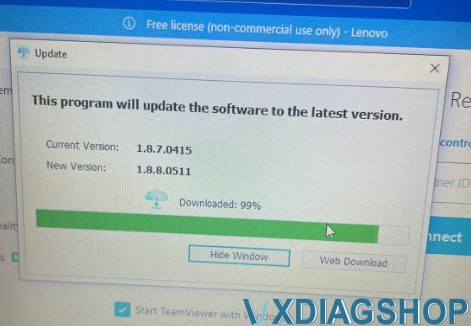
VX Manager 1.8.8.0511
2020-05-11
Update Feature:
- Update new platform SDK v1.8.7.0 (Device disconnect detect)
- User interface language setting
- Show progress when license updating.
Free download VX Manager 1.8.8
https://mega.nz/file/eRIikSQS#wwZ-2_nrBtAnm76G2Gjc2aSVDspRK5Y4sPuhMkKAPhY
Operating system: Win7, Win8, Win10, Win11
How to install VX Manager driver?
https://www.vxdiagshop.com/service/how-to-install-vx-manager-1003.html