VXDIAG Ford IDS Tested Working on Windows 11
New test reported: Vxdiag Ford IDS V125.01 was tested working on Windows 11 (Home edition). It was a Ford Edge 3.5L 2007.
Compatible devices: vxdiag vcx nano ford,vxdiag vcx se pro,vxdiag full etc
NOTE:
Update vx manager driver to latest version (1.8.8)
Don’t install Ford IDS and Mazda IDS on the same operating system, better don’t install GDS Techstream Tech2win etc programs with IDS.
Follow Ford IDS installation guide to set up IDS
Win11 Home edition is not very stable, Win10 is recommended. Win10 pro works 100%


How to Fix VXDIAG Xentry "No Access Authorization Code"?
As titled, here comes the working solution to vxdiag benz c6/vcx se benzxentry hdd or 2tb full hdd Xentry software ‘No access authorization code! Contact User Help Desk’ problem.

Quick Solution:
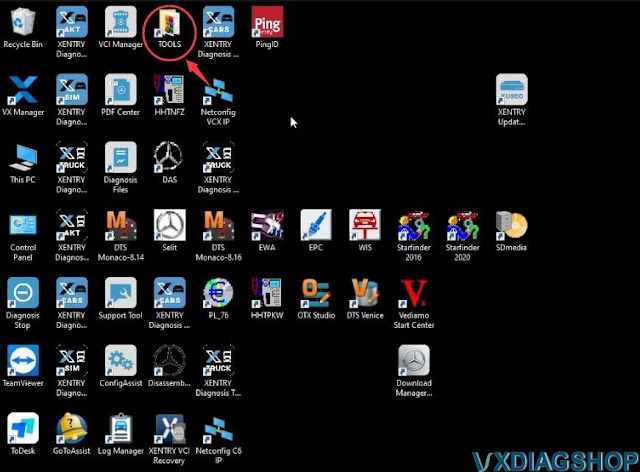
Open TOOLS folder on the desktop
Run configassist file, close the file, then run Xentry again.
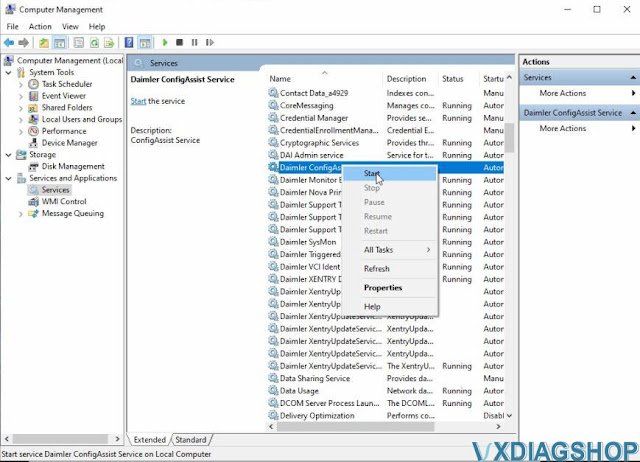
If it is not working and reports another ‘Unable to access service’ error, follow the steps below to start configassist file manually.

Run This PC
Right-click Manage-> Computer Management-> Services and
Applications
Locate and start Daimler ConfigAssist Service File.
Run Xentry again.


Any questions feel free to contact www.vxdiagshop.com customer service.
How to Flash Mercedes HU5 Headunit with DTS Monaco?
DoIP is needed for flashing headunits. DoIP stands for
Diagnostic over Internet Protocol, and is the newest standard for offering
diagnostic and firmware flashing.
The main benefit is that it is way faster
than the older CAN protocol. So instead of firmware flashing taking several
hours, sometimes days, with this, the procedure is reduced to a few minutes!
Starting with HU5 and newer, and now, on the newest w223, the flashing and diagnostic is carried out by DoIP.
Here is a useful guide on flashing headunits by DoIP, using DTS Monaco.
How to flash a HU5es2 control unit with DTS Monaco over DoIP?
These newer units can ONLY be flashed over DoIP. Trying to flash them via CAN, will very likely brick your control unit, so that should not be attempted, under any circumstances! A DoIP hardware is required to flash these newer units. Such a hardware can be an SDConnect C4 DoIP, ECOM, VXDIAG Benz C6 or VXDIAG VCX SE Benz. DoIP brings signifficant advantage versus CAN, by that it is much faster (eg. flashing times take a few minutes, instead of several hours, telematics disks are not needed anymore, etc etc). Once you own the equipment, it will need to be correctly set up.

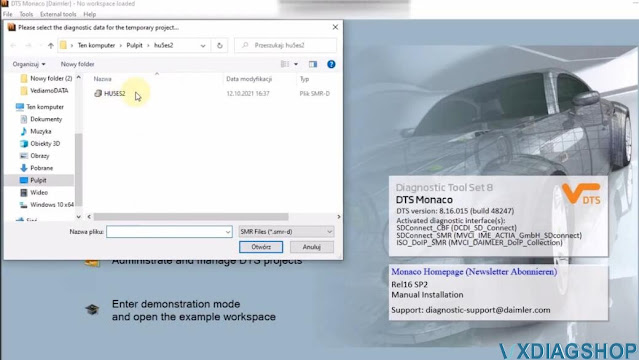

First, we'll need to select the relevant SMR-D file of the control unit which we'll be interacting with.
Once interfacing with the control unit, before flashing, it is always a good idea to have a backup of all the variant coding, which can be lost during the procedure.

Once that is out of the way, begin the search for DoIP control units.
If everything is properly set up, then you will see both the UDS_CAN and UDS_Ethernet options available.
Begin by activating the Ethernet communication, from the Execution menu.
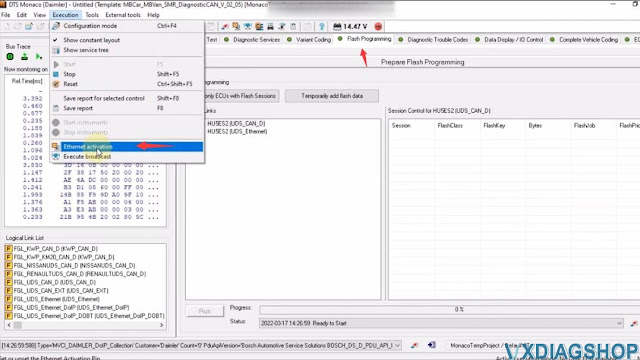
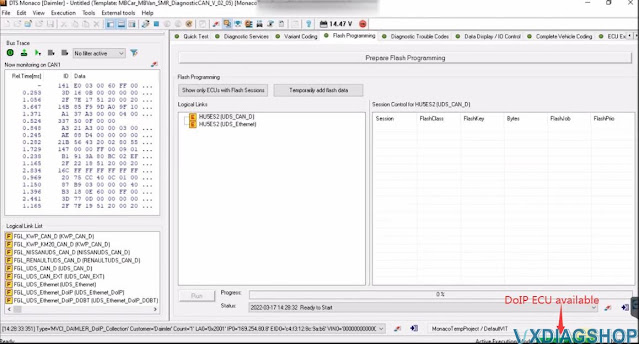
If Ethernet activation was successful, you should see the "DOIP ECU Available" message, in green, in the bottom right side of the screen.
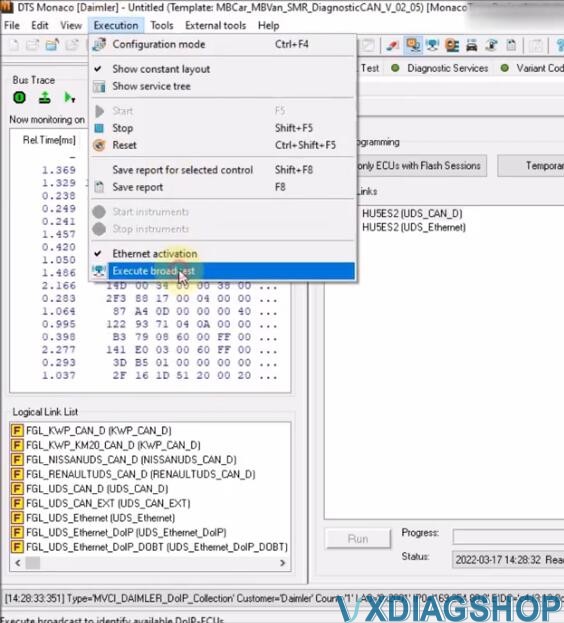
If that is not the case, attempt to send a network bradcast "Execute broadcast", to try and wake up the control units.
Once that is out of the way, you can begin to establish the DoIP (UDS_Ethernet) connection.
Go to Execution- Execute broadcast
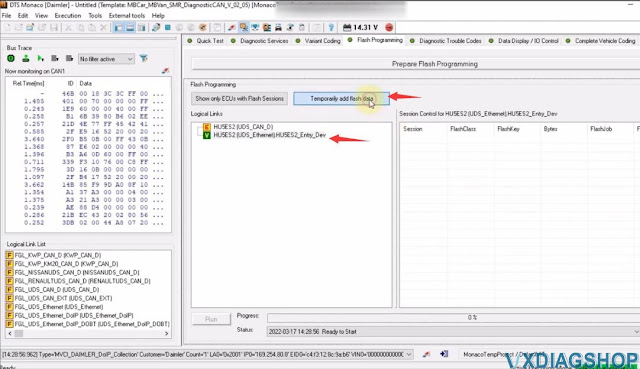
Continue by adding one or more flash files.
You need to get yourself possible flash files.
The only important thing is for the bin file to be in the same folder as
the SMR-F file.
No need to interact with it in any other way.
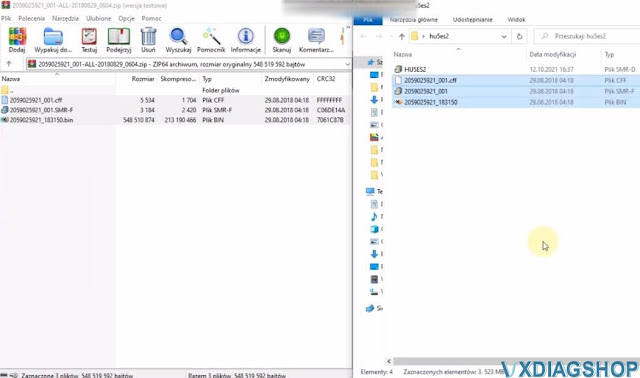

Unpack the downloaded flash files, then open them in DTS Monaco, to add them to the console.
Notice how the archive contains multiple files. Simply leave them all in the same folder. Then in DTS Monaco, you will have the option to select the SMR-F file.
Once the flash file(s) have been opened, you have the option to select one or more, for flashing purposes.

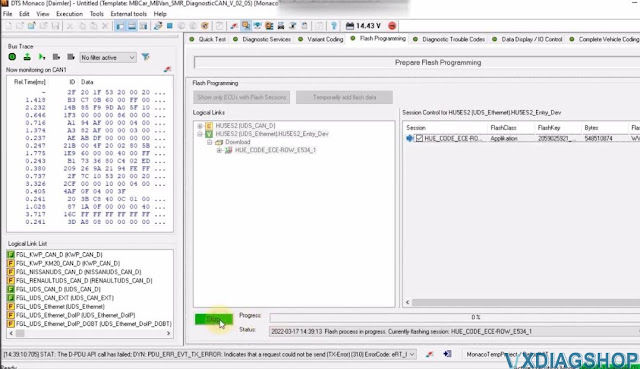
Once everything is set, press on "Prepare Flash Programming", to put the car in this special mode.
When everything is ready, car, and laptop are connected to the external power source, press the RUN button.
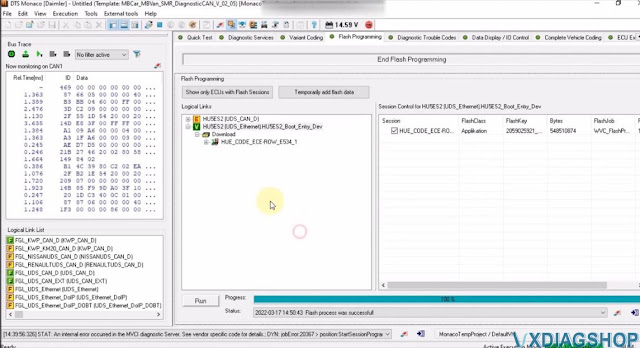
Should the process ever fail, during the flashing process, you should NOT perform a Hard Reset. Instead, simply retry, for as many times as needed. It should normally work from the first or second try.
The whole procedure can take between 10 minutes and a few hours, depending on
the size of the file you will be flashing.
The advantage of DoIP flashing,
versus CAN, is that the required time is significantly reduced.
If after flashing, the headunit is Antitheft locked, simply wait a bit, then perform a hard reset. This will fix it.
https://www.vxdiagshop.com/service/flash-benz-headunit-with-vxdiag-dts-monaco.html
How to Set up VXDIAG VCX SE with Latest ISTA 4.35?
Sometimes you may get firmware error when running ISTA 4.34 4.35 or later version with vxdiag vcx se bmw because the BMW driver is not update-to-date to support the latest ISTA.
Here is the customer solution to this issue. You are at your own risk.
'I found the solution
now VCX SE can work with latest ISTA version 4.35.18 or any ISTA version
below link to download 2 ICOM firmware just install them on PC and VCX will work.'
https://mega.nz/file/rf4hBJrD#qdcDMoRlFVwKs-MU7Cfy73HdNB0BaEaIawjPoPnB1oQ


VXDIAG VCX SE Configuration DTS Monaco 8.16 Guide
VXDIAG VCX SE Benz and C6 HDD come with DTS Monaco 8.13 version in default. DTS 8.16 has been tested by many without issue. Here’s the tips to set up DTS 8.16 for vxdiag scanners.
We don’t provide DTS 8.16 software download nor activation service.
DTS 8.13 does not require activation and special setting. Direct run and go.
How to configure DTS Monaco 8.16 with VXDIAG?
First of all, let’s connect vcx.
Connect vcx se or c6 vci with laptop
Get your DTS 8.16 installed and activated
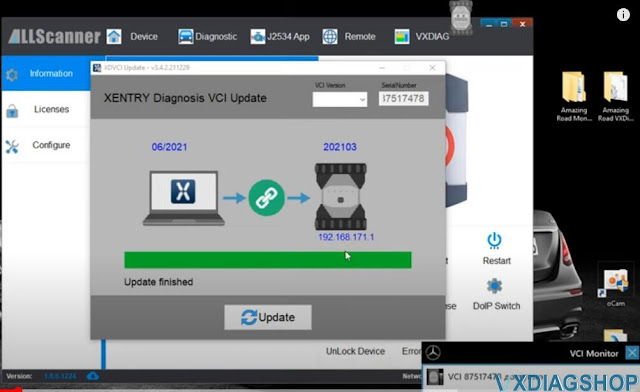
Run vx manager
Update Xentry VCI driver


Select Xentry VCI version according to your xentry version
if cannot find
correct VCI version, leave it blank

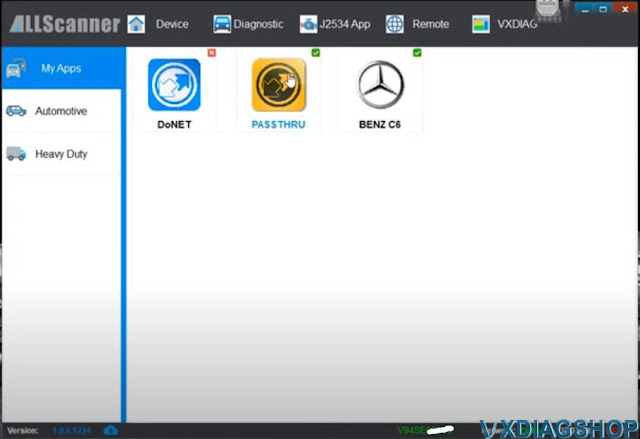
Device
is connected
Make sure you have Passthru and C6 driver well installed.
Go to the folder you downloaded and copy this file (slave)
Copy and paste slave file to "C:/Program Files (x86)/Softing/Diagnostic Tool Set 8/8.16/Interfaces/DCDI30" folder

Run DTS Monaco 8.16

Open Adminisrate and manage DTS projects
Go to System settings- Interface CBF
Tick eCOM_CBF (DCDiPartP)
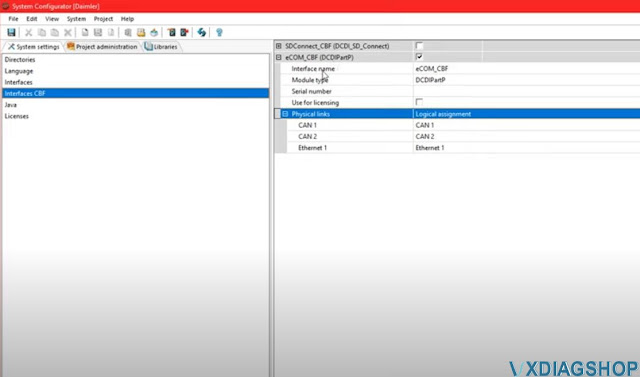
In Interface section, selectVXDIAG (J2534)interface

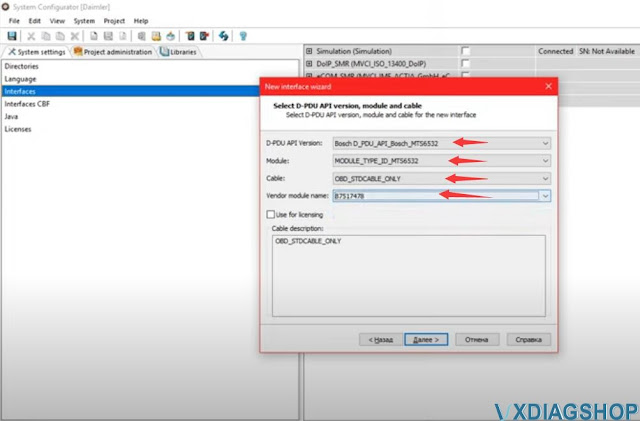
Add new interface: VXDIAG
and select D-PDU API

Press Next
Complete following information
D-PDU API version: Bosch D_PDU_API_Bosch_MTS6532
Module:
Module_Type_ID_MTS6532
Cable: OBD_STDCABLE_ONLY
Vendor module name:
87517478
Tick Use for licensing
Save setting

VXDIAG will work in C6 mode.