Does VXDIAG 2TB Software Include a GM DPS license?
Question:
Does the VXDIAG 2TB Software HDD/SSD include a GM DPS license?
The VXDIAG 2TB HDD/SSD typically comes preloaded with diagnostic software and tools for various vehicle brands, including GM (General Motors).
The 2TB software hard drive or solid drive does include a GM DPS (Diagnostic Programming System) software 4.52. But the DPS license has expired.
DPS 4.52.2000 license valid in 04/2024. Try to change the computer date/time to before April 2024.
If it is not working, better get the newer version.
The newer version, DPS 4.53, comes with a lifetime license. But it is not free. You have to buy it somewhere else.

VXDIAG Reprogram GM Volt 2012 HPCM2 with Techline Connect on Win10
Another GM Volt HPCM2 reprogramming review using VXDIAG VCX NANO GM scanner and Techlinne Connect subscription.
“I have a 2012 Volt that keeps throwing a bogus code about low coolant in the high voltage battery coolant reservoir. Not often, maybe once a year or once every 6 months. I have no idea why it is doing this. I tried the plug that basically hardwires the right resister to the leads. I checked and even cleaned up and resoldered the leads from the sensor where they go into the wiring harness and still, sometimes it just trips. When it does, the HPCM2 needs to be reprogrammed. I finally got tired of taking it to the dealership and decided to try the VXDIAG VCX Nano. I’d post the latest on how I successfully pulled it off.
1: Use a windows 10 computer. Windows 11 may work, but I didn’t try.
2:
Order a VCX Nano. It went on sale for $105.
3: Download the latest VX Manager
software installer from the vxdiagshop.com site where
you ordered your VCX Nano. Surprisingly, that appears to be clean.
4: When
installing, check the box for J2354
Passthru driver, NOT any of the manufacturer specific ones
and NOT the GM ones.
5: Go to acdelcotds.com, create an account, and buy the
$45, 1-VIN software subscription for 2 years.
6: After buying that, go back
to the subscriptions page. You will see an ‘Add VIN‘ link, but
only if you’re logged in and you have to log in again every single time you go
there. They must have some of the worst web application developers out there.
Click it. It will take you to a page where you can download the TLC (Techline
Connect) installer.) Fear not. On the pricing page, a license for Techline
Connect is over $4,300 per year. Don’t worry, you won’t need a license, but you
will need the software.
7: Run the installer. When it completes, it will run
Techline Connect. Close it. The username and password you created on
acdelcotds.com will not work in the username and password fields to login to
Techline Connect, so don’t bother trying.
8: Go back to acdelcotds.com,
Login, and again click the ‘Add VIN’ link again. On the page that comes where
you downloaded Techline Connect, leave the ‘Run as admin’ checkbox unchecked and
click ‘Launch Techline Connect’. When it runs, it will see there are a boatload
of updates that it does not have and it will go through them all. It is going to
install a lot of software.
9: When it’s all done, it will close. Again go
back to acdelcotds.com and repeat above process for launching Techline Connect.
This time, you should make it all the way into the application. Click on the SPS
option on the icons in the list of icons on the menu at the left of the
window.
10: VXDIAG should show up as a device option. After this, the VIN
should be automatically detected and then you can keep clicking Next and make it
through the process. When it gets to the modules, it’s a much longer list than
most vehicles. Find the Hybrid Powertrain Control Module 2 option and click it.
Then, just keep clicking next and agreeing to everything until it’s done.
After programming is complete, you may need to turn the car off and turn it back on again if the check engine light is lit.
Start to to finish, you’re looking at around 1 to 2 hours depending on how fast you are.
For ~$147 I now have the capability to clear codes whether it’s a real problem or not.”

Updated:
It works fine on Windows 11 as well.
Another review:
“I ordered VCX Nano from vxdiagshop.com and followed the above instructions on my Windows 11 Computer with the virus protection off. I followed your steps exactly and in 2-3 hours I was able to clear the DTC’s, and I plugged in and got a green charging light again. I have never been so happy to see my Volt charging. And it worked using Windows 11 without a hitch.”
VXDIAG Driver "GM GDS2 and Tech2win Not Installed" Solution
Problem:
Failed to install driver for VXDIAG VCX NANO GM scanner. VX Manager gives error MDI driver not installed and device license for this application is invalid or expired.


Solution:
Usually, you don’t need to install SGM RDS driver. It is for Chinese brands.
If need to diagnose Chinese GM with RDS, your license has expired. Update license before installing the SGM RDS driver.
Update:
Got the license update. When installing driver again, it says GM GDS2 or Tech2win Software Not Installed.

Solution:
Just as indicated, install GDS2 and Tech2win software, then install this driver.
017 GM Volt LT Openpilot with VXDIAG and SPS2
Tutorial: How to program 2017 Chevrolet Volt LT to allow Openpilot Operation using Techline Connect SPS.
Several people have successfully enabled Openpilot operation on 2017 LT Volts without stock Premier features. This section will cover the firmware modifications required to enable Openpilot. Hardware modifications are also required. Stock cruise control will be inoperative after these modifications, only cruise available will be Openpilot once it is booted.
Introduction
The Chevrolet Volt (2016-2018) is a popular vehicle to use with OpenPilot and the C2/C3. Out of the box, only the Premier optioned Volt with the Driver Convenience II package is supported. This model includes a radar behind the bow tie on the grille, LKAS, and Adaptive Cruise Control. The LT version is not officially supported, nor is the Premier version without radar Adaptive Cruise Control. But…. There is a way! Either way you have to have a radar which can easily be bought on eBay and wired to the OBDII port, as well as the radar transparent bow tie which is much harder to come by. I believe this is optional if you want to use the very Alpha E2E longitudinal model.
All of the main modules in the vehicle are the same between LT and Premier versions. This means that the only limitation is in software, i.e. which commands the ECM (Engine Control Module), BCM (Body Control Module), Brake Module, Power Steering Module, and Cluster are willing to accept/transmit between each other and OpenPilot. GM may change their software in the future, breaking the process. As always, do at your own risk. Worst case scenario can leave a vehicle module inoperative if done incorrectly. Firmware modification like this will result in DTC (Diagnostic Trouble Codes) that will be invisible to the user (no dash icons) but will be visible if you take the vehicle to the dealer. All codes reference lost communication with Premier modules that do not exist such as Park Assist and Blind Spot Monitoring and do not affect normal operation.
After programming, stock cruise control will cease to exist, you must always use Openpilot.
Required
- GM TechLine Connect (included in when purchased against a VIN)
- GM Developmental Programming System (DPS)
- Windows 10 or 11 computer with at least 8GB of RAM and modern specs (see specifications list on GMs website)
- VX Manager
- VXDIAG VCX Nano GM OBDII Programmer (or equivalent product/official MDI from GM)
- About 2-5 hours depending on computer speed and your proficiency with operating the systems
- An internet connection during all programming tasks
Notes:
- Car must be unplugged from wall charger
- Car should be attached to a 12V trickle charger (I did this without, but the software recommends it as battery voltage fluctuations could cause adverse programming effects, i.e. bricking a module).
- If using a laptop, ensure sufficient battery charge or keep it plugged in.
- I have found most success programming with the car in maintenance mode (hold start button down with foot off brake for about 5 seconds). * If you have issues with this, try with vehicle fully on or off.
- When completed with programming, use extreme caution when testing Openpilot for the first time, it may or may not work correctly (no longitudinal or no lateral control). Once you confirm everything works as expected, it’s just like a Premier Volt!
- Throughout programming, various chimes/lights will turn on and off/relays will chatter, this is normal.
If you do not disable Anti-Virus and firewall you will have issues! VX Manager is highlighted as a virus for some reason. I installed on a fresh Windows install out of caution.
Software Preparation
- Install VX Manager. Only install “PASSTHROUGH - J2534”. The GM packages will be handled by GM’s installation.
- Install GM TechLine Connect
- Install GM Developmental Programming System / Patches
ACDelcoTDS
ACDelcoTDS is GM’s online portal to vehicle diagnostics and programming. A single VIN costs $45 for a year.
Sign into https://www.acdelcotds.com/subscriptions, or create an account if needed.
When purchasing a VIN through the system, you will need to find a VIN that has the software you desire. i.e. a Premier with Driver Confidence II package (make sure it has a flat plastic trim where the bow tie is on the grille). Also, ensure the VIN you select is the same year as your vehicle.
Optionally purchase another VIN that is the actual vehicle that you own, in case things don’t work you can flash the original firmware back to the car (or if you sell the car and wish to return to stock).
Once purchased you will see your active VINs under “My Subscriptions”. Click “View”, then select the Premier VIN. This will bring you to a page to download and install TechLine Connect if you have not already. If TechLine Connect is installed, you will see an option to start it. Before running/installing TechLine Connect, open VX Manager, your VCX Nano will beep to verify connection, if it does not, select reconnect on the main screen.

VIN Subscriptions.

VXManager Reconnect if needed.

Actual Programming
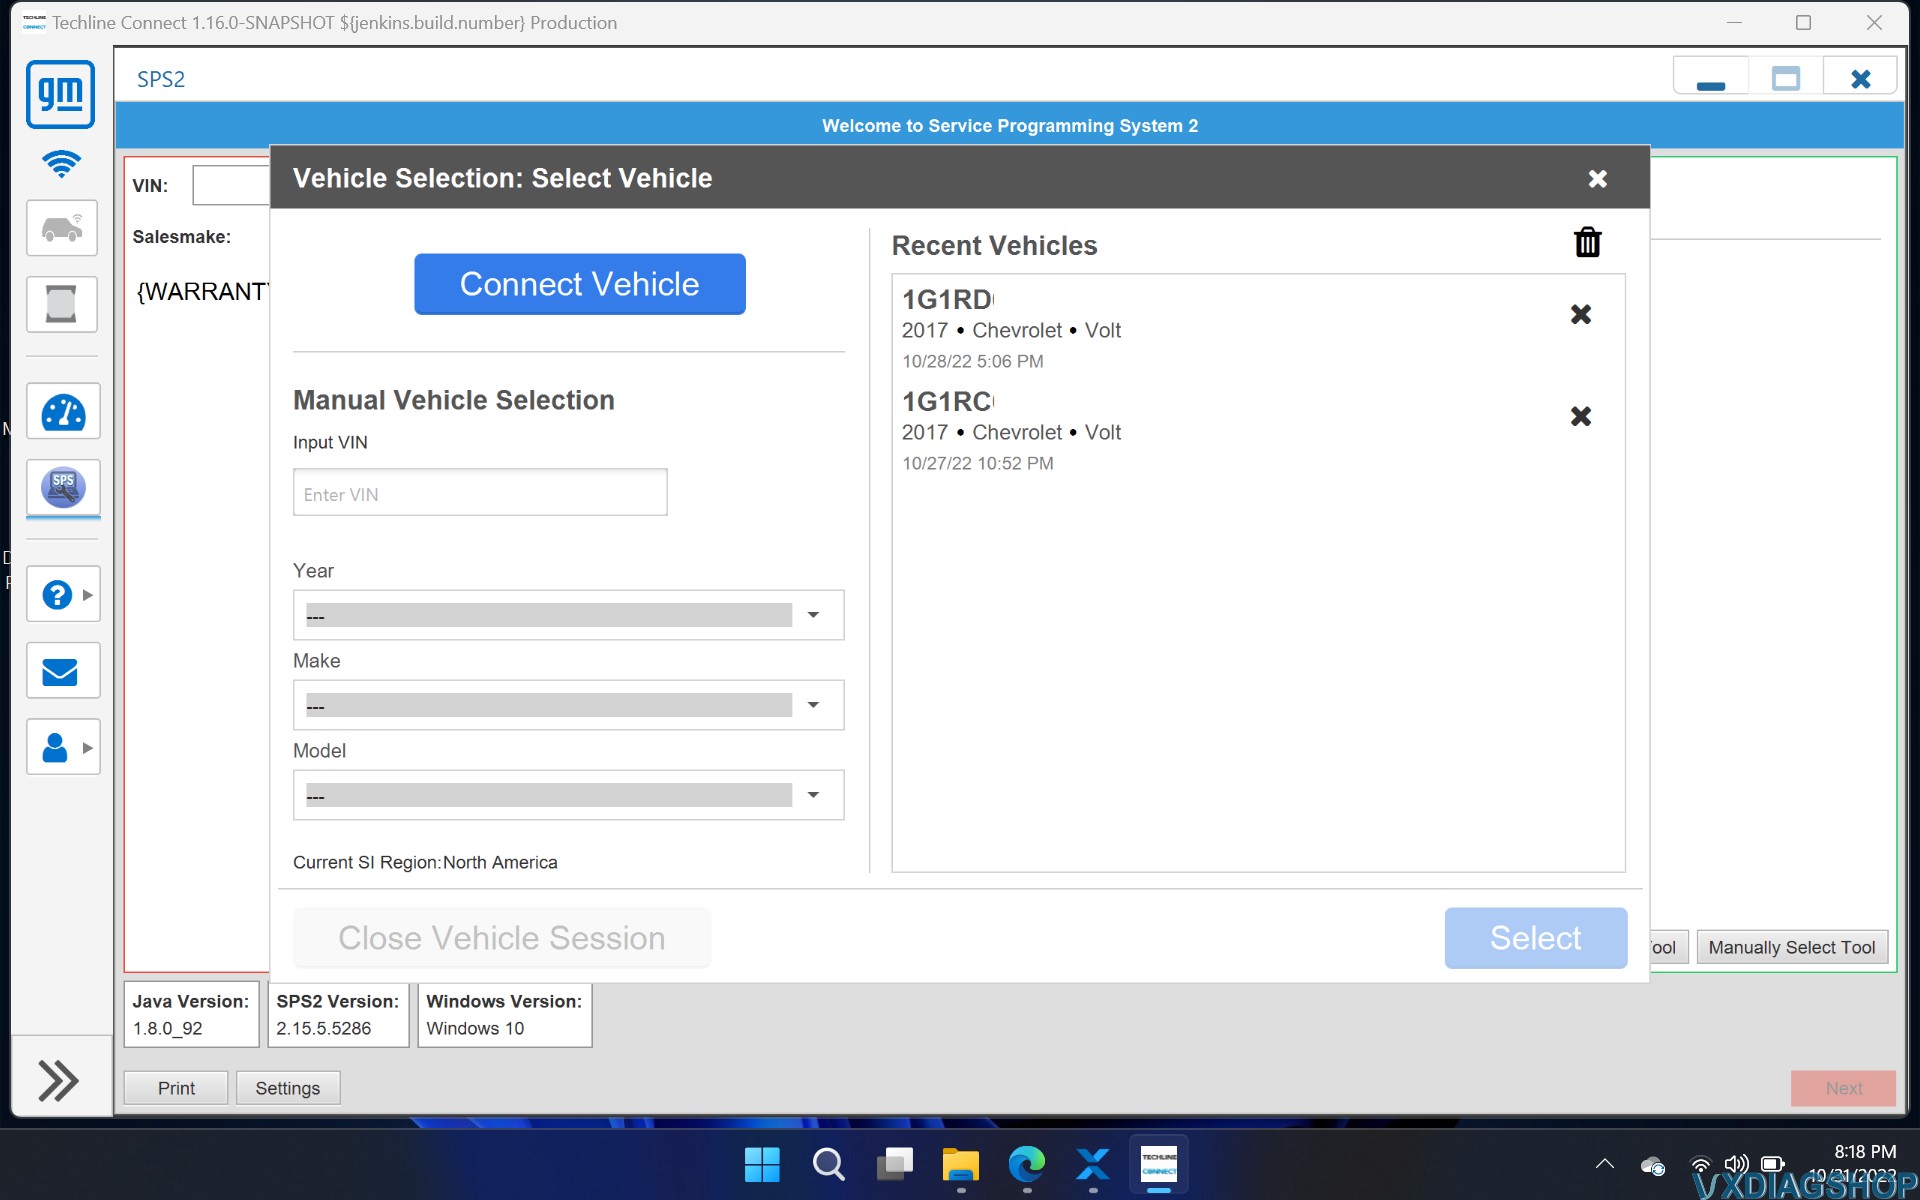
Once TechLine connect is opened, make sure your Premier VIN is selected, then click “Select”.
A dialog box will pop up to select the interface with the vehicle, select “VXDIAG”.

Ensure Premier VIN is selected at top dropdown box. Click “Next”.

A listing of all the control modules from the Premier VIN is shown. From this point forward, this screen will be where you select the module you would like to program.

The system will give you an error at the selection of each module, letting you know the VIN selected does not match your VIN, always select “OVERRIDE”.

The following photos show the programming process as well as the ECU list. It will be the same process for each module, although the information displayed will vary.
ECU List Page 1-3


ECU Programming Page 1-4


Body Control Module Programming (K9)
Body control module programming is required to allow lateral/longitudinal operation of Openpilot. This module may not need to be programmed if you already have lateral control with Openpilot and are currently using a Pedal for longitudinal control.
- Select “Body Control Module” under the ECU list in TechLine Connect.
- “Override” VIN mismatch.
- Click “Next”
- Click “Next”
- Click “Ok” for the warning on reprogramming with same calibration
- Programming will finish properly. At the end you will probably get a warning on the dash to recalibrate the driver’s window. DONE!
Engine Control Module Programming (K20)
Engine control module programming is required to enable longitudinal operation of Openpilot
- Select “Engine Control Module” under the ECU list in TechLine Connect
- “Override” VIN mismatch
- Click “Next”
- Click “Next”
- Click “Ok” for the warning on reprogramming with same calibration
- Programming will NOT finish properly. Wait till it finishes trying and gives you a dialog box saying there was a failure. DONE!
Power Steering Control Module Programming (K43)
Power Steering Control Module programming is required to enable lateral operation of Openpilot. Not required for Volts that already have LKAS
- Select “Power Steering Control Module” under the ECU list in TechLine Connect
- “Override” VIN mismatch
- Click “Next”
- Click “Next”
- Click “Ok” for the warning on reprogramming with same calibration
- Programming will finish properly
- DONE!
Electronic Brake Control Module Programming (K17)
Electronic Brake Control Module programming is required to enable longitudinal operation of Openpilot
- Select “Electronic Brake Control Module” under the ECU list in TechLine Connect
- “Override” VIN mismatch
- Click “Next”
- Click “Next”
- Click “Ok” for the warning on reprogramming with same calibration
- Programming will finish properly
- DONE!
Brake Booster Control Module Programming (K177)
Brake Booster Control Module programming is required to enable longitudinal operation of Openpilot
- Select “Brake Booster Control Module” under the ECU list in TechLine Connect
- “Override” VIN mismatch
- Click “Next”
- Click “Next”
- Click “Ok” for the warning on reprogramming with same calibration
- Programming will finish properly
- DONE!
Instrument Cluster Programming (P16)
Instrument Cluster programming is not required for Openpilot operation, although it does offer a more streamlined user experience.
Without programming: Cruise Control icons will appear distorted
- ACC icons on the cluster will be missing
- “Following Distance” menu on the cluster will be missing
- “Following Distance” menu on the cluster will be missing

With programming:
- Cruise Control icons will show premier versions of icons
- ACC icon will show selected following distance
- ACC icon will show an Openpilot vehicle lead is targeted
- “Following Distance” menu on the cluster will be visible

Instrument Cluster programming is a bit more involved. If you flash with the
Premier firmware, you will fix the above issues, but the cluster will also
display errors for ECUs that your vehicle does not have (for an LT Volt you will
receive “Service Park Assist” and “Service Blind Spot Monitor” errors EVERY TIME
YOU START THE VEHICLE. It will also dash out the mileage after an undetermined
amount of time due to a VIN MISMATCH. We need to tell the Instrument Cluster
that we do not have these systems installed so we no longer receive these errors
AND keep our original VIN. This is done using an XML/RPO Build File. A “recipe”
per se for the cluster firmware.
At the end of this document, I will document
how these files are acquired. For your enjoyment I have attached this file, for
a 2017 Volt, here. (unzip
it). I have also attached an
example XMLFile.txt here. All
you need to do is replace YOUR_VIN with, well, your VIN.
NOTE: Using the following directions, you will temporarily receive a "Service Front Camera" error anytime Openpilot is disconnected or not fully booted. Go to the next section to see how to fix this issue if you find it to be annoying.

Copy “XMLFile.xml” to /DPS/Config.

Open “Developmental Programming System”. Select “Program” at the top of the window, then “Dev. Programming Tool”

Select “1 (33.3KBd)” from the “Diagnostic Pin” dropdown box. Select “ECU Configuration”.

Select “Select XML Config File”, choose the file you just copied to /DPS/Config. Select “Create Build Data File .TXT”

Ensure the VIN at the top is populated with YOUR VIN. Select options under “RPO Selections”.
For an LT Volt:
- EF7 - United States (or change to your country accordingly)
- KSG - This corrects cruise control icons
- UE1 - Onstar
- UE4 - This enables the following distance indicator/menu
- UHX - This corrects ACC icons
Select “Write RPO Build Data”
Ensure “Build Data File” box has been populated with the file you just created.

Select “Execute”, do not interrupt process until it finishes or errors out.
To quickly verify correct execution, try to turn on cruise control on the steering wheel, you will see the new icons!
Explanation
In short, the firmware is a generic cake (could be chocolate, could be
vanilla) lol. The XMLFile.xml is the
recipe to make any generic cake minus the flavor.
The XMLFile.txt file that we create tells
the recipe XMLFile.xml to make a
chocolate cake vs a vanilla cake. Make sense?
GMs intention is to make this process seamless, and for most users this is
fine. But when we want to modify the firmware we have to do this manually.
Timing is important for this,
the XMLFile.xml is temporary while the
firmware is being downloaded and is immediately deleted. We have to copy the
file at JUST the right moment.
In Windows File Explorer, navigate
to /USERNAME/sps/type4, if this folder does not exist,
create and open it. Keep it visible alongside the TechLine Connect software.
Go through the process of programming the “Instrument Cluster” just like you would any of the other modules, get to the point where you select “Start Programming”
After clicking “Start Programming”, the program will have a spinning circle
as it makes connection with the vehicle. As SOON as it gets to the next step of
downloading the firmware, pull the VCX Nano out of the OBDII port (to prevent
actually programming anything). AT THE SAME TIME there should be a new folder in
the type4 folder. Either open it and drag
the XMLFile.xml to the desktop, or drag
the entire folder to the desktop. At this point TechLine Connect will report an
error (because the precious files are gone). That’s fine. Exit TechLine Connect
and use the XMLFile.xml in DPS as
described earlier. Even better, open that file in notepad and you can see what
each RPO code in the build file does.
Note: Not all ECUs have an XMLFile.xml, there seems
to be no reason an ECU has it vs not. What’s important is the Instrument Cluster
has this file and allows us to cherry pick the features we want and don’t want,
allowing an LT Volt to have Premier ACC icons without additional system errors,
while at the same time keeping YOUR VIN on the ECU, preventing a VIN mismatch
error (dashed out mileage).
Service Front Camera Error Fix
One of the things that bothered me with this setup is the “Service Front
Camera” error that temporarily pops up before Openpilot is fully booted. So I
dove down the task of getting rid of it, and sure enough, it's possible! I have
loaded the modified XMLFile.xml here.
Two RPO codes when applied to the IPC create this
DTC/error. KSG: CRUISE CONTROL AUTOMATIC, ADAPTIVE WITH
STOP/GO, and UHX: LANE ACTIVE SAFETY-KEEP
ASSIST. This makes sense as the stock Premium Volt has a camera for both
of these systems.
The file that will be edited for this is
the XMLFile.xml
This file has several sections that are important. DPS looks at the XMLFile.txt on how to build the instruction set to the IPC. So everything is based solely off RPO codes.
At the very bottom of the file, there is a section that simply lists RPO codes, for example:
<RpoCodeItem>
   <OptionCodeID>OCKSG</OptionCodeID>
   <OptionCode>KSG</OptionCode>
   <Description>CRUISE CONTROL-AUTOMATIC, ADAPTIVE, WITH STOP/GO</Description>
</RpoCodeItem>"
Above this section are the RPO options themselves.
Then above that, there are DTCs that can be set! For example:
<Parameter ParamDefaultValue="00">
   <ParameterName>P_ENABLE_DTC_C23A_FTB_00</ParameterName>
   <StartByte>3</StartByte>
   <StartBit>4</StartBit>
   <BitLength>1</BitLength>
   <ConfData useConfData="true">
      <ConfigData Value="00" AutoGenExpression="(!KSG)">
         <Product>
            <RpoCodeRef IDREF="OCKSG" hasToBeAvailable="false" />
         </Product>
      </ConfigData>
      <ConfigData Value="01" AutoGenExpression="(KSG)">
         <Product>
            <RpoCodeRef IDREF="OCKSG" hasToBeAvailable="true" />
         </Product>
      </ConfigData>
   </ConfData>
   <ServiceSection IsServiceAccessAllowed="false">
      <Interpretation Text="Disable" Value="00" />
      <Interpretation Text="Enable" Value="01" />
   </ServiceSection>
</Parameter>
The first RPO code that will throw DTCs, as well as the "Service Front
Camera" error, is KSG: CRUISE CONTROL AUTOMATIC, ADAPTIVE
WITH STOP/GO. Pay attention to the above section. First, you can see that
this block of code references setting a DTC if the RPO code
of KSG is selected. For
the ParamDefaultValue, it
shows 00 meaning this DTC is set
to DISABLED. But, if you
have the KSG option, the DTC value
is 01, meaning this DTC is set
to ENABLED so if the IPC finds an
issue with option KSG you will get an
error on the display. Changing
the 01 to 00 disables
the DTC even with this RPO code selected! This will have to be completed on line
969. No more “Service Front Camera”, for Adaptive Cruise Control!!!
The second RPO code that will throw DTCs, as well as the “Service Front
Camera” error, is the UHX: LANE ACTIVE SAFETY-KEEP
ASSIST. Notice in the DTC list of XMLFile.xml, there is no DTC item
matching up to the RPO code
of UHX. BUT… notice that
there are two different sections for UHX. One
is P_LANE_KEEPER_ASSIST_INDICATOR_ENABLED and
the other is P_OPTION_LANE_KEEPER_PRESENT. So on line
1595, we change
the 01 to 00.
This tells the IPC not to look for the system on the CANBUS, while the indicator
is still enabled.
After editing the XMLFile.xml, load it into DPS as
the instructions dictate, and flash the IPC. You will never receive “Service
Front Camera” ever again.
FINAL NOTES: Like I said earlier, do all this AT YOUR OWN RISK. It worked on mine, but differing models/years could be different. After programming, you may need to use GDS2 to remove all DTCs, or a code reader to clear out the check engine light. This is normal. Also needed is a window re-calibration (move driver’s window full up and full down to calibrate automatic operation). Last but not least, you may have to accomplish a parking brake re-calibration through GDS2, which basically walks you through setting the electronic parking brake while the system reads it’s position. Viewing all DTCs in GDS2 will let you know if you need to accomplish this. GDS2 will list “Parking Brake Relearn Required” under the full list of DTCs.
Troubleshooting
If you're getting a "Cruise Fault" and unable to enable openpilot control after confirming all firmware has flashed correctly, try recalibrating the brake pedal position sensor through SPS.
VXDIAG VCX NANO Nissan No Detected by Consult3 Software?
Problem:
One of vxdiagshop.com's customer reported that
his vxdiag
vcx nano Nissan scanner can not seen in c3plus software.
All
are installed by instructions.
All fixed. Fixed by our engineer via Teamviewer.
Reinstall Nissan Bosch VCI driver.
(Nissan requires Bosch VCI driver installation separately. Don’t need to install Nissan driver in vx manager)
Now the Consult 3 plus software can see vcx nano device.
Connect fine both USB and WiFi.
