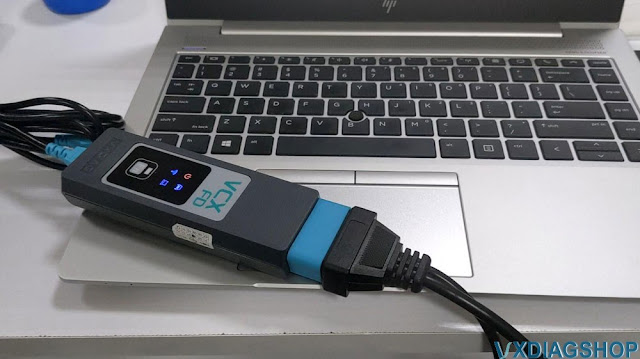
Change VXDIAG 2TB HDD Boot Language to English

Problem:

When starts VXDIAG 2TB software hard drive, it displays in Chinese. How can I change the English system?

Change VXDIAG 2TB HDD Boot Language to English 1

Solution:
Set your system language to English as follows:

Right click and hit Display settings.

Change VXDIAG 2TB HDD Boot Language to English 2

Go to Time & Language.

Change VXDIAG 2TB HDD Boot Language to English 3

In Region, select your region and current format: English

Change VXDIAG 2TB HDD Boot Language to English 4

In Language, choose Language.

Change VXDIAG 2TB HDD Boot Language to English 5

Save setting.

Then go to Control Panel-> Clock and Region

Go to Administrative->Copy settings

Change VXDIAG 2TB HDD Boot Language to English 6

Tick both “Welcocome screen and system accounts” and “New user account”. Click on OK to save setting.

Change VXDIAG 2TB HDD Boot Language to English 7

Select Change system locale. Select current system locale as English, save setting.

Change VXDIAG 2TB HDD Boot Language to English 8

The system locale has been changed.

Restart computer.

Then you can see the VXDIAG 2TB HDD/SSD boot screen is displayed in English.

 https://www.vxdiagshop.com/service/change-vxdiag-2tb-hdd-boot-language-to-english.html

How to Print VXDIAG Benz DAS Xentry Diagnostic Reports?

Newbie question:

When using DAS/Xentry software in VXDIAG VCX SE Benz scanner, I want to save diagnostic results from a session, How can I do that?


Take the example of DAS.

After doing a quick test or diagnostic session, hit F11 button.

Choose printout of test step (or other formats), tick Print to file, name the file and hit Print.

Print VXDIAG Benz DAS Xentry Diagnostic Reports 1

Go to Systems- Mercedes Benz- PDF Center

Print VXDIAG Benz DAS Xentry Diagnostic Reports 2

PDF document saved successfully.

Print VXDIAG Benz DAS Xentry Diagnostic Reports 3

Go to PDF Center.

Click on Opening.

Print VXDIAG Benz DAS Xentry Diagnostic Reports 4

You can see your diagnostic reports in the XentryPdfPrinter folder.

Print VXDIAG Benz DAS Xentry Diagnostic Reports 5Print VXDIAG Benz DAS Xentry Diagnostic Reports 6Print VXDIAG Benz DAS Xentry Diagnostic Reports 7Print VXDIAG Benz DAS Xentry Diagnostic Reports 8

The xentry shares the same root directory after you click the Print icon (Direct Print).


Note: Printer is set to Default under Windows and set it as Printer in PDF Center.


www.vxdiagshop.com

How to Run VXDIAG VCX SE Rolls Royce ISTA-D Software?

How to switch VXDIAG VCX SE BMW ISTA-D diagnostic software to Rolls Royce diagnostic software?

Follow the steps below:

Hit Tools icon on the top.
The default setting is for BMW/Mini diagnostics.
Choose Rolls-Royce and save.

Run VXDIAG VCX SE Rolls Royce ISTA-D Software 1

Restart ISTA. Click on Yes.

Run VXDIAG VCX SE Rolls Royce ISTA-D Software 2
Exit software.

Run VXDIAG VCX SE Rolls Royce ISTA-D Software 3
Run ISTA-D software on the desktop again.

Run VXDIAG VCX SE Rolls Royce ISTA-D Software 4
Now you can see Rolls-Royce diagnostic software.

Run VXDIAG VCX SE Rolls Royce ISTA-D Software 5

After diagnose Rolls Royce models, change the setting to default (BMW/Mini), save and exit.


www.vxdiagshop.com

Use VXDIAG VCX SE with Launch Smartlink B Remote Diagnostics

The VXDIAG VCX SE is a powerful and versatile diagnostic tool that offers both local diagnostic and DoNET remote diagnostic capabilities, making it an indispensable solution for automotive professionals, fleet operators, and technicians.


Local Diagnostics:
The local diagnostic function of the VXDIAG VCX SE is designed for hands-on troubleshooting directly at the vehicle or system. By connecting the device locally to the vehicle’s onboard diagnostics (OBD) port, technicians can easily read fault codes, check system parameters, run component tests, and perform calibration or programming tasks. Local diagnostics are ideal for on-site inspections and immediate fixes, offering quick access to essential information and allowing technicians to make adjustments directly at the vehicle.

DoNET Remote Diagnostics:
The super remote diagnostic capability takes the diagnostic process to the next level, allowing technicians to remotely access and control the system from any location. With this feature, the VXDIAG VCX SE enables full remote diagnostics, including advanced system analysis, error code interpretation, and detailed performance testing. Remote access minimizes the need for physical presence, reducing downtime and increasing efficiency by allowing technicians to diagnose and troubleshoot issues without being on-site. This mode is particularly useful for fleet management, remote diagnostics in the field, and off-site technical support.


VCX SE can be used as the C side or B side of remote diagnostics.

VXDIAG VCX SE with Launch Smartlink B 1 


Users are allowed to set up Allscanner’s DoNET remote diagnostics for the VCX SE.

It can also be used with other remote diagnostic equipment. For example, works with Launch Smartlink B VCI for diagnostic and programming through the Launch’s super remote diagnostics system.

You can use VXDIAG with JLR, Toyota, Honda, Volvo, Porsche, Peugeot, Citroen, BMW, Benz, Nissan, Subaru etc software (need to have license activated).

VXDIAG VCX SE with Launch Smartlink B  2

VXDIAG VCX SE with Launch Smartlink B 3

VXDIAG VCX SE with Launch Smartlink B 4

VXDIAG VCX SE with Launch Smartlink B 5

VXDIAG VCX SE with Launch Smartlink B 6

VXDIAG VCX SE with Launch Smartlink B 7

VXDIAG VCX SE with Launch Smartlink B 8

VXDIAG VCX SE with Launch Smartlink B 9

VXDIAG Benz Xentry Cannot Display Module Data Solution

Problem:

Tried to scan a Mercedes W206 with VXDIAG VCX SE Benz and Xentry 2024.09 software. VCX SE is well connected and xentry will read vehicle information. But cannot display module data (shown in the image below).

VXDIAG Benz Xentry Cannot Display Module Data 1

VXDIAG Benz Xentry Cannot Display Module Data 2

VXDIAG Benz Xentry Cannot Display Module Data 3

VXDIAG Benz Xentry Cannot Display Module Data 4

VXDIAG Benz Xentry Cannot Display Module Data 5

Solution:

If had a similar problem, adjust the computer resolution. It will be fine.