Clear Lexus LS460 VSC Error with VXDIAG Techstream?
Lexus LS460 tutorial: How to Clear "Brake Malfunction, Check VSC System" Dashboard Error Messages with vxdiag vcx nano toyota techstream software.
Symptom:The dash instrument display panel shows a yellow "!" light with the white warning message: "Brake Malfunction" or "Check VSC System" or "Check Brake System", "Stop the vehicle immediately in a safe Place. Call a dealer". The brake pedal feels hard and stiff. The photo below shows the actual warning messages.
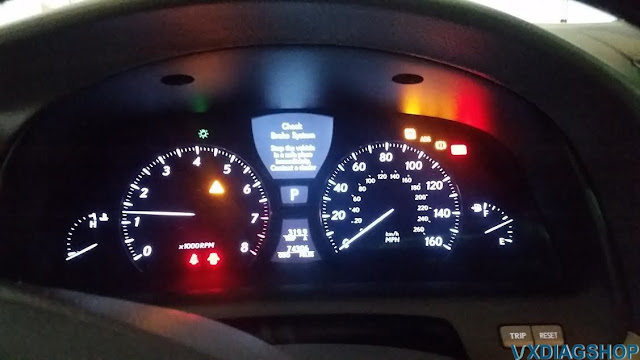
Cause of the symptom: This is a common problem related to LS460 brake system. It could be triggered by any bad brake component, such as a water soaked brake sensor wire, a broken brake fluid tube, a broken brake caliper seal, or even worse, a bad brake actuator. In my case, it was triggered by an accidental operational error on my part. Last Sunday, I performed a full brake fluid bleeding procedure with Techstream on my 2008 LS460. When I was bleeding the third brake caliper (the rear right brake), my car battery died (lesson learned here). At this point, the brake actuator solenoid for the rear right brake caliper was still open. I removed the dead battery from my LS460 and put in a good one from another car. When I pressed the start button, the dash display panel showed the above error message. I was able to start my car, but the brake pedal felt hard and stiff.
Solution:Use Techstream to perform the following two procedures.
Here use Techstream version 10.30.29. The procedure may differ to other versions. You are at your risk.
Please note that this solution is only good for clearing the warning message when you brake system hardware is good. If you have a bad brake part (e.g., a bad actuator or broken brake tube), after your have cleared the warning message, it will come back soon. You'll need to replace the bad brake part first and then do a brake bleed procedure to clear the warning message, which is not more difficult but is a different process.
1) Reset Memory, and
2) Linear Valve Offset Calibration
Steps of performing these two procedures:
1. Connect VXDIAG Techstream to the OBDII port under the dash.

2. Select "ABS/VSC/TRAC" menu and double click it (or click the arrow at the right bottom of the screen).
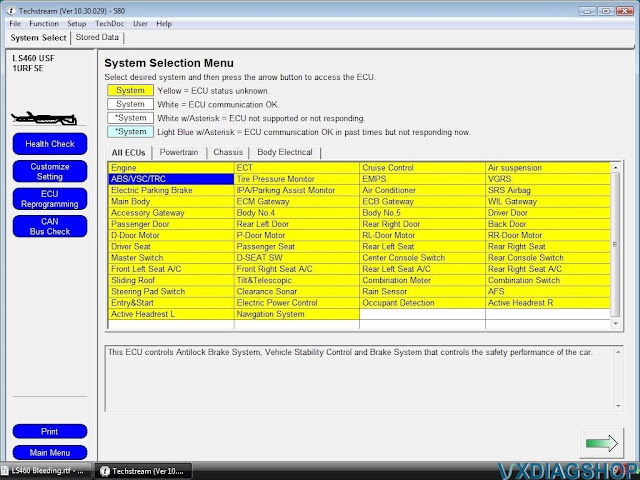
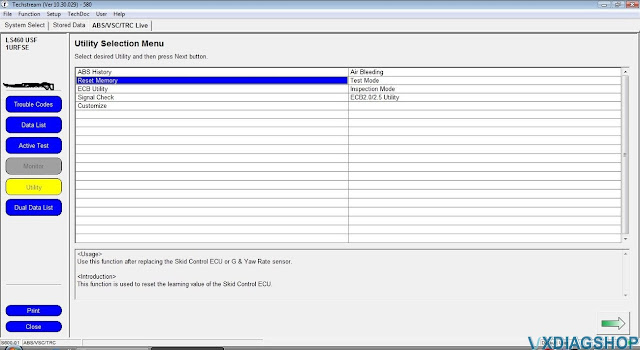
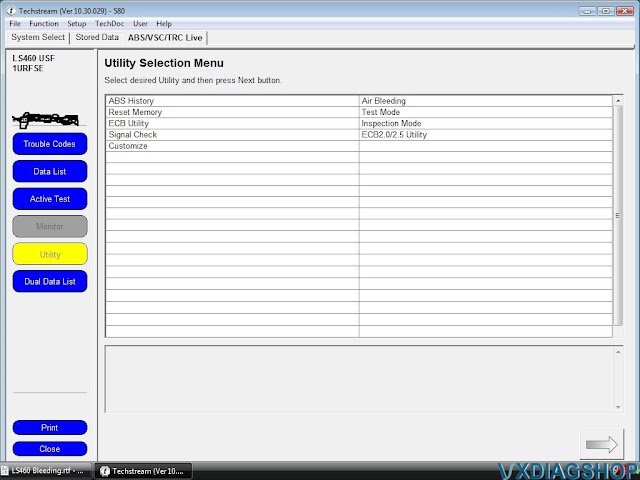
3. Select "Utility" button on the left of the screen and double click "Reset Memory" menu (or click the arrow at the right bottom of the screen).
4. Click "Next" on the screen below.
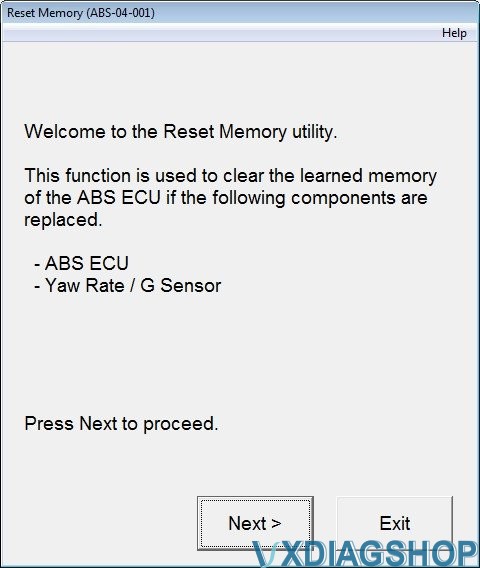
5. Click "Next" on the screen to confirm resetting memory.
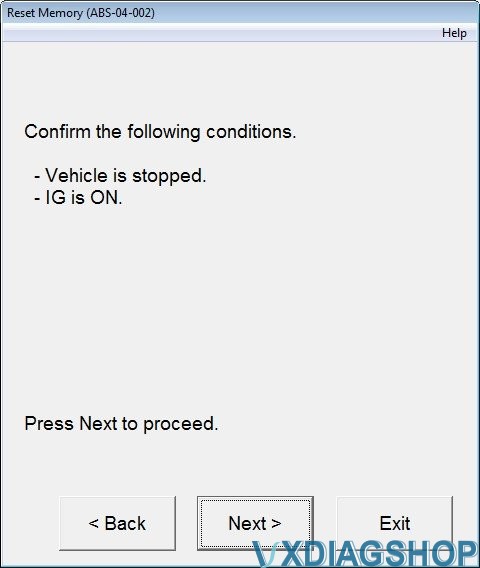
6. When the reset memory procedure is completed, click "Exit" to go back to the Utility Selection Menu shown below. Select "ECB Utility" and double click it to go to ECB Utility menu.
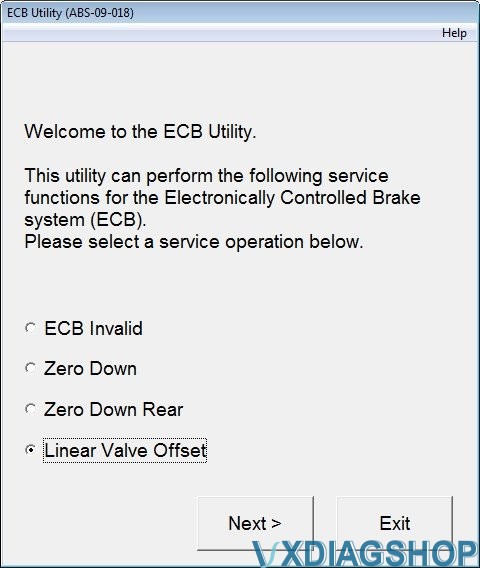
7. On the ECB Utility Menu, select "Linear Valve Offset", and click "Next".
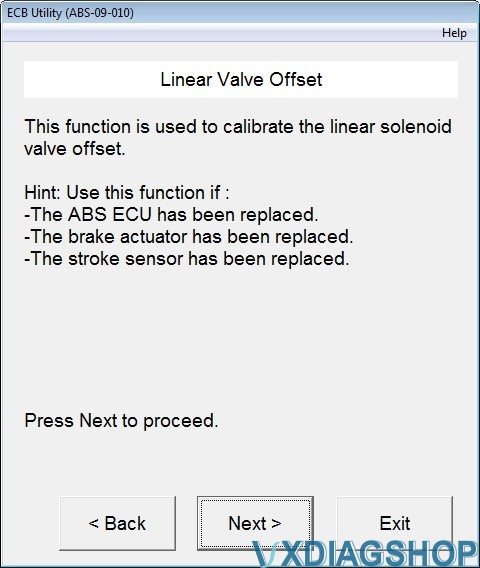
8. Click "Next" on the subsequent two screens to confirm the linear valve offset procedure. Then, the final confirmation screen shows up. Click "Next" to begin the linear valve offset.

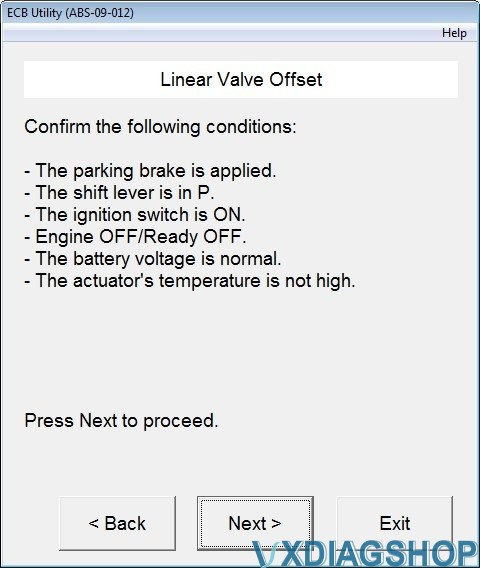
9. The linear valve offset procedure runs for 120 seconds. During this process, DO NOT press the brake pedal. When the linear valve offset procedure is completed, press "Exit". Then, go to the "Trouble Codes" menu. There should be no error codes. If there are error codes, repeat the reset memory and linear valve offset procedures. When there are no error codes in the "Trouble Codes" menu, exit Techstream. Start the engine and the "Brake Malfunction", "Check Brake System", "Check VSC System" error message should disappear from the dash display panel. Test-drive the car to make sure that the brake system functions normally.
Congratulations. You have successfully restored the brake system.
Mercedes W205 Start/Stop Coding with VXDIAG DTS Monaco
Mercedes Benz W205 Start/Stop coding tutorial using vxdiag vcx se benz or benz c6 doip with DTS Monaco 8.14.
Requirement:
VXDIAG uses DTS 8.13 and here we use DTS Monaco 8.14.
You should download SMR-D files for connection and SeedCalculator. Download free here.
Everything you do is at your own risk. We are not responsible for the damage.
Disable Start/Stop in W205 with DTS Monaco
1. Turn on the ignition. Launching DTS Monaco
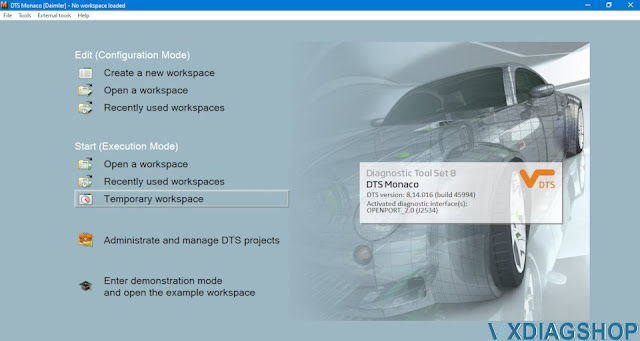
2. Select the SMR-D file from the list, depending on which module you want to connect to. in our case, MED40.
3. Remove the module from the control unit. In the Diagnostic service tab, we find the Security Access line, find the Request seed key line in the list, click on the Transmit button. We get the key, which we enter in SeedCalc.

4. Run SeedCalc. At the top, select MED40CNG_med40_sec_new_00_00_00.

5. In the "SEED" field, enter the values obtained from the Request seed key at the previous stage. Click "Generate". Copy the first 8 characters (all except 00 00 00 00).
6. Go to DTS Monaco. Select the line Send Key Variantcoding. On the right, in the "Send key" field (highlighted in green), paste the data received from SeedCalc.

6.1. Click on the Transmit button. If the code is correct, then below it will be " acknowledged ".

IMPORTANT! If, when sending a seed code, the Response State is marked in red and written not acknowledged, then you need to select another module option in SeedCalc and calculate the code again. The unlock code changes after each entry. Those. if the unlock code did not fit, then you need to select Request seed key again and insert new values into SeedCalc.
7. If everything is successful at this stage, then go to the "Variant coding" tab. In the ECU selection menu, find MED40 and click "Connect". Scroll down, find the desired line and change to "Last mode". Then click on Do Coding! In this way, you can change the speed limiter and in general everything that is in the MED40.
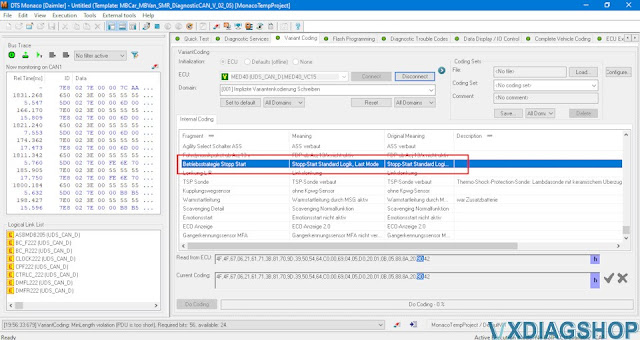
8. After you have done the encoding, you need to return to the Diagnostic service, select Hard reset and click Transmit.
Now start / stop remembers the last position and does not turn on automatically when switching between sport-eco-comfort modes and does not turn on when starting the car. Those. the start-stop system is in the state it was in before the engine was turned off.
The same logic encodes all other units that support variant encoding.
http://blog.vxdiagshop.com/2022/05/31/vxdiag-vcx-se-with-dts-monaco-doip-configuration/
VXDIAG VCX NANO 2012 Toyota Prius V Review
I got Vxdiag VCX nano Toyota Techstream wifi cable for my 2012 Prius v wagon 3 . Working pretty fast and well – faster than the cheaper ones, no glitches. I heard it's the best money/quality.
If you get this some tips: after you install Techstream and you copy Toyota Launcher.exe in the bin folder, and you install VX Manager (anyway dongle software) and update the dongle. Disable firewall defender from control panel. Launch Toyota Launcher.exe. If that doesn't open Techstream like in the VXDiag tutorial (they also have youtube versions), then open Techstream and fill in as per the tutorial with those names, numbers, settings. Then as you reach the key box, close. Then open with Toyota Launcher.exe copied in bin – might take 2-3 seconds before the program responds. It should open Techstream at this point and you know you're good when you see 2d23h59m in the left corner at the bottom.
Reactivate firewall and always use Toyota Launcher.exe in bin to launch Techstream – delete the original .exe and make a shortcut of the copied Toyota Launcher.exe . So far I was able to monitor live my brakes and to run general diagnostics. It works pretty fast; I tried the mini vci a bit and it was much slower and glitchy, every other third major thing I did it crashed.
The reviewer made a point: you gonna keep this car for years; so it's a worthy investment if you DIY. The VCX won't give you trouble as far as I know.
2022.06 VXDIAG Xentry "No Access Authorization Code" Solution
Here comes the working solution to 06/2022 VXDIAG Benz C6 / VCX SE Benz Xentry 'No Access Authorization Code' problem.
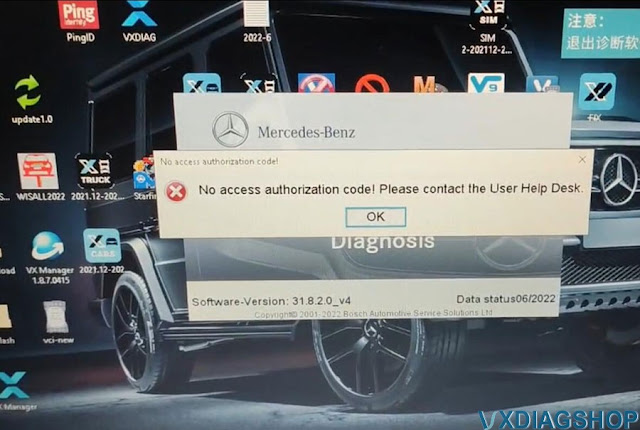
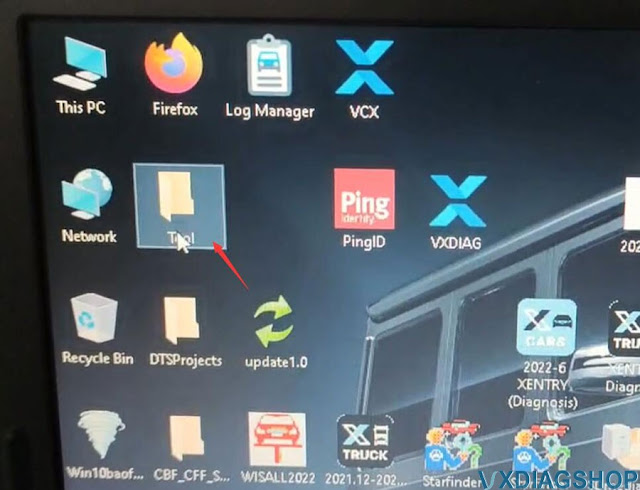
OpenToolfolder on desktop
RunConfigAssitprogram
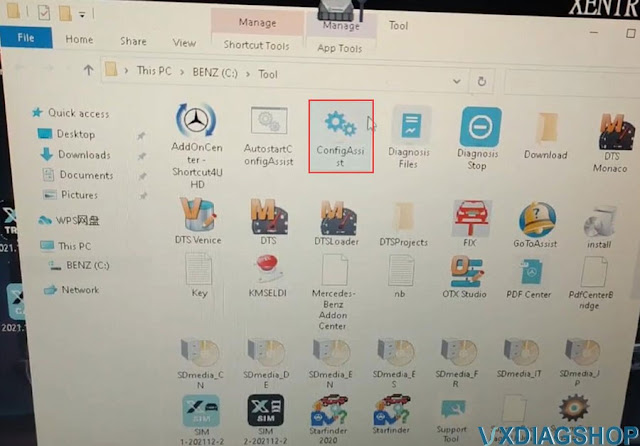
Select device type:Xentry Diagnosis VCI


Exit ConfigAssist
Run 2022-06 XENTRY (Diagnosis) on desktop
Software is ready to use


If not working restart computer and run Xentry again.
Technical support from www.vxdiagshop.com
VXDIAG VCX SE DoIP Switch Not Working Solution
I got the vxdiag
vcx se BMW ista+ 4.32 for 320 m sport 2016. Why doip switch stopped
working? Software is up to date but doip can't read vin.
doip switch not
working anymore, software is up to date but can't read vin. Can you help?
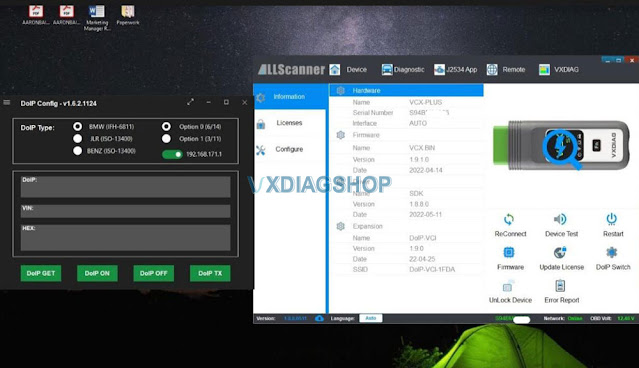
Solution:
The doip problem is solved now, so there's no need to make a teamviewer.
Problem was with 'windows firewall' being activated for some reason, and this wouldn't allow doip to start reading.I turned off the firewall and all sorted now.Doip is working fine.
I love using your device.