How to Set up VXDIAG Ford IDS V121 on Windows 10?
Here’s the step-by-step guide on installing Ford IDS V121.01 software for vxdiag diagnostic scanners. Windows 10 64bit has been tested perfectly. Windows 7 works no problem as well.
Compatible all vxdiag Ford device: vxdiag vcx nano for Ford/Mazda USB and WiFi, vxdiag vcx pro, vxdiag full , vcm2 clone (using vxdiag solution) etc
Software and patch can be download here for free
How to Install VXDIAG Ford IDS V121?
Open Ford_Install folder

Run IDS_121.01_Full setup

Select setup language
Press Yes to agree reboot after installing software
Press Next to Installsheild
Accept license agreement
Choose destination drive C://

Press Install
If system prompt an update for VCI firmware is available, press OK to continue
Updating database

Reboot


Install VCI Manager Ford driver until finish


Open VCI_Software_1.0.0.10 until finish
Open Ford_Mzd_Patch folder

Copy and cut IDS_Patch to desktop
Open VX Manager V1.8.4
Select Ford/Mazda IDS software to install
Connect vcx nano device with computer

Then Open VX Manager
Check device connection
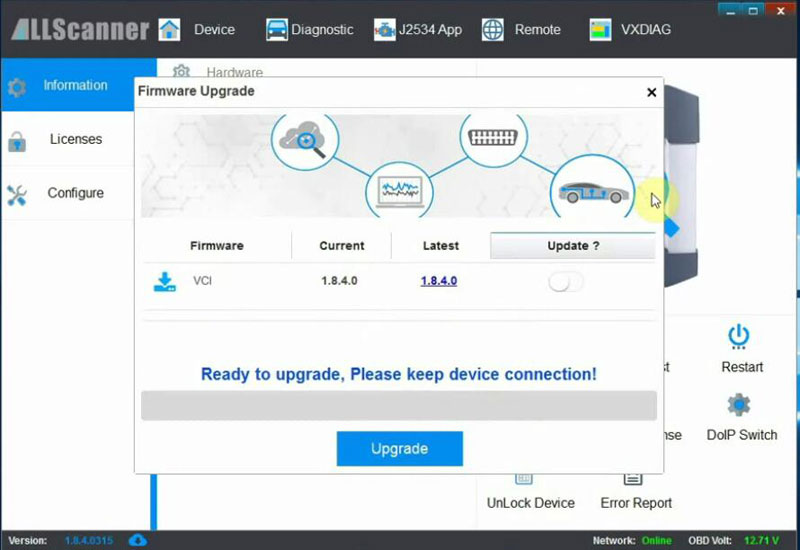
Run an firmware update if there is new VCI version
Run IDS software from Patch on desktop
Software is ready to use.


Run diagnosis or programming.
Free Download Easy Version 2020.07 VXDIAG GM GDS2
Free download GM GDS2 Tech2win crack for 2020.7 VXDIAG VCX NANO GM on mega:
https://mega.nz/file/0oZGXJaC#6mKkEWDB0Z6lz7wulFjzmb4bpyoK1KWDkQIzdQW8HFQ
Contributor: vxdiagshop.com engineer
Contained: GDS2, Tech2win, Patch, both new and old vx manager
Working or not? Any difference?
It is tested by an increasing number of users.
If you download the link supplied by the VXDIAG factory and found it failed to install or got any error, please download from this link, because we modified something so that you can use if successfully and pleasantly.
OS:
Win7: confirmed
Win8: not yet, but should be okay
Win10: confirmed
GM GDS2 Languages: English, Spanish, French, Italian, Portuguese, Netherlands, Russian, Arabic, Japanese, Chinese, Vietnamese
GM Tech2win language: English
GM GDS2 & Tech2win Installation Manual
VXDIAG VCX SE Benz firmware newer than software solution
Problem:
i bought the VXDIAG VCX SE for Benz and i’m trying to get it connected with my XDos Xentry 12.2017.
But my VCI Monitor tells me that the Firmware is newer than the Software installed on my Laptop.
The oldest Firmware which i can install on my VCX SE is 12.2018.
I would like to know if i can install an older Firmware on my VCX SE Benz (e.g. 12.2017) in order to “communicate” with my XENTRY 12.2017.
Or do i have to download and install a newer version of XENTRY (e.g. 12.2020) in order to get the VCX SE working with XENTRY?
Solution:
The problem is caused by the missing vci patch.
https://mega.nz/file/HUJxmCIA#z7YJ1-rDxD-bamXgL-jMO9BuD-2NjufGkMHWzoTMIMg
Put it on desktop. Connect device to laptop, install Benz VCI driver from “Diagnostic” menu on vx manager.
After install driver, run the update patch.
Then click “Firmware” to update firmware again.
Also keep the vx manager to latest version.
Download latest vx manager here
https://www.vxdiagshop.com/info/vxdiag-diagnostic-software-download-4048.html
VXDIAG VCX NANO FJDS and Forscan Review
I bought a VCX Nano and loaded Ford’s FJDS onto a laptop, then bought a 3-day FJDS license via Ford and was able to load a bunch of updates to the different modules (DDM/PDM/ACM/etc…) bypassing the need to go to the dealership or buy the ultra expensive VCM2 with the ultra expensive IDS license. They just aren’t interested in using IDS to update firmware because they lose out of money for labor hours. The VCX Nano is a SAE J2534 pass-thru device, so you can run FORSCan with it at a significantly faster speed than OBDLink MX / ELM327. OBDLink MX and ELM327 is like watching paint dry compared to VCX Nano with FORScan.
This is what I bought to use with Ford’s FJDS on my 2017 Fusion Sport (17k miles):
https://www.vxdiagshop.com/wholesale/vxdiag-vcx-nano-for-ford-mazda-2-in-1.html
It also happens to work fully with FORScan as a SAE J2534 pass-thru device instead of ELM327. It is much faster than OBDLink though.
I even ran Ford’s IDS hardware with FORScan and it took forever. It’s kind of funny that Ford’s IDS hardware/software is slower to pull DTC error codes than with FORSCan and either ELM327/OBDLink/VCX Nano.
With Forscan the OBD Mode 6 shows a bunch of stuff including misfire for each cylinder for the past 10 drive cycles as well as prev drive cycle. It’s supposed to be a generic universal set of data PIDs defined for OBD2.
I don’t use FORScan to display gauges/datalogging because it isn’t pulling DMR’s and is too laggy for actual tuning use. I run HPTuners for datalogging/tuning but haven’t upgraded to the MPVI2 module yet.
I used FJDS with VXDIAG VCX Nano Ford to successfully program modules on the Fusion Sport and Explorer, it was able to pick up the MS-CAN and HS-CAN modules, so I was unsure why others had problems. It’s not like you are using FJDS every day to be honest, but I found VCX Nano could be repurposed for use with FORScan so I can clear DTCs after tuning or read MS-CAN module data much much much faster than with OBDLink MX or a modified ELM327.
How to Set up VXDIAG DoNET Remote via Wechat?
The DoNet remote diagnosis mode only requires a single client VCX device to realize multi-brand original software direct connection to remote vehicle diagnosis. This article introduces the steps of using DoNet remote diagnosis with VXdiag VCX device i.e VXDIAG VCX SE (vcx se pro, vcx se bmw, vcx se jlr, vcx se benz). Same procedure goes to vcx doip series.

If don’t have Wechat, follow DoNET setting via phone explorer directly here.
Requirements
Server
- Prepare the computer with original software.
- Confirm that the latest VXManager client software and the original diagnostic driver have been installed.
- Confirm that the computer has a stable and fast network connection (wired network connection is recommended).
Client
- Connect the VCX device to the vehicle.
- Confirm that the vehicle is powered by a stable power source.
- Confirm that the device has stable and fast network connection (wired network connection is recommended).
Steps:
- Follow the official account
Scan the QR code or open WeChat to search for ” DoNet 远程诊断平台” and follow.

Click [智能诊断] to enter the remote diagnosis platform.

- Configure user information
User information needs to be configured for the first use. Please fill in the mobile phone number to facilitate contact between you and VXDIAG engineer.


- Bind Device
The VCX device serial number needs to be bound for the first use.

- Configure Device Network
For remote diagnosis, the device needs to be connected to the Internet, and click [Configure Device Network].
Select the device network connection method and follow the on-screen guide to complete the network configuration.
There are several methods to connect:
Wired network connection
Wireless network connection
Mobile hotspot network connection

Configure Hotspot
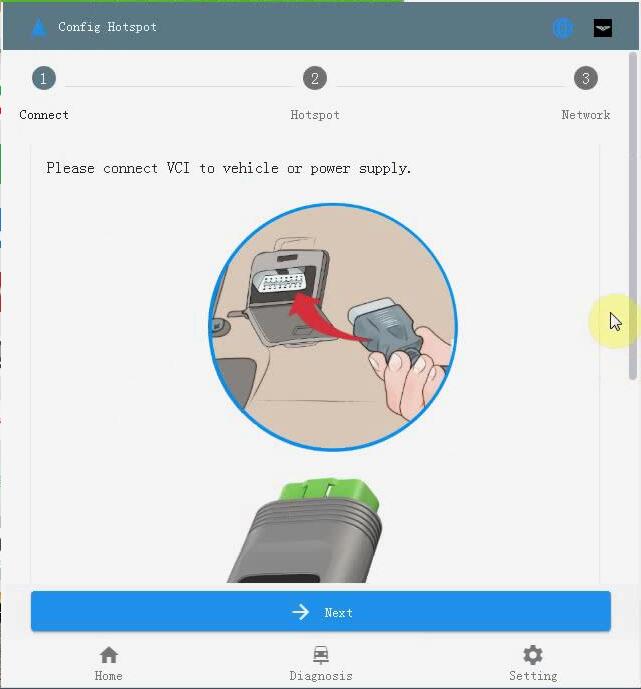
1) Just simple click on “Next” and follow the on-screen guide to complete Hotspot configuration.
Please connect VCI to vehicle or power supply.
2) Open [Settings -Wifi -Hotspot], Turn on Hotspot and set the name and password as: DiagOnNet.

3) Press the button (Fn) for 3 seconds to enter NetConfig mode, wait about 30 seconds to hear the buzzer, then the network is successfully connected.


Configure wired network connection:
1). Make sure that the VXIDAG VCI is connected to the vehicle or the power supply and it works properly.

2). Use a USB TYPE-C to RJ-45 network port cable to connect the device, and then use a CAT-6 network cable to connect the device to the router.

3). Press the Fn button of the device for 2 seconds to enter the network configuration mode, and wait for about 30 seconds until you hear the device buzzer “beep” to complete the network configuration.

*Please ensure that the Internet connection is stable and fast, when the network speed delay is less than 100ms,it is recommended to choose the wired network first.
- Configure network connection successfully
After the device is successfully connected to the Internet, the home page will display information including the device serial number, voltage, network, and speed.
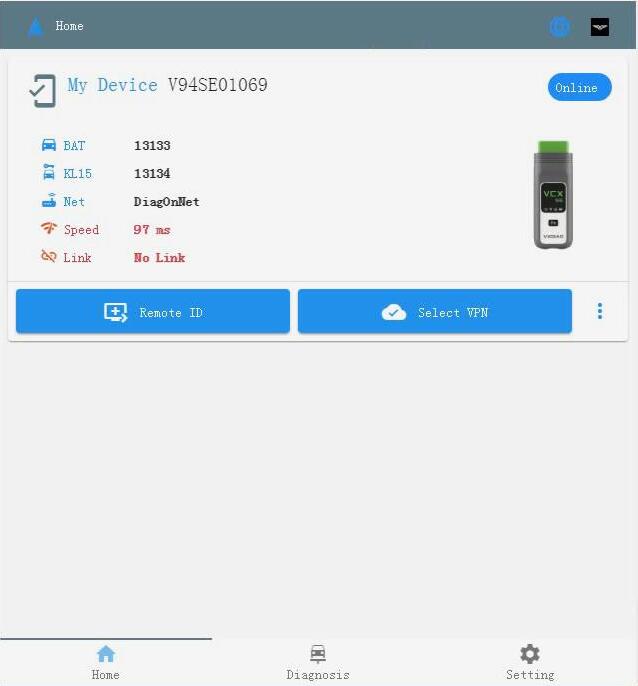
- Share [Remote ID]
Click on [Remote ID] to copy the ID and send it to the server, and wait for the server to start remote.

Next is VX Manager operation
- Open the VX Manager device management software and click on “Remote”.
- View remote device information
Input the correct [Remote ID] and click [Refresh Device], you can see that the client device has been connected normally.


- Connect to the remote device
Click [Connect Device] to start to establish a remote connection.
- The remote connection is successful
After the remote connection is successful, the VX Manager software will automatically restart, and you can see that the device information has been read through the DoNET remote interface.
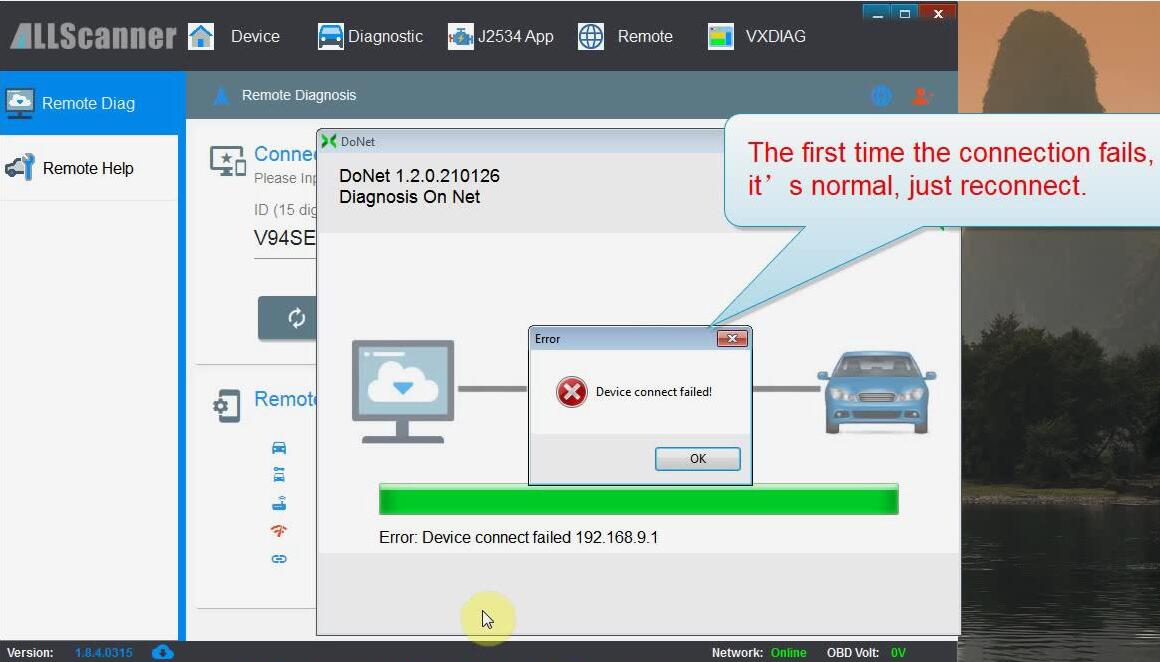
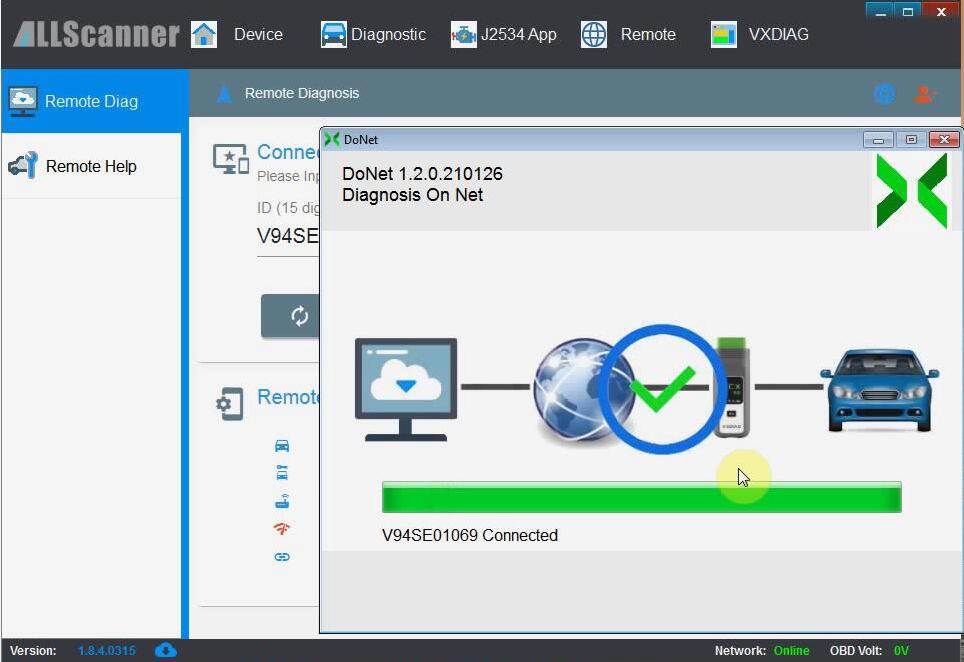

- Start remote diagnosis
After the remote connection is successful, you can use the original software for remote diagnosis, coding, programming and other operations.
After the diagnosis is completed, you need to click [Disconnect] on the [Remote Diagnosis] page to release the remote device.


Enjoy