How to install 2105A VIDA for VXDIAG VCX NANO?

Easy steps to install VIDA 2015A software with vxdiag vcx nano for Volvo scanner.

Operating system: 
Windows 7 operating system (32-bit or 64 bit)


Main Steps:
1.Install Setup
2. Install patch
3. Install VX Manager driver
4. Run VIDA software


Procedure:
1. Install setup
Create a new folder “2015a” on desktop
install-vxdiag-vida-2015a-1

Copy all files from software CD to folder “2015a”
install-vxdiag-vida-2015a-2

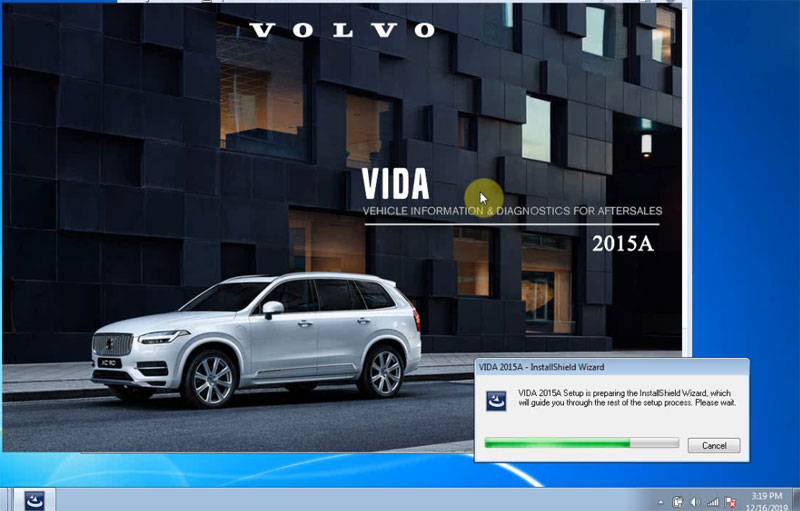
Go to C://2015a/Install/DVD/Vida_dvdheader/Main and run setup.exe
install-vxdiag-vida-2015a-3
VIDA 2015A setup is preparing the installshield wizard
install-vxdiag-vida-2015a-4

Choose VIDA All-in-one, press NEXT
install-vxdiag-vida-2015a-5

Select software language, press Next
install-vxdiag-vida-2015a-6

Select destination location C:/VIDA/, press Next
Accept license agreement
VIDA installation in progress. Wait until the installation process is completed.
install-vxdiag-vida-2015a-7

Select connection type: VCC intranet and Close
install-vxdiag-vida-2015a-8

InstallShield Wizard Complete. Select restart computer later and press Finish.


2. Install Patch 
Open “2015a”folder
install-vxdiag-vida-2015a-9

Run 2015A+ NEW+ Patch (1)
install-vxdiag-vida-2015a-10

Press Install
Restart PC.

3. Install VX Manager 
Run VX Manager software CD or download VX Manager from official website
install-vxdiag-vida-2015a-11

Open VX Manager 1.6.2
Press Next
install-vxdiag-vida-2015a-12
Select VIDA program to install and press Next
install-vxdiag-vida-2015a-13

Install VX Manager driver succeed, press Finish.
install-vxdiag-vida-2015a-14
Check vcx nano information
install-vxdiag-vida-2015a-15
install-vxdiag-vida-2015a-16
Make sure Passthru and VIDA license are enabled
Update VXDIAG VCI firmware to latest version
install-vxdiag-vida-2015a-17

install-vxdiag-vida-2015a-18
VCI upgrade complete.

4. Run VIDA software
Run Vida All-in-One software on desktop
install-vxdiag-vida-2015a-19

Enter User name: 1 and press LOG IN
Choose communication tool as VXDIAG
install-vxdiag-vida-2015a-20
Identify VIN
Complete vehicle information, transmission, steering, body style etc information
install-vxdiag-vida-2015a-21

Perform diagnostic function.

VXDIAG VCX NANO for GM June 2020 Review

Here’s some latest user reviews on vxdiag vcx nano gm gds2 scanner. (Updated on June 30th, 2020)


1).

It works, just install gds2/tech2win and Download the latest vxmanager, and run the tech2 autoinstaller from the CD. Then download the GDS2 drivers from the link in the instructions PDF that shipped with the CD and run the autoinstaller. Then install GDS2/tech2 and passthrough drivers and vxmanager with the adapter plugged in. Update firmware if asked. Order of operations once all is installed: plug in nano adapter to PC, launch vxmanager, launch GDS2, then if you are a pre-2011 GM vehicle launch tech2, then plug in nano to OBD2 port with vehicle in the on position. Wrong order will result in errors.


2).
kind of a pain to setup! Follow the installation video and you will be ok. Once setup the tool does everything a GM Tech 2 scanner will do. Used it to diagnose an intermittent air bag light on one vehicle and perform a steering angle relearn on another to get rid of a weird traction control issue. Immediately paid for itself even if I never have to use it again. Great value!


3).
Worth the price. Not hard to set up.
Was exactly what I needed. Was able to read check engine light codes, clear codes, and perform relearn procedures for certain sensors. Was great for the money.
Would not recommend using the included disc for install. Simply go the the vxdiag website for install instructions. Worked on Windows 10.


4).
Bought this to interface with my 2013 Chevy Volt and it worked but, the software was a mother dog to load on my laptop. I noodled around for about an hour and finally got it working.


5).
I am pretty computer savvy, so installation was not too bad on Windows 10 64 bit on a Lenovo laptop. 30 minutes later, I was looking at real-time power train data on my 2003 ion, commanding lights and locks on and off, and reading bcm codes. For the price of a decent obdII scanner, this thing is incredible.


6).
Reset alcohol content on 2007 GMC YUKON 5.3 flexfuel. Nice device.


Keep updating…

Cannot access VXDIAG Cloud Diagnosis Solution
Question:
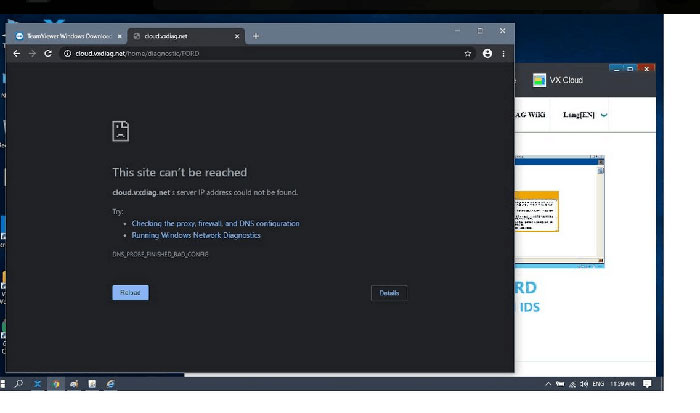
I bought the vxdiag vcx nano pro for GM, Ford Mazda and VAG from vxdiagshop.com. I tried to access Cloud diagnosis on official website. It failed me and told this site cannot be reached.
How can i access the Cloud Diagnosis?
vxdiag-cannot-access-cloud-diagnosis-1

vxdiag-cannot-access-cloud-diagnosis-2
Solution:
VXDIAG Cloud Diagnosis is not available now.
It is not necessary to access Cloud diagnosis any more. Because all VXDIAG software can be installed without VMware which is easier to use.
The function of vxdiag cloud diagnosis can be found here.
http://blog.vxdiagshop.com/2018/11/23/use-vxdiag-cloud-diagnostics-function/
See
For other software installation, please search our blog.

VXDIAG Benz C6 and Xentry 12.2019 Review

I have been using a VXDIAG Benz C6 (the new one with the LAN port and mini-USB jack) for sometime (I have the Xentry and ODIS licence).
From my experience, I can tell you it’s a good device for Xentry.
I have been using it with Xentry 12.2019 and have tested it on a variety of cars (even on older DAS cars like W211). Every function I have tried on Xentry / DAS has worked so far.
– ignition status is detected automatically (like C4) and it reads the voltage no problem
It is advertised to work with DoIP modules, but I haven’t tested this myself (there are videos on YouTube where they demonstrate this)
It does work wirelessly as advertised through Wi-Fi.
It tried it on normal Xentry (not passthru). It should also work on Passthru as it has a passthru licence and can work was a passthru device
The way it works is – Allscanner develops a driver for Xentry which allows their device to work with Xentry (xentry sees the mux as a Xentry Diagnosis VCI)
A potential problem is that Allscanner has to develop a new driver for each new version of Xentry – so you may not be able to use the latest version of Xentry when it comes out – you’ll have to wait till they release the driver for that specific version of Xentry (as of writing this, Xentry 06.2020 is the latest driver available)
When you install their software on a Xentry system, it will auto detect the Xentry version installed and will load the correct driver for you (convenient)
It gets occasional firmware updates (through the allscanner software) – you don’t have to connect to car to power it on, just plug it into USB it will power on and you can do the FW updates at your home.
I have not tried it with online SCN coding, so can’t comment if that works.
Overall, I like it a lot and have not used my old C4 since I received this. (keeping the C4 in case older cars come by which require HHTwin etc)

How to Connect Older Toyota with VXDIAG VCX NANO?

Problem:
My vxdiag vcx nano toyota techstream cannot connect with a Prado 2008 model year-engine code: 2TR-FE.
Here’s the procedure:
vxdiag-toyota-prado-2008-01
The vehicle is imported from Japan.
Start engine, connect vxdiag vcx nano Toyota via WiFi
The vx manager detected the vcx
vxdiag-toyota-prado-2008-02
Go to VIM select and choose VXDIAG Toyota VCI
Run Techstream, connect to vehicle, vxdiag cannot connect to car nor detect vehicle information
vxdiag-toyota-prado-2008-03
Also tried manual vehicle select, vxdiag still cannot detect vehicle
vxdiag-toyota-prado-2008-04
Solution:
For older Toyota models, you need to manual select vehicle information.
Don’t use Auto vehicle selection.