2020.7 VXDIAG VCX NANO GM GDS2 Installation
Latest version 2020.07 GDS2 software has been tested working with vxdiag vcx nano gm USB and WiFidiagnostic interface. Here vxdiagshop.com provides software download and installation tutorial.
Software version:
GDS2 v22.1.00900
GM Global v2020.7
Tech2Win 16.02.24
Multi-language: German English Spanish French Italian Dutch Portuguese Veitnam Russian Thai Japanese Chinese Korean
Operating system: GDS2 Win7 32bit, (free to try Win8 Win10); Tech2Win Win7 32bit
Free download 2020.7 VXDIAG GM GDS2 Tech2win
https://share.weiyun.com/CNl4ztK5
password: xwynde
(If have problem download software, contact our customer service for fast download)
How to Install vxdiag gm gds2 tech2win 2020.07?
Note: Direct install newer version VX Manager may cause “no default device detected” error. Require install older version vx manager 1.4.1 then install vx manager 1.8.1.
Software link contains both versions of vx manager.

Download software


Open GDS2AutoInstall folder and install GDS2AutoInstall setup

Press Start to load MDI.exe, GDS2 Javeinstall.exe
Open Tech2Win folder
Install AutoInstall

Choose Install this driver software anyway

Teh2Win install complete
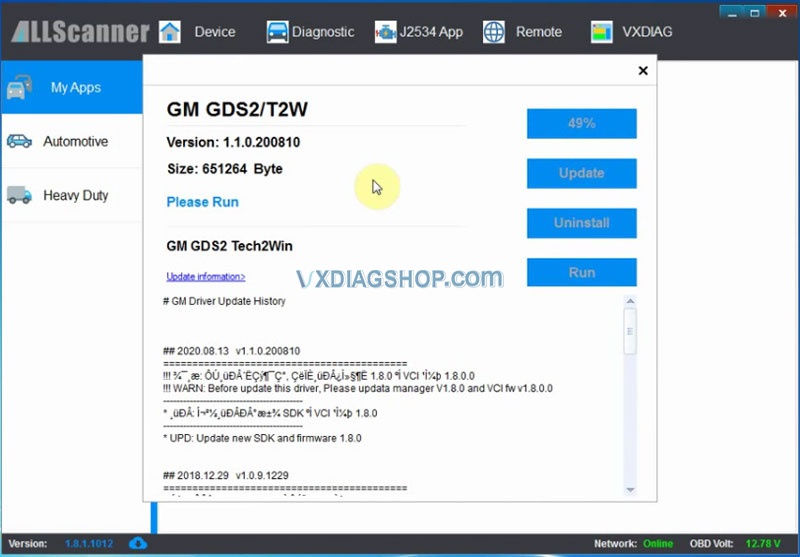
Install VX Manager 1.4.1


Select GM GDS2/Tech2win program to install

Finish install VX Manager setup, press Finish
Open VX Manager 1.4.1, check device information
Then open VX Manager 1.8.1

Select GM software to install
Scanning for new hardware

USB serial port was set to COM4
Device driver software installed successful
Finish install VX Manager 1.8.1, press Finish
Now enable network connection of your computer
Run VX Manager on desktop

Detect hardware information
Go to Diagnostic Tab
Install Passthru and GM GDS2/T2W driver respectively


Open GDS2AutoInstall folder
Open GDS2Install folder
Copy, paste and replace GDS2 from GDS2Install folder to Local Disk C:


Then run GDS2 on C://
Accept windows security alert

Select GDS2 language
Come to GDS2 diagnostics interface

Press Diagnostics icon

Select interface as MDI 2 and continue

VXDIAG GM GDS2 supports latest GM up to 2021
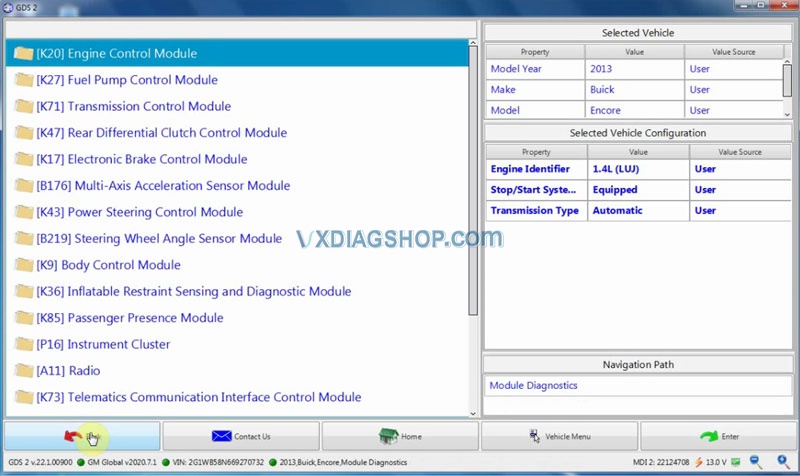
GDS2 software is ready to use
Tech2win software works as well.


https://www.vxdiagshop.com/service/install-2020-7-vxdiag-gm-gds2-software.html
VXDIAG VCX NANO GM T2W Win7 32bit Setup Tip
Ever since VXDIAG VCX NANO for GM / OPEL came to the market, Vxdiag has received a myriad of user reviews. And some are selected in this post. Now, let’s read them one by one.
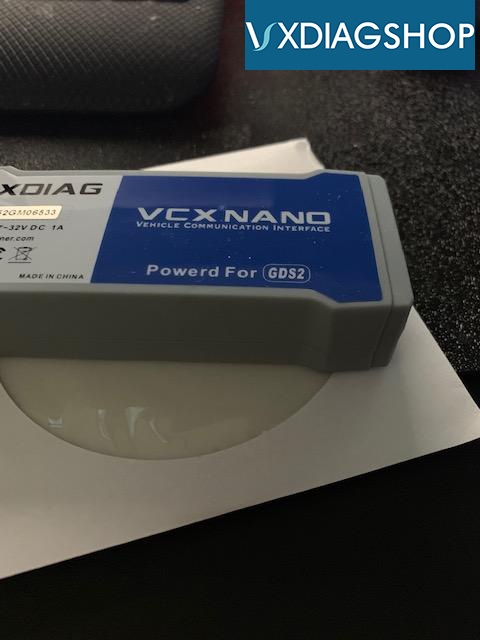
The moment when I received VXDIAG VCX NANO for GM / OPEL that was purchased from www.vxdiagshop.com, I was quite impressed by its good quality box, which included a long USB cable, VXDiag VCX NANO for GM as well as a Diver CD. Here is what I got:
When I got it, it took me a couple of hours to figure out how to install the program correctly and learn the functions of the Tech2WIN program that comes with it. You have to follow the directions exactly on the VCXDIAG website on how to install the software and firmware. A tip is to use the CD of programs it comes with to install everything, rather than going to the website and getting the updated programs. I found that if you use the updated VX Manager program from the website, you will have a problem with TECH2WIN finding the VxDiag NANO module to use. I installed this on a Windows 7 32Bit laptop that I have for just vehicle programming and diagnostics for all my vehicles. I have read that it works with Windows 10 64Bit, but I cannot speak on this. Once I got it working I could use the TECH2WIN program to read all the modules on my truck, even the BCM that the dealer could not read. I realized the RCDLR was bad and bought a new one, but it needed to be reprogrammed to the BCM.
VXDIAG’s suggestion:
When it comes to Tech2WIN installation, you’d better use the CD of programs it comes with to install everything, instead of resorting to the website and obtaining the updated programs.
Hopefully, this post can help you.
Review VXDIAG GM on Windows 10 Pro USB 2.0 Port
Here’s the VXDIAG VCX NANO GM GDS2/Tech2Win working experience on Surface Pro (Windows 10) tablet:
“I tried on three of my Surface Pro 2017 models (Windows 10 Pro) Everything would work except the Tech 2 software. CANDI not connected. Not matter what I tried. When launching Tech2 the popup to choose connection to the MDI wasn’t appearing. I looked everywhere for the usb drivers with no luck.
After messing around a couple days with it, I got it to work with another laptop running Windows 10 Pro.
I think the problem is that the Surface Pro runs a usb 3.0 port and the other laptop has a 2.0 port. So if you only have a 3.0 port you may run into issues. A possible workaround would be a usb port splitter that supports usb 2.0. I haven’t tried this because I didn’t have one on hand.
The winning combination for me was:
1. USB 2.0 port on pc
2. Windows 10 Pro
3. Latest version of VX Manager from vxdiagshop I think it was 1.6xxx
4. Latest downloads for the GD2 folder & tech 2 folder from vxdiagshop.com
5. Didn’t use anything from the CD in the box
6. When installing Vx Manager I did tick the boxes for pass-through and GDS2 / Tech2Win and SPS.
7. Installed all three software programs
8. Plug in the module to the pc (doesn’t need to be connected to car)
9. Run VX Manager and the module should show up. Update firmware on module itself.
10. Hit the automotive tab on the left and verify pass-through and GD2/Tech2 (and SPS if you need it) have green checks on them. If not double click to open them and install / update if necessary.
11. Leave the VX Manager running – minimize it if you want to.
12. Double click shortcut on desktop to launch Tech2Win
13. Choose North America
14. Choose MDI interface – not MDI2
15. Next dialog box pick the only choice there is to choose from.
16. Tech2 should run fine. Splash screen on startup will show CANDI unit connected.
https://www.vxdiagshop.com/service/set-up-vxdiag-vcx-nano-gm-on-windows-10-pro.html
VXDIAG VCX NANO GM 2011 Volt SPS Programming
With SPS you can update the ecu software ( gm calls it calibration). Other tweaks can be done with gds2 offline.
I just did SPS programming with my 2011 Volt and here are the notes I made to myself so I could remember what I did. Hope it helps.
Preparation:
-Download newer version of software on vxdiagshop.com website, not the older version provided on the CD.
-Both the downloaded and the CD version of the file GDS2AutoInstall\GDS2Install\GDS2.exe are reported to have a virus by both Windows 10 Defender (on the Win10 laptop) and Comodo (on the eePC laptop). One needs to turn off all virus protection to get the GDS2 package to install.
I have not been able to get the Tech2Win software to work on Windows 10. The Tech2Win installer and the GDS2 installer seem to use different versions of the GM MDI package, so the order of install may matter quite a bit. But i have managed to get it working on Windows 7 32bit.
Note:The Volt has TWO OBDII connectors, one on the driver’s side and one on the passenger side. I could only get the driver’s side to work with the ACDelco SPS module upgrade software.
Generally want the car in Service Mode when messing with this stuff. Without touching the brake pedal, push the start button for 5-10 seconds.
What worked on the Window 10 x64 PC and Windows 7 x32 PC:
TO INSTALL VxDIAG provided software:
– Turn off virus protection (e.g. Windows Defender)
– Install VMWare-player. Use 15.5.1 on a Windows 10 x64, and 6.0.6 on 32 bit Windows 7 machines. I think 6.0.6 is the last VMWare-player to include 32bit OS support.
– Install the downloaded version of the VX Manager. This code seems to manage the interface to the VXDiag VCX Nano for GM dongle.
– Install the downloaded version of the GDS2 package using the autoinstaller (click on GDS2AutoInstall.exe)
– Now need to run VxManager with dongle attached. Go to the Diagnostic tab, and install the three drivers there (PASSTHRU, GM GDS2/T2W, SGM RDS). I always installed all three. Don’t think GDS2 will work without at least the GDS2/T2W driver.
TO USE:
– Start VxManager. This always has to be running first. Make sure it connects with with the dongle. Seems like the config can be set to AUTO and it still works. On Win7 it needed to be set to USB though.
– Start GDS2.exe.
– Click on the Diagnostics block in the upper left
– Select MDI2 Device (must be this device!)
– Could only get GDS2 to work on the driver’s side OBDII port. The passenger side OBDII won’t communicate.
INTERPRETING BATTERY CAPACITY: 2011 Volt shipped with 16 kWh battery (when new).
Battery Capacity is represented as a hex number, HH. It is readable at
Module Diagnostics\Hybrid Power Control Module 2\some reset grouping somewhere
To convert to kilo-watt-hours (kWh):
Convert HH to Decimal, DD.
DD/10 = AA Amp-hours
AA * 358 Volts / 1000 = battery capacity in kWh
For example, on 1/17/2020, with about 85000 miles on the car, we read a hex value of 0x179 = HH.
DD = 377, so 37.7 Amp-hours
37.7 Ah * 358 V /1000 = 13.5 kWh battery capacity.
13.5/16 = 84.3% of original capacity.
ACDelco Module upgrade software (https://www.acdelcotds.com/subscriptions)
This whole package seems to be a Java application, so will need Java installed.
TO INSTALL: (only tried this on Windows 10 x64)
– Click on the “View” button for our subscription to Vehicle Programming Software (bought the $40 one VIN only option)
– Click on the VIN
– Some informational screens may be displayed, need to scroll down to the bottom to click on OK buttons. One of these will be about installing new J2534 wrapper software.
– Click on SPS (Service Programming System) icon
– Click on “start SPS” button. This will download a java applet that will control the rest of the install process.
– At some point it will ask to install three new packages. Do NOT install a newer version of the GM MDI package (pick DO NOT INSTALL). Seems like we need to use the VXDiag supplied MDI to work with the dongle. The other two packages seem to have to do with the J2534 wrapper. I tried “version 6” for the bottom package, not version 7. It might work with version 7.
TO USE:
– Put the car in Service Mode. Without touching the brake pedal, push the start button for 5-10 seconds.
– Start VXManager software, make sure it connects to dongle.
– Select VXDiag GM interface in the SPS software java app.
– Could only get this all to work with the driver’s side OBDII connector. When installed on the passenger side OBDII connector, it complains with some “Detected Off-board programming!” error or something like that. So I couldn’t update modules only accessible from the passenger side OBDII.
– When I reprogram the brake module, it threw a hard service code and disabled brake assist (BE CAREFUL DRIVING THE CAR WITHOUT BRAKE ASSIST AS IT TAKES MUCH MORE PEDAL EFFORT TO APPLY THE BRAKES). I then needed to run GDS2 and do the learn procedures for that module. This cleared the code and got the brake assist working again.
How to Fix VXDIAG Device Not Supported by GM Error?
