How to Solve VXDIAG Ford IDS Cannot Change Other Language?
Problem:
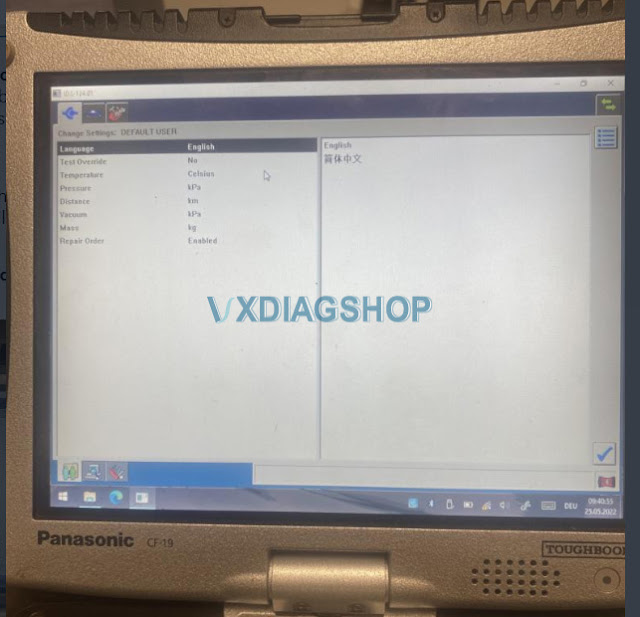
I want to change vxdiag vcx nano Ford IDS V124.01 software to German, but i cannot find the German language. Only English and Chinese language are available. Any idea?
VXDIAGSHOP Solution:
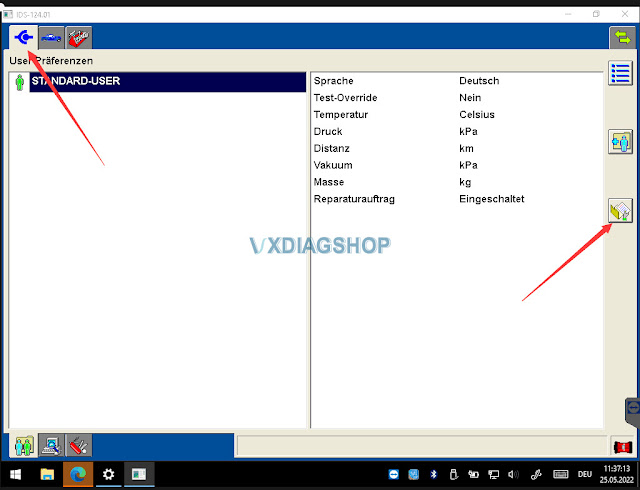
Change computer system language to German and change time zone in Germany. Same operation for other languages.
If it is not working, reinstall IDS software, change system language/time and try again.
It should work no problem.
How to change IDS language?
Press the icon on the right, then press IDS software icon
Select the language you desired and save setting.
Multi-language: English, German, French, Italian, Dutch, Spanish, Swedish, Finnish, Danish, Norwegian, Portuguese

VXDIAG or Mini VCI for Toyota Lexus Hybrid?
After reading this review, I decided to get the vxdiag vcx nano Toyota WiFi cable. I received it and I configured it.
Now they are links to get GTS 17.00.020.
For information, the software (VCX Manager) works very well with Windows 7 64bit.
VX Manager 1.8.7
Firmware 1.9.1
I downloaded version 17 from Techstream.
Shortly before purchasing the VCX, I was sent a version from Techstream that was newer than the one I had.
The patch is valid until version 18 if I understood correctly.
I tried
this patch with Techstream version 17 and it works.
I ran TIS on my Prius IV to do a health check, it reads 41 control
modules.
I was able to do what I wanted, the Mini VCI I had didn't allow me
to do it. As soon as it exceeds a certain number of units, I get an error
message.
We have access to an incredible amount of data (particularly the
hybrid part).
With the Mini VCI, it was limited.
With the VCX NANO, it
works very well.
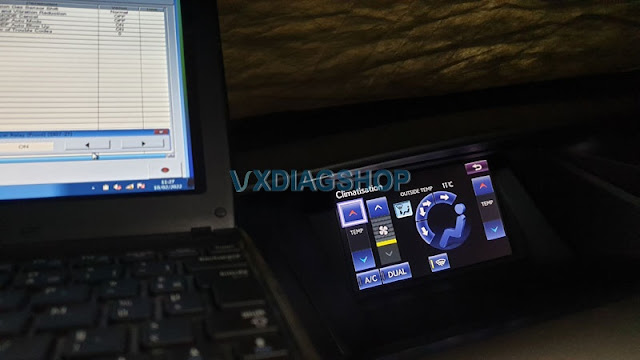
Another little test on the 2014 Lexus Rx 450h F Sport. That works well.
For each system there is a screen giving the possible fault codes, a screen giving the state of the system with the parameters then an "active test" screen.
For example, for the "air conditioning" system, I chose a simple command:

For the air conditioning, there is an interesting function, which varies the maximum speed of the compressor (probably "Target Speed").
As regards the active tests of the hybrid system, they are to be used in a
particular context.
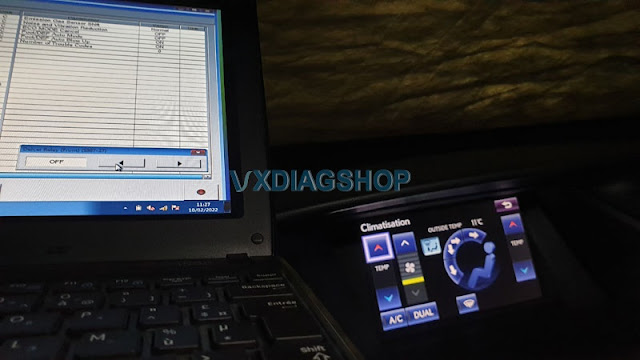
The only ones that can be launched without any particular
procedure (apart from the ventilation control) are the "Inspection Mode" (used
for example for pollution control).
You can set to "ON" or "OFF" from the PC and see the status on the control screen:
The hybrid function is copious (6 pages)
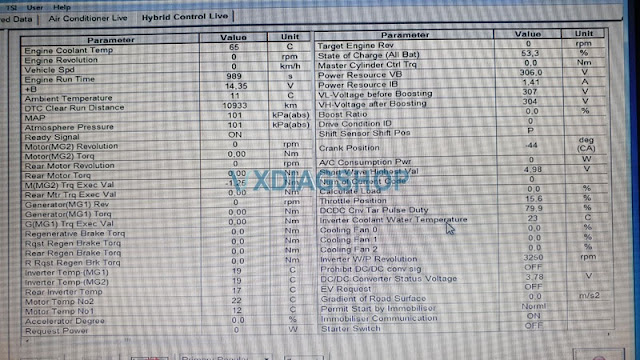
with interesting commands:

and others that seem risky.

I am really happy with this vxdiag vcx nano toyota techstream cable, and again a big thank you to all those who contributed.
[VX Manager 1.8.6] How to solve VXDIAG VCX SE not recognized?
Here comes the solution to vxdiag vcx se, vcx nano and vcx plus no device detected problem after updating vx manager to 1.8.6, 1.8.7.
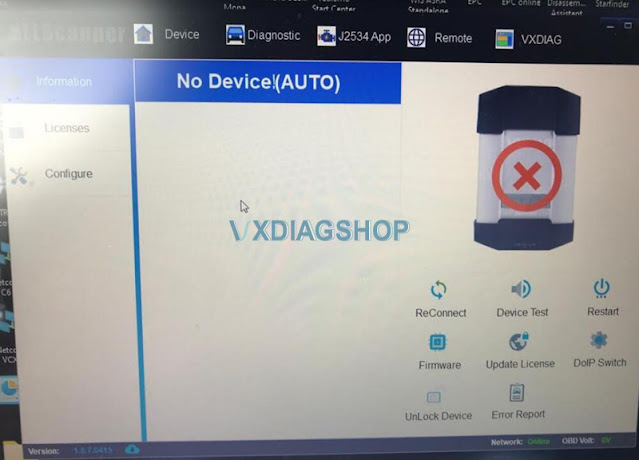
Possible solutions:
Solution 1: Change a USB port or cable
Solution 2: Delete vx manager,
install the latest version vx manager, update firmware and license.
Solution
3: Change USB or WiFi connection, reset the firmware.
How to Reset VXDIAG VCX SE Firmware?
How to Reset VXDIAG DoIP Firmware?

If all the above not working, contact vxdiagshop.com customer service for technical help.
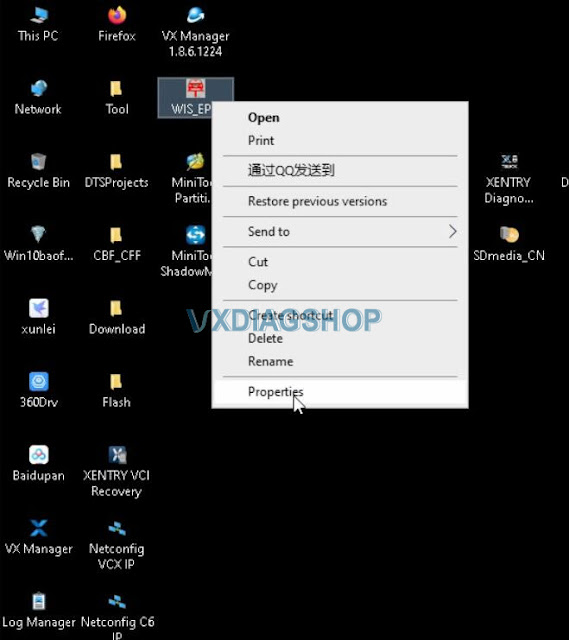
VXDIAG Benz WIS_EPC Not Working Solution
One of our customers failed to open VXDIAG Benz WIS/EPC and StarFinder software. Our customer helped him out via Teamviewer. Hope it helps if you have the same problem.
Don't change your computer's default browser. In this case, he has changed the default browser from Edge to Firefox.
Follow the steps below to run WIS EPC on firefox. Same procedure with other browsers.
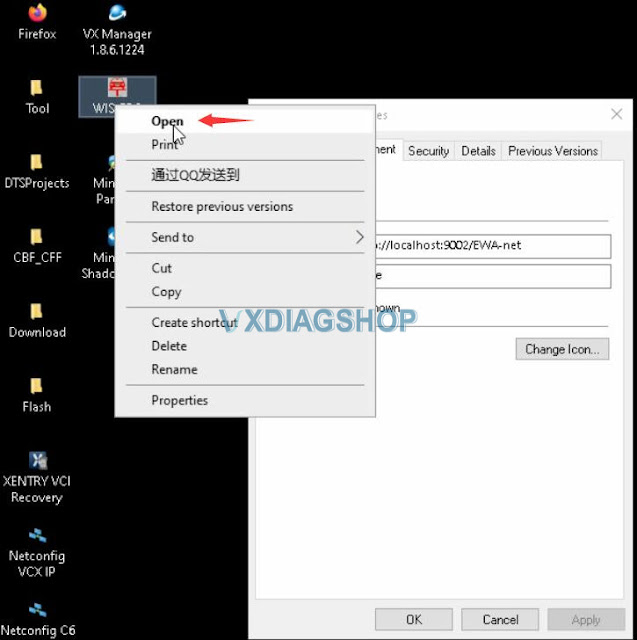
Right-click WIS_EPC desktop shortcut on the desktop
Go to
Properties
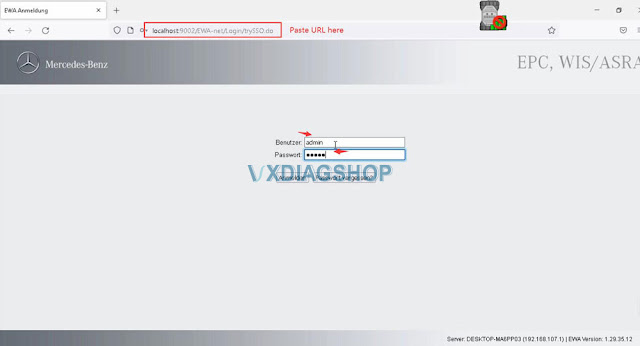
Copy and Paste the URL
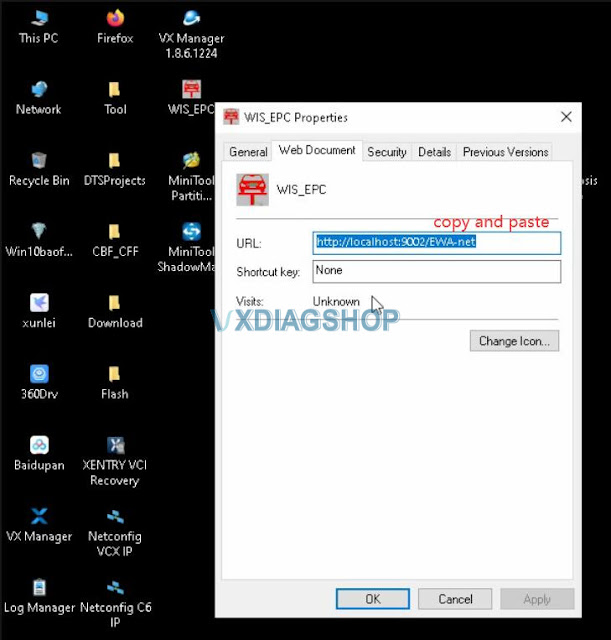
Open WIS_EPC
Paste URL here
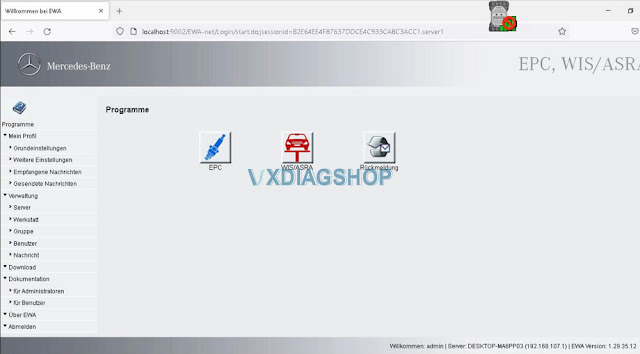
Login with User name (admin) and password (12345)
Read also:
Can I Change VXDIAG VCX SE 6154 Language?
Question:
Can i change vxdiag vcx se 6154 odis language to German? If yes how to change language?
Solution:
Yes, vxdiag 6154 software is multi-language enabled.
Multi-language:
English Japanese Portuguese Romanian Korean Dutch Polish Turkish Spanish French Italian Croatian Danish German Swedish Finnish Slovenian Czech Russian Greek Chinese
The first installation will ask to select language pack. DO select the language you desired. You cannot change language within software program.
.png)