MB Headlights Coding: How to Retrofit Halogen to LED?
Who can benefit from this article?
Anyone who is
interested in retrofitting or repairing headlights, replacing headlight control
modules, studying coding, or gaining a better understanding of their car.
Background
The Mercedes owner didn't want to replace the old
headlights because they were working well, but after a deer damaged them, his
insurance company paid for the repairs. By using the money he saved on labor
costs from other repairs, he was able to invest in a retrofit for the new
headlights.
Total Expense
- Static LED Headlights: +$420 (2 EA. OEM compatible aftermarket)
- Headlight control modules: +$200 (2 EA. OEM)
- Wiring parts: +$50
- Old OEM headlights: -$150 (sold)
- Coding tool: vxdiag vcx se Benz with DTS Monaco or other J2534 passthru device.
Level of Skill
Mechanical: easy. Wiring: moderate, Coding:
moderate
Before Start
Do you need a coding? Yes, you will need to code your
vehicle's control module in order to properly integrate factory OEM (or
compatible aftermarket) headlights. After installation and coding, the
headlights should look and function just like the original equipment.
Procedure
- Remove the bumper
- Remove the old headlights
- Install the control modules on the headlights.
- Install the headlights
- Do wiring
- Do Coding
Wire Harness
You have two options for the wire harness: you can
create your own, or you can purchase a ready-to-install aftermarket harness. He
made his own harness as he wanted to do it on my way. It's a time consuming job
but it makes the retrofit look more like the original equipment.
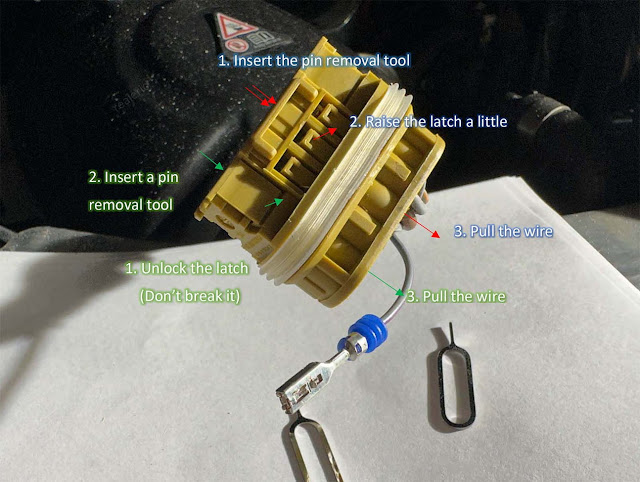
Depin the current headlight connector, move two pins, add three pins.
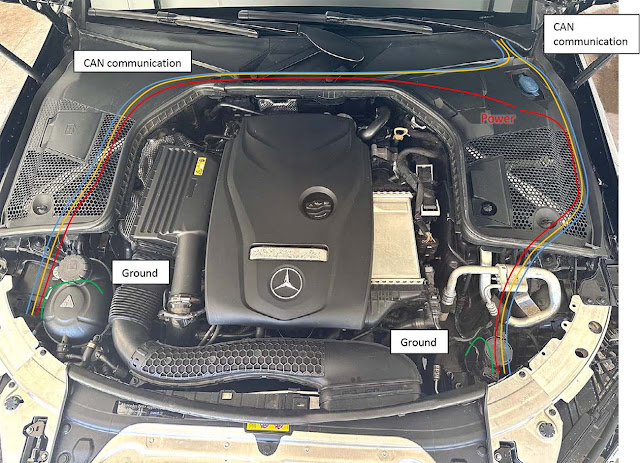
Connect to the CAN bus. It's located under the driver's carpet.
Connect to the fuse box,

The detailed procedure for the wiring;
- To access the fuse box and the engine-cabin hole, remove the wiper arms and the cowl cover.
- Disconnect the battery (-) terminal.
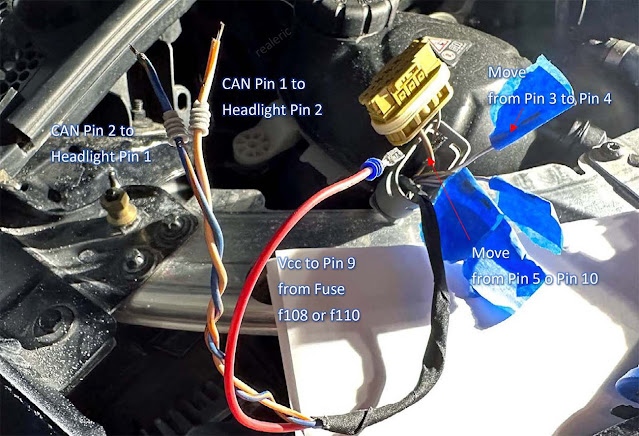
- Move pin 3 (DRL) to pin 4 (30L Vcc) at the headlight connector. (Pin 4, Vcc L/R)
- (US Only) Move pin 4 (SML) to pin 6 (SML) at the headlight connector, and crimp a new pin. (Pin 6, SML L/R)
- Move pin 5 (GND) to pin 10 (GND) at the headlight connector. (Pin 10, GND L/R)
- (US Only) Add a new 16 or 18 AWG GXL wire to pin 5 (GND) at the headlight connector. (Pin 5, GND L/R)
- Then, screw the new ground wires to the body ground point.
- Install two new sets of twisted pair 22 AWG wires from the engine compartment to the cabin by passing them through the grommet located near the brake Hydrovac on the driver-side.
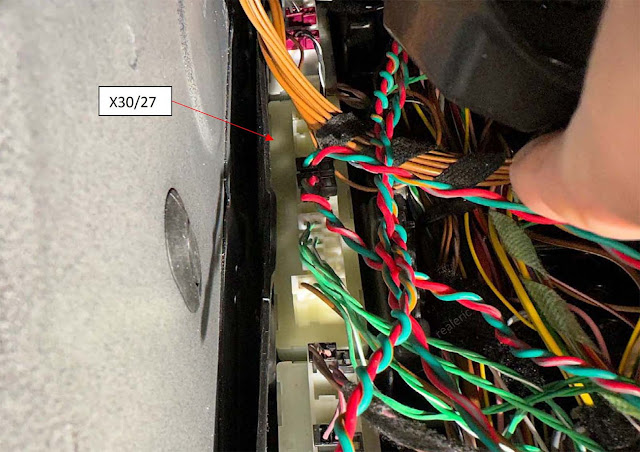
- To access the CAN distributor located under the driver-side carpet,
- Remove the four bolts holding the driver seat.
- Lean the seat back to gain better access.
- Raise the carpet, and
- You will be able to see the CAN distributor (X30/27) (WIS reference: PE 00. 19-P-2135FBA)
- Insert the two sets of twisted pair wires into the CAN distributor and crimp two connectors. Connector part # is 049-545-8428. (Pin 1, 2. CAN signal, L/R)
- To connect the wires from the left and right headlightw to the fuse box
K40/8,
- Install two 18 AWG GXL/TXL wires, one to the left headlight and the other to the right headlight, running from the fuse box (K40/8) to the headlights. (Pin 9. Vcc L/R).
- Crimp a proper fuse terminal onto each wire.
- Connect the wire from the left headlight to slot f110 (20A) (Pin 9, Vcc-L), and connect the other wire from the right headlight to f108 (20A) (Pin 9, Vcc-R).
Replacing Headlights
As it's covered many times on other threads or
youtube, I will skip it. You will need to remove the bumper cover.
Do Coding
You need to do coding. Coding, which is changing
parameters in the vehicle with a software, is required to disable the warning
messages on the instrument cluster and let the car know you have installed
static LED headlights. The coding process can be done with a tool called DTS
Monaco or Vediamo. It's not that difficult but requires a little experience.
First, you need to have a J2534 pass-thru device such as the OpenPort 2.0,
VAS5054, VXDiag
VCX SE, etc.
Second, install Xentry diagnostic software and also a coding
software such as DTS Monaco or Vediamo. I will not cover this topic as you can
find the information online.
Third, you need to change parameters in the
control modules. That's the most important thing when doing the retrofit. You
can do it yourself once you know where they are.
.
- Disable halogen headlights and warnings in the Front SAM (BC_F222).
- Enable LED headlights in the EIS (EIS222).
- Proper coding to HLI_FL222 for left headlight control unit and HLI_FR222 for right headlight control unit.
- (Option) Add SA Code 632 (Right hand traffic) or 631 (Left hand traffic; for UK, Japan, etc) into VeDoc for future-proofing. It will cost $$$ as you cannot do it yourself. However, you can live without it.
What you need
- 2ea Static LED Headlights. Genuine $1,100+/ea, Aftermarket $200~$500/ea
- Headlight (static LED, EU version) : 205-906-7303 (left), 205-906-7403 (right)
- Headlight (static LED, USA version) : 205-906-7703 (left), 205-906-7803 (right)
- Headlight (dynamic(ILS) LED, USA version) : 205-906-5605 (left), 205-906-5705 (right)
- 2ea LED control modules. Genuine $230+/ea, OEM look $95+/ea.
- Control modules (for static LED headlights) : 205-900-6805 (left), 222-900-8005 (right)
- Control modules (for dynamic LED headlights) : 205-900-4330 (left), 222-900-0115 (right)
- Wiring parts
- 2ea 16 AWG GXL wires 10ft for Vcc
- 2ea 16 AWG GXL wires 2ft for GND (USA Only)
- 4ea 22 AWG TXL wires 12ft for CAN communication
- 2ea 16 AWG GXL wires 10ft for Vcc (for ILS Only)
- 4ea 22 AWG TXL wires 20ft for level sensors (for non-USA or for ILS)
- Headlight connectors : 2 ea x A0525456026 ($5 ~ $7 / ea)
- Headlight pins (small) : 4 ea x A0009823026 (or TE#: 7-1452665-1)
- Headlight pins (larger) : 6 ea x A0135451526 or A0135451626
- Wire seals : for 5.0mm diameter, for 3.0mm diameter
- CAN bus connector : 2 ea x A0495458428 ($3 ~ $4 / ea)
- CAN bus pins : 4 ea x TE# 5-963715-6
- Fuse box terminal : 2 ea x TE# 927833-2 or DJ6218B-E6.3B or N90732703 or N90696603
- 2ea 20A ATC/ATO fuse
- Harness tape (150°C, high heat, made by Tesa)
- Pin removal tool ($10 on Amazon), or 2ea of SIM card removal tools (alternative).
- Molex crimp tool, wire stripper, utility knife.
- (Alternative) Wiring harness kit ($170 ~ $200).
- J2534 Pass-thru adapter, Mercedes Xentry software, and either DTS Monaco software or Vediamo software.
If you want to upgrade to ILS (Dynamic) headlights, you also need to replace the windshield glass with a camera and install two level sensors (front-left, rear-left), connect the sensors to the headlights (2 set of twisted pair wires). It's possible to do, but he wouldn't recommend it because the cost is high and the benefits are limited.
You can buy the connectors at a dealership but they may not carry the pins. Alternatively, you can order from online electronics suppliers, or search on AliExpress. Don't forget to get a pin removal tool. It will save your life. You may also buy a ready-to-install aftermarket harness for $170~$200. However, if you use an aftermarket wire harness, (1) You can't change the route of the wiring. (2) You have to replace the pins at the front SAM. (3) You may have unused wires (4) You will have an unused connector dangling near the headlight.
There are three types of the control modules; Genuine ($230+/ea), OEM look($95+/ea), Chinese no-brand($40+/ea). Don't buy the chinese no-brand as it doesn't work correctly. I couldn't verify if the OEM look is genuine or not, but it looks and functions like a genuine.
Pin Assignment
Coding using DTS Monaco
If you are experienced in coding, it's not that difficult once you know what to be changed. It's very similar to changing the parameters on the control panel in Windows of your PC.
EIS (EIS222)
You need to let your car know that you removed the halogen headlight and installed the LED headlight. The parameter for that purpose is located in EIS222. Find "Headlamp Style" in "[001] EVC CfgList_01_0C Schreiben" and change it to "632 HEADLIGHT UNIT LED W. STATIC LIGHT SYSTEM RHT" from "620 HEADLIGHT UNIT RHT". If you live in UK or Japan, you may want to select "631… LHT".
Front SAM (BC_F222)
You also need to turn off the old circuits for the halogen headlight. It's located in "Front SAM, BC_F222". Then, let the Front SAM know that you are going to use LED logics instead. (will be updated later)
Headlight module for Front-Left (HLI_FL222) and Front-Right (HLI_FR222)
HLI_FL222 and HLI_FR222 will work as a default without coding. But it will complain about "missing level sensors", and it's recommended to customize it a little more. The easiest way is getting a backup from other vehicles and restoring it. (will be updated later)
Quick Solutions to Resolve VXDIAG Device Not Found Error
Problem:
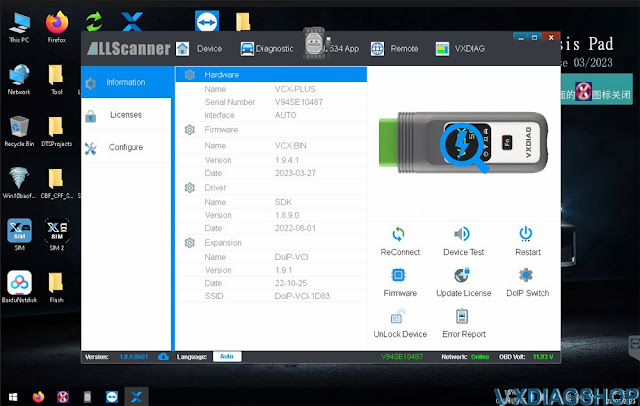
I got the vxdiag vcx se Benz DoIP Device. After update vci firmware, firmware and license, vx manager cannot find device.
Error: No devices were found from server. License has been erased.

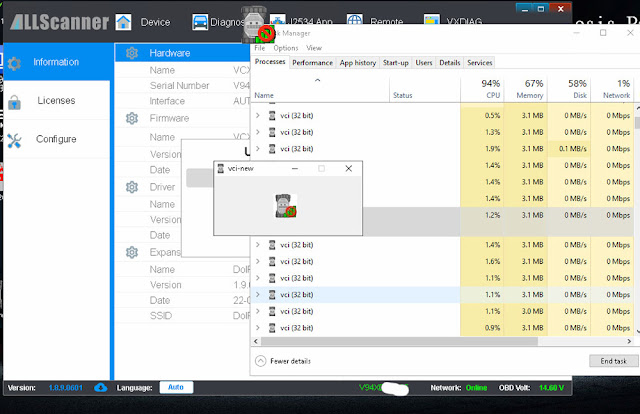

Solution:
Disconnect vcx for 3 minutes.
Reconnect vcx with laptop.
Update license
and firmware again.
Make sure Benz driver is installed.
If still not working, contact vxdiagshop.com for help.
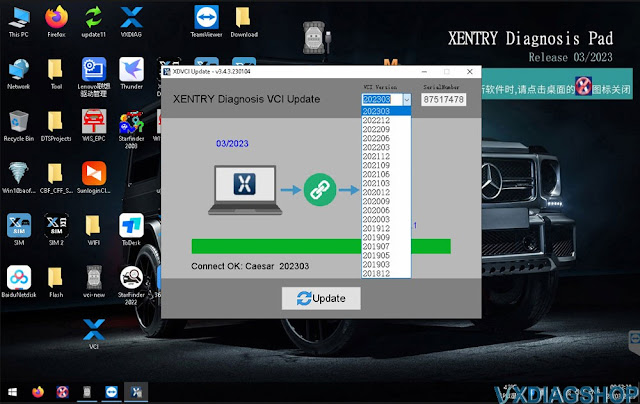
Upgrade Your VXDIAG Benz Xentry to V2023.03 Now!
The latest version of VXDIAG Benz Xentry HDD/SSD goes to V2023.03 in March 2023.
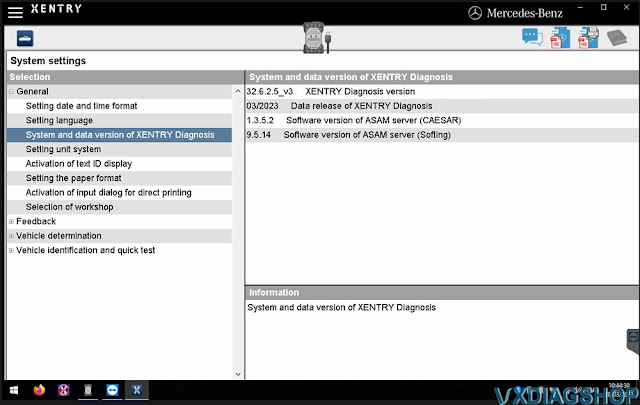
Xentry 2023.03 Desktop
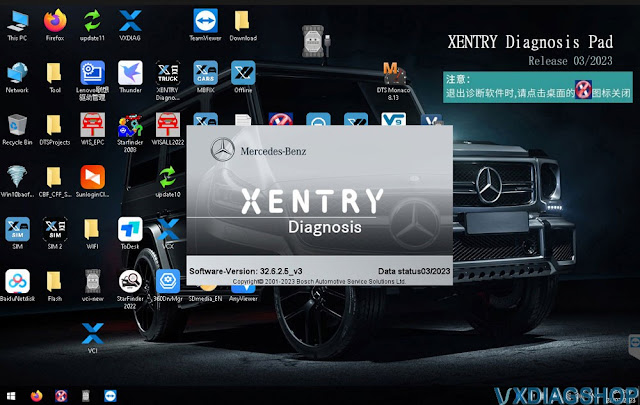
Version:
XENTRY 32.6.2.5 v3 03/2022
WIS/EPC 3.22.11.0, 06/2021
StarFinder
2016-2022
SDmedia 2014
DTS Monaco 8.13.029
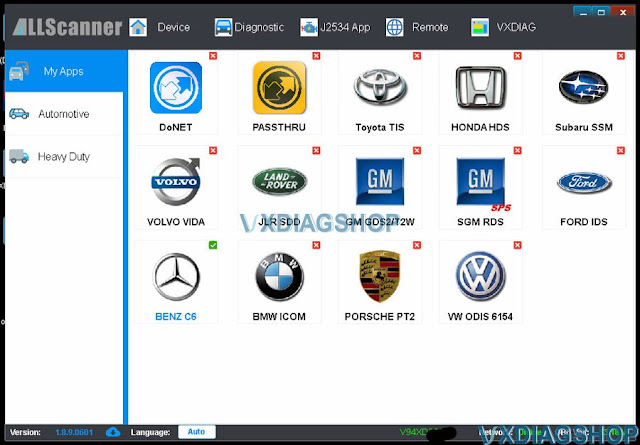
Compatible with VXDIAG Benz C6, VCX SE Benz and other VCX SE with Benz license.
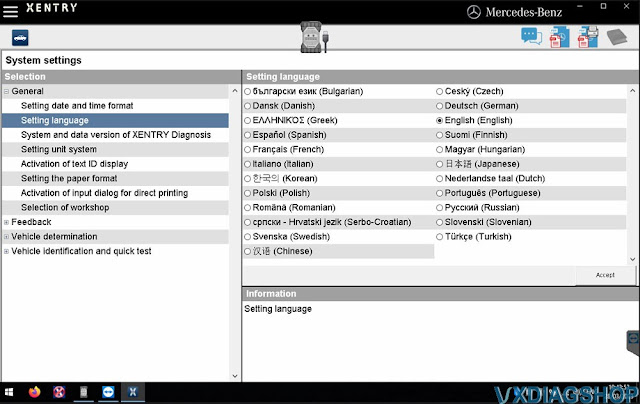
Multi-language: Bulgarian, Czech, Danish, German, Greek, English, Spanish, Finnish, Japanese, Hungarian, French, Italian, Korean, Dutch, Russian, Portuguese, Polish, Romanian, Slovenian, Swedish, Turkish, Chinese
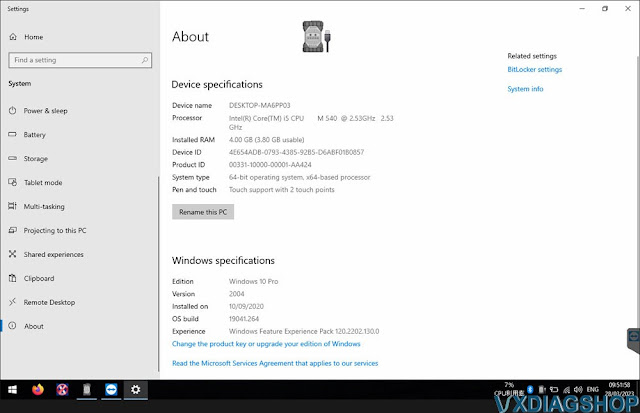
Windows 10-64bit system
03/2023 Xentry requires latest Benz C6 driver.
Update firmware/VCI-> Update C6 driver-> Sync VCI
Don't mess up the order.
Update firmware/license
Update VCI and DoIP
Go to Diagnostic tab, Update Benz C6 driver
After update C6 driver, run Xentry recovery tool on the desktop to sync Xentry VCI.
Select VCI version 202303 if use 03/2023 Xentry.
Fix SRVD Disabled on Subaru Outback by VXDIAG SSM3
This post helped to save me a ton of money.
Fixed Subaru Outback 2015 SRVD Disabled Issue without the Dealer
My wife's 2015 Outback started getting the SRVD disabled warning light about a month back. When I read of the steps you took, I seriously considered buying a VXDiag and hunting down a set of radar reflectors. While I could find the VXDiag vcx se subaru, I couldn't find a good source for the radar reflectors. Instead of getting two replacements, I ordered a single 87611AL00B off of eBay for $92 (w/shipping). The original parts were 87611AL00A also available on eBay for a few bucks less, but I figured the newer model might be more reliable.
I watched a couple YouTube videos on how to remove the tail lights and bumper. They noted that I'd likely break some of the fender clips, so I went to Amazon and ordered a set that included a handy trim remover tool (Dr.Roc Subaru Replacement Bumper Fender Clips Set) for $17–it really came in handy, as I did break a couple of the clips.
The mud flaps were a bit of a challenge, but a small offset screwdriver took care of the one screw with low clearance, so I didn't need to remove the tires. Fortunately, I found that I didn't need to fully remove the bumper. Once I pulled it back enough, there was enough room to reach in to unscrew and replace the RADAR units. I replaced the back right with the eBay unit and turned the car on. Nope, still got the SRVD disabled warning. I put the old unity back on and then tried the eBay unit on the left side. When I turned the car back on, lo and behold, no more SRVD Disabled warning! And yup, SRVD is back to working like normal! Overall, it took me about an hour to go through the whole process.
So, for those who stumble upon this thread and are experiencing this dreaded
SRVD Disabled problem, I suggest these steps to resolve it:
1) Lie down under
your bumper, find the RADAR units on either side (black boxes, a bit larger than
a deck of cards) and see if you can reach up and disconnect/reconnect the
harness to see if that works, as IdahoPat noted above. It didn't work for me,
but you might get lucky and you'll fix the problem for free
2) Order a single
87611AL00A or 87611AL00B off of eBay and try swapping it in on either side to
see if you get lucky like me and find that only one of yours has failed
(likely). Note, it's the same part for both sides and yes, you can mix the old
and new part numbers.
3) If that doesn't work, you may have gotten a bum one
from eBay. Consider ordering another and giving it a try. It'll still be cheaper
than the next two options
4) Do all of the steps that original post did.
It'll cost you, but you'll get a cool VXDiag to play with out of the deal.
Subaru outback 2015 – SRVD disabled (bumped into a pole, got a small dent on the rear passenger side bumper). Fixed the dent.
Steps taken so far:
1. Took out the bumper, bought a sensor part
87611AL00A of eBay, replaced the sensor – passenger side.
2. SRVD disabled
sign was gone for 15 minutes, drive around those 15 minutes to see if blind spot
detection works, it worked but then conked off again.
How to Use Porsche PIWIS II /III Programming
These are programming tricks/tips of Porsche PIWS II/III tester.
This is not our work. Credit to Jhon from Porsche forum. Just for sharing purpose. Hope it helps who has a porsche tester.
First of all, a PIWIS II and a PIWIS III do the same things, only the III can do newer cars, 2018 and on, where as the II is limited to the 2017 and earlier models. The III is easier to use but is more technically challenging to clone since it seeks a signal from Porsche to authorize the VCI (the thing you plug into the car's diagnostic port). The Chinese who sell the clones, created their own server to clone and send out those signals, then modified the VCI firmware to look for the Chinese signal instead of the Porsche signal.
There are plenty of other devices that you can purchase to reset your service interval, change your battery or set the parking brake to the service position. What those devices can't do that the PIWIS can do is code modules to your car, change the way those modules operate, run some diagnostic tests and see the output and input of almost every sensor and button in the car.
You purchased your tester, now what.
Some terms. VAL Vehicle Analysis LOG. When your tester first connects to the car, it reads the state of all modules and records all the faults in a log. This log is then tagged by you either as before repair, during repair or after. These logs serve as proof for Porsche that the dealer performed work for service payment. They don't serve a lot of value for individuals, other than document all your errors for offline. I found them somewhat useful as a milestone as my car had over 150 faults when I began and I could see my progress looking through vals as I did repairs. VALS want to be uploaded so they look to Porsche servers to upload but since yours doesn't have a PNN account, it can't connect.
Programming or Coding. Porsche uses both but really doesn't seem to distinguish between them. You cannot update the firmware of the modules, you simple program it to your car. You can add or change the VIN in the modules. For modules to work in yor car, they must have the VIN programmed in them. Buying a new module from Porsche and sticking it in, won't work because the module needs a VIN programmed in it to talk to the other modules in the car. Beyond that, you need to program the module to your options. For example, the rear door module on a panamera uses the same module for the right and the left doors. If you place a new module in the right door, the window operates in reverse. Programming it, tells the module, it is located in a right door and reverses the up/down. . There is auto and manual programming.
Initial set up and overview
When you first connect to
your car, you must have the car on, but not running. Connect the VCI to the car
and the laptop, turn on the car then start the diagnostic program on the laptop.
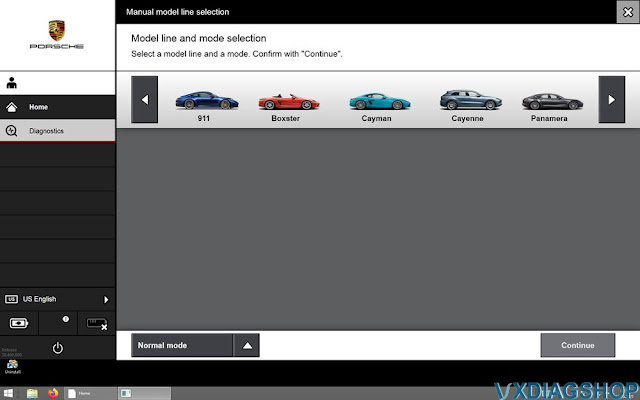
The PIWIS III will auto determine the model of the car, the PIWIS II requires
you to select the model when starting the diagnostic program. I will add
pictures at times when asked. Keep in mind I sold my PIWIS II, so I can only add
pictures of the three. if you are not connected to a car, both versions of the
PIWIS will offer simulation mode which is a good way to get familiar with the
unit without messing up your car.
When you first enter the diagnostic mode, you are shown a list of all modules in your car. In engineering mode, all modules are shown, even those not in your car so make sure you are in Production mode. If everything is in English you are in production mode. If the module names are in German, you are in engineering mode. Note there is a language selection prior to entering the diagnostic program for those who seek other languages. You are on the overview tab and there are other tabs, but on the module listing page, you do not want to enter any of those other tabs, They are used when looking at one module. The first thing I recommend people do is hit the button marked add. menu at the bottom.(F7) From here you can run read all fault memories. Run that and don't run the other options as many require a connection and a Porsche account. Don't get too concerned with your faults, many show up simply from a low voltage situation. Try erasing them all first. If they all disappear, that's good, any that stay on will require investigation. Please note that some will disappear because the module is not active. If you run the car and then note the same faults reoccur, you should investigate them.
Once you have cleared all the faults, you should go back to the overview screen which shows all the modules and select any module you want to investigate then hit next. That will take you to that specific module where you can now use the other tabs across the top to show the module information, read any inputs or outputs and do any repairs that may be listed.
Finally, there are certain modules that you cannot replace. These modules hold the key code information and must be programed by the dealer. They are the engine module, the Front and rear Body control modules, the Steering ELV module (few people have this module) I read somewhere that the airbag module is also on this list. I cannot confirm this as that is one of the only modules that is original in my car and still worked. While you cannot replace them, you can certainly do repairs, or change options in some of them. You can use them to diagnose problems, you just can't replace them entirely.
Another tip-as we know, to use PIWIS III, we must turn the date and clock back to 2020 for the VCI to work- once your car is automatically detected and you connect, you can re set the date back to current. I have since done this for VALs and Vehicle Handovers to have a current state of the car-
Here are some screen shots, after I did Vehicle Analysis Log and Vehicle
Handover Log.
After disconnecting from the car, I opened piwis and entered
simulation mode, by going to diagnostics and manually selecting my car:
Then, under control unit selection, overview, at the bottom you see Logs(F10)

Select Logs and choose either Vehicle Analysis Log or Vehicle Handover:

Then you'll see them,
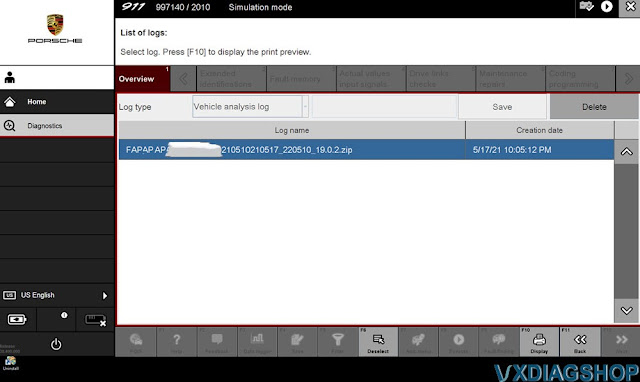

After hitting display(F10) you can read the reports:
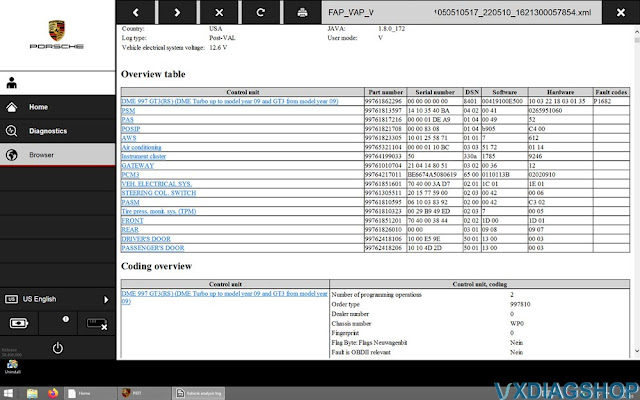
Screen shot only shows the overview of the VAL, you have to scroll through an extensive list. I erased VIN in Photoshop before posting-
Here's the Vehicle Handover:

There's also a path in Windows to see the LOGs but right on PIWIS itself it's
nice to look at them-
Once you open your VAL, it's a long page and you can
scroll and view everything.