VXDIAG GM BCM SPS2 Programming Review March 2023
vxdiag vcx nano gm March 2023 review: This plus 45 bucks Acdelco subscription I fixed the car ('14 GMC Sierra.).

I had some issue with the BCM, ECM, and I need to diagnose the car for the DTCs. Then I decided to work on it by myself…I didn't really know anything about fixing cars…so…2 months, every night reading and learning online, I decided to give it a try. I bought the vxdiag vcx nano gm gds2, thank god the acdelco subscription is for 2 years, so I still had that. Then followed instruction on the VXDIAG website, everything was great! One thing I did was installed two systems on my computer, one I used for like tech2 and GDS, the other one is just for SPS2 programming. Because if you read, there can be problems if you use this and run SPS2 directly, to run SPS2 for programming, you need to do:
1. install the VX manager.
2. Install Passthrough (that is in the VX manager)
3. Run passthrough first, when the program loads, just click "load" on the top right corner, then you can start log in the website for acdelco and then start SPS2.
It may still quit sometimes, but make sure when you choose the
connection you are using the VXDIAG, there are a lot of videos on youtube, the
most helpful one I found was the one "how to program BCM using
VXDIAG".
Once you get car connected, basically it works as any $1000+ thing
to program your car modules. I replaced my BCM, ECM, Radio, Amplifier module,
and all programed fine with this!
If you are also changing the Instrument Cluster, you can't program it with SPS2. You need EEPROM programming, it is much easier, just find the EEPROM programming kit, which I got on ebay for 16 bucks, works amazing and yes I did got my Instrument cluster replaced too, by myself. When using EEPROM you have to make sure the parts number are the same.
So anyways, vcx nano gm works great with SPS2. For Tech2 and GDS,
it works smoothly. VXDIAG website has a GDS patch or it comes in that little
flash drive, patch the GDS program, start from the patched file, no problem. I
got everything fixed now on my car, and yes, 2 months ago, I knew nothing about
fixing cars. The last thing I fixed was getting rid of the service engine light,
it has been there since the day I got the car, then since I changed throttle
position module, I need to get crankshaft position relearned, I ran Tech2 and
there's an option under the ECM part to relearn it, so I did it, in about 3 mins
it's relearned and the check engine light is finally gone!
I'm pretty happy with this, I don't think I would need to use it
for a while since everything important is new and just replaced and DTC cleared
once fixed, but compare to what they showed you to do it professionally and
correctly, this saved me thousands of dollars. I didn't need to go to the dealer
to program modules, I didn't need to buy parts from the dealers, I didn't need
to go to the dealer to get the code read. This is wonderful!
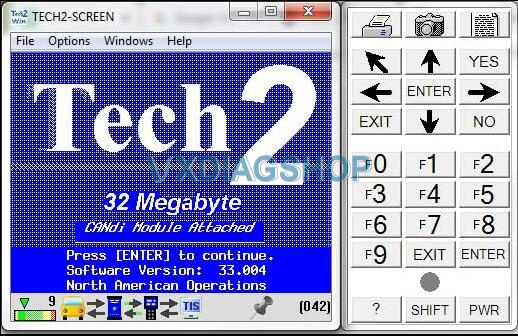
Set up VXDIAG GM Tech2Win on Win10 32bit
It is always recommended to install vxdiag vcx nano gm tech2win software on Windows 7 32bit operating system. But if some only have Win10 laptop?
You cannot use a 64bit OS system it has to be a 32bit device. The newer units are 32bit and can't run from a Vm image that is 32bit OS.
People already figured out how to fix that problem.
Set up Tech2win on Win10 32bit:
Load VX manager first, plug in the Nano, and get it working in VX manager. Hence click on firmware icon to update the firmware, then click on licence icon to install the licenses.
Now with the VX manager open and the nano plugged in, now load that auto install.exe of Tech2win to load it to your machine. Hence the autoinstall.exe will need to over ride some VX manager files when it installs, so VX manager has to be open with the Nano connected/being seen in VX manager when you load tech2win auto install. Installing tech2win, with VX manager not open and the nano not plugged into the machine will end up with install problems every time with Win 64bit system.
Lastly, if you are loading in the Newer VX manager, you have to go in and install the needed programs from inside VX manager (no long load into VX manger from the white disc). So Tech2, GDS2 and SPS have to be installed from within VX manager. If you check in VX manager and these are loaded already, uninstall and reload them from VX manager again if you are having problems. When you have done these three reloads, go back in the licence tab in VX manager and make sure you are showing licences for all three of these. If not, then go back to the main page and click on the licence ion to update the licences on the refreshed installed. I bring this up, since if you are using the last right hand top tab in VX manager to download the lastest VX manager, you will have to install Tech2win/gds2/SPS from within VX manager (will still use the white disc to install Tech2win to the laptop to get the desktop icon.
Now the glitch with AC Delco TBS.
If you are using the older VX manager
and older firmware on the Nano, when you get the screen to install the
BoschTech2 win driver and GDS2 in TBS (will be a pop up screen), you want to
skip these installs each time you use TBS.
If you are using the latest VX manager and latest Nano firmware, then you want to install these two Bosch drivers from TBS instead.
Trust is, for TBS now, you want to be using the lastest VX manager and firmware. When you load the two Bosch drivers, it going to load another program that is needed to get the Nano to work (TBS changed about a year ago, and its this third driver that loads with the Bosch drivers that is needed to get the VXDIAG VCX Nano GM to work with the system.
2023 Updated:
Install VX manager, then go click on the VX manager license and firmware icons to install/update them so the Nano is showing up in VX manger and working.
Next, Install Tech2win using the auto.exe install with VX manager open and the VX nano attached to the machine, and watch for defenders to block something during the installs. If defenders blocks, the go into defender to allow the needed file to run, then go back and re run autoinstall again for tech2win..
Now go into VX manger, click on the top diagnostic tab, automative tab left
hand side, and install Passthru, GM gds2/tech2w one at time.
Note, if you
update VX manager, after the update, liscence and firmware updates, go back and
uninstall and reinstall these three again (don't just use the update
button).
Note, will get that a few items have already been installed during
the above steps, so just click and allow the installs to continue as needed.
Now at this point, do a restart of the entire laptop, and should have your problems solved.
As for tech2win, delete the quick start tech2win on the desktop since your never going to use it, and once you click the normal tech2win icon, select North America in the first screen, MDI1 in the second screen, then usb device in the third screen. If you do not get the third screen USB device with the nano connected, it because when you first went to install Tech2win on the machine, VX manger was not open with the Nano connectors, so the auto install could over write a few files needed in VX manager to make the software work. So start from the above steps with VX manager open and the VX connected to the machine, and nana showing up in VX manager.
As for once you are into Tech2win , pretty straight forward for the most
part, and the Vet is a Y body type.
For 2005 vet, use that year for all
modules, while if you need to get to the BCM setting for a 2006 to 2013 Vet, use
the 2013 year alone (the rest of the modules you can just use the car actual
year isntead).
VXDIAG GM Win7 32bit Setup Review for GMC Sierra
You will find no cheaper alternative compatible with Tech2Win. Rest assured, if you install it exactly as described below you will find success – in fact, I just completed an automatic ABS bleed today with my GMC Sierra 2500HD!
Disclaimer:
As indicated by others, viruses and hidden software may lurk
in the required files. However, my own scan with Kapersky did not flag any.
Regardless, it is recommended to perform a fresh OS install on spare/burner PC
for three reasons:
1) No personal files or info to worry about
2) Windows
7 Professional 32-Bit is required. If you don't already have it, you will need
to get it and perform a fresh install. There are many documented failures from
attempting to use Windows 10, Win 7 64-bit, etc -I prefer Win7.
3) Lastly if
you think you can get away with running Windows 7 Pro 32-bit inside a Virtual
Machine, think again – Tech2Win will crash while establishing vehicle connection
(ask me how I know).
Okay, on to the guide…
1) Perform fresh install of Windows 7 Professional 32-bit (x86).
2)
Install drivers on your machine and all that good stuff.
3) Fully update
windows via Windows Updates (skipping this step may result in cryptic "missing
.dll"
errors during install).
4) Install Microsoft Visual C++
Redistributable 2010 to avoid more .dll errors.
5) From VXdiagshop.com, download the latest
versions of the following (do NOT use the USB key):
-VX Manager
-VXDIAG GM
GDS2
-VXDIAG GM Tech2Win
6) Unzip/extract as necessary. Inside the
Tech2Win folder, run AutoInstall.exe.
7) Inside the GDS2 folder, run
AutoInstall.exe. Expect long wait times. Note that GDS2 may not strictly be
required for Tech2Win but I installed it anyways.
8) Install VX Manager –
select PassThru & GM.
9) Plug in VCX
Nano GM. Windows will automatically find and install the USB driver as long
as step (8) has
been completed
10) Launch VX Manager. VCX Nano should now
be recognized. If not, unplug and re-plug back in, restart VX manager, restart
the computer, etc. It will show up eventually. Note that an OBD connection is
not required at this time.
11) Go to Diagnostic tab at top. Double click "GM
GDS2/T2W" and hit Install. Do the same to PassThru if it doesn't already have a
green checkmark.
12) Plug in to your vehicle.
13) Launch Tech2Win with VX
Manager still open in the background. Tech2Win It should prompt you to select
your communication tool in a popup window – pick GM MDI (not MDI 2). It should
then pause and prompt you again, this time with one option – a string of numbers
and "USB". If it does not prompt twice, close Tech2Win and try again.
14) Hit
OK at the second prompt. That's it – Tech2 emulation is running and you should
be able to communicate with your vehicle.
I've had fairly good luck pulling data and performing special functions with this since I got it working.
Good luck to you – hope the guide was helpful.
VXDIAG 2014 GMC Sierra ECM Programming Review
January 2023 new user review of vxdiag vcx nano for gm.
Worked great for GM SPS / Techline Connect programming.
This little device saved me a bundle. I had a job replacing a 6L80E transmission in a 2014 GMC Sierra. Instructions that came with the reman transmission stated the TCM/ECM needed to be updated together with most recent calibration and suggested towing the vehicle to the dealer. A tow plus dealer programming charge would have been several hundred at the very least. No thanks. Did a bit of research and a lot of folks recommended this little jewel.
It was very easy– install VX Manager, and choose the "J2534 Pass-thru driver" only. For SPS programming, you don't want all the other stuff. No viruses were detected when installing just that feature. I used a Windows 11 Pro 64 bit desktop computer. After VX Manager is installed, it will show you the device status, and you can update the VCX Nano firmware if you wish.
Once GM Techline Connect was installed, it recognized the VCX Nano right away and it was one of the module options when I got into the SPS programming. Paid GM $45 plus tax for the 2-year VIN subscription, and away it went. Updated the ECM/TCM like I was supposed to and all other modules that had fixes/updates. It performed flawlessly and truck / new transmission works great.
I can't comment on the GDS2 / Tech2 functionality of this unit, as I have an expensive scanner that does everything but J2534 Pass-thru. I might play with it someday, but I bought this purely for SPS programming and it was easy. It was also my first time using GM SPS/techline or programming a GM module if that says anything.
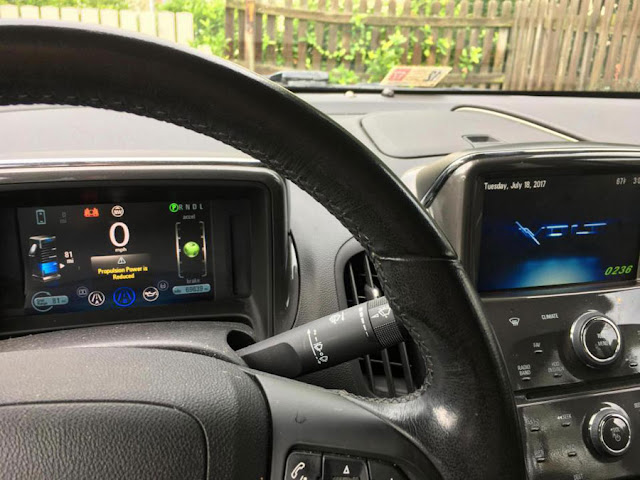
VXDIAG Solve GM Volt Gen1 "Reduced Propulsion Power" Error
Vehicle: GM Volt 2012 or other Gen1 models
Symptoms:
I experience the "reduced propulsion power (PPP)" message if I make a stop after switching to the ice on my way home.
Solution:
The message that required the update was
"service high voltage charging system". The range change was instant,
immediately following the update。
To enable hardware replacement, the Hybrid Powertrain Control Module 2 can be placed into a fast learn mode with the scan tool.
Here is the fix for this problem. ( Gen 1 Volt )
Purchase a used HPCM2
module from Ebay or an auto wrecker the same year as your Volt.
You can use another year Volt providing the used HPCM2 module has the same part number as stamped on your existing HPCM2 module label.
Next, purchase a vxdiag vcx nano programmer from the following web site:
https://www.vxdiagshop.com/wholesale/vxdiag-vcx-nano-for-gm-opel.html
Download the free software to run the VXDiag programmer into your laptop running Windows.
Disconnect your 12 volt battery, ( in the trunk compartment ) and swap in the used HPCM2 module ( module is located under the passenger front seat ) it is easier to remove the 2 torx bolts and lift the seat out of the way to swap the HCPM2 module out.
Reconnect the 12 volt battery. Power up your Volt. Next plug in the VXDiag programmer into your OBD2 port ( under the steering wheel ), run the downloaded program ( from VXDIAGSHOP website ) and "reset" the HCPM2 module in the menu. ( You need to scroll down the various menus to find this "reset" option )
Once you reset the HCPM2 module, turn the Volt off and back on again. Now charge your Volt. Your battery range will come back to the original 10.3kwh ( or whatever it was before the GM dealership HPCM2 firmware update ) per full charge range.
This method works 100% because I successfully performed this on my 2012 Chevy Volt car after a GM dealership reprogrammed my HCPM2 module and subsequently I lost 1.2kwh per full charge. ( 9.1kwh ).