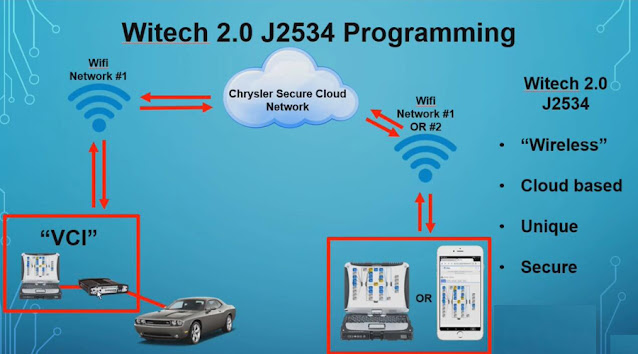
Does VXDIAG VCX SE Work with Chrylser wiTech 2.0?
Question: Can I use VXDIAG VCX SE as a Passthru device for Chrysler wiTech 2.0?

Some people tested working with witech 2.0. Some J2534 devices failed to connect 2018+ security gateway models via wiTech 2.0, i.e old Autel Maxiflash as it cannot do CAN FD protocol. So does vxdiag. So better test on -2018 FCA models. Free to test by your side.
Here are tips for setting up j2534 passthru devices with wiTech 2.0.
Getting approval for your device: You PC is what is serialized and what actually gets approved. It is not a combination of PC and J2534. It is the PC alone. Once the PC is approved, you can use ANY J2534 device that has installed drivers to ATTEMPT to use the WiTECH 2.0 software.
Only a handful of devices are validated for use, many other devices will work, even old Bosch "Green Box" Mastertech has performed flashes on late model Chryslers…. where you run into trouble is vehicles with 3 and 4 CAN networks, the Bosch unit does not support that many CAN channels, thus it was not communicating with entire legs of the vehicles network.
On to system requirements:
Most new-ish laptops with windows 10 will meet the requirements for tech support to help you when you are in a pickle, but windows 7 does function. IF you only intend to use the partition or computer for 2010+ WiTECH 2.0 software, and not the included Legacy 2009 and older programmer, NO JAVA IS NEEDED at all! The very specific version of Java is only needed if files are to be downloaded.
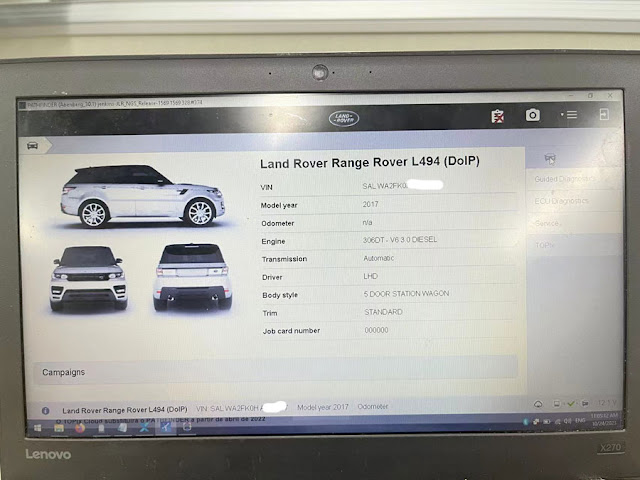
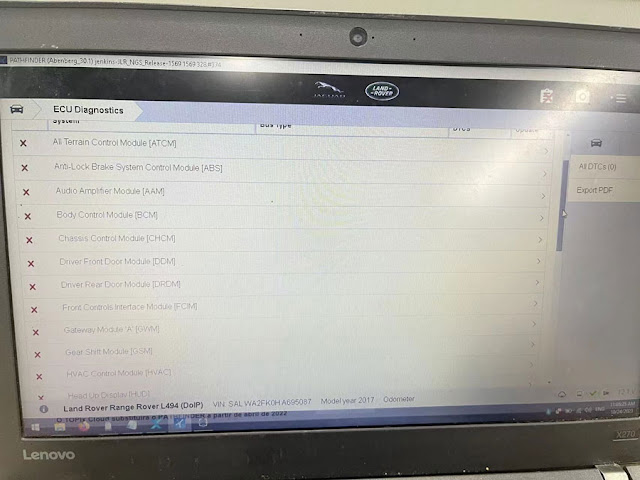
VXDIAG VCX SE Cannot Read JLR DoIP Module Solution
Problem:
The vxdiag vcx se JLR DoIP device only reads VIN and vehicle information of the Range rover L494 MY2017, it cannot access/scan any modules. Any suggestion?
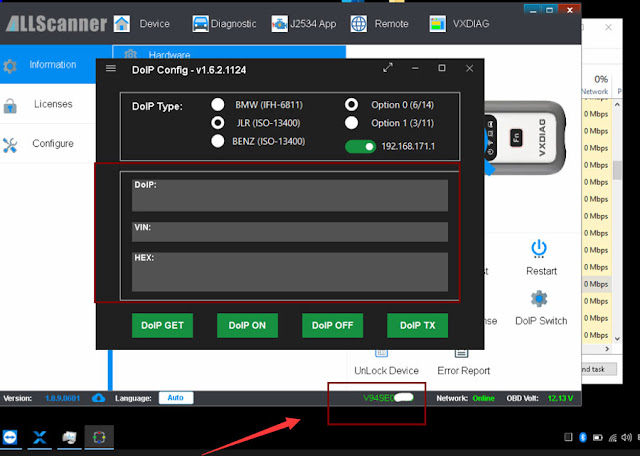
Solution:
Turn on JLR DoIP switch.
If vx manager detects the device but DoIP config shows nothing, restart computer, disconnect vcx se for a few minutes, then plug the device, turn on DoIP switch and try again.
If DoIP switch still not working, there is a problem with the DoIP module. Contact your dealer to see if your vcx se need repair.
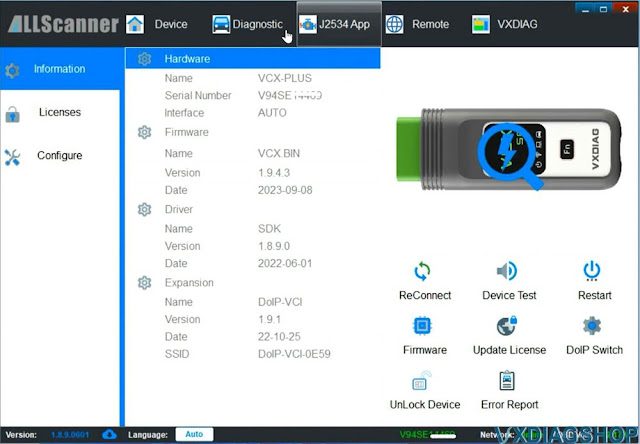
VXDIAG VCX SE OBD Indicator Not Turn on Solution
Problem:
My vxdiag vcx se Benz device was not detected by vx manager (no device error). The vx manager version is up-to-date.
OBD indicator on the vcx se unit did not turn on. Any advice?
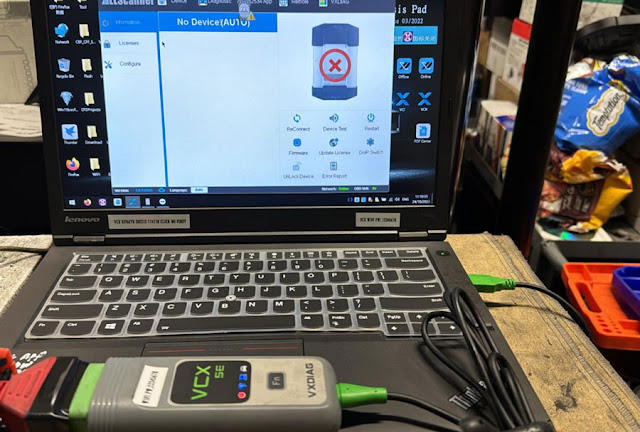
Solution:
OBD indicator does not turn on which means there is no communication between device and OBD.
Unplug vcx se, connect it with OBD and PC again. It will work.
If OBD indicator still not turning on, this is a faulty device.
Better have your dealer check your device and decide if it requires repair.
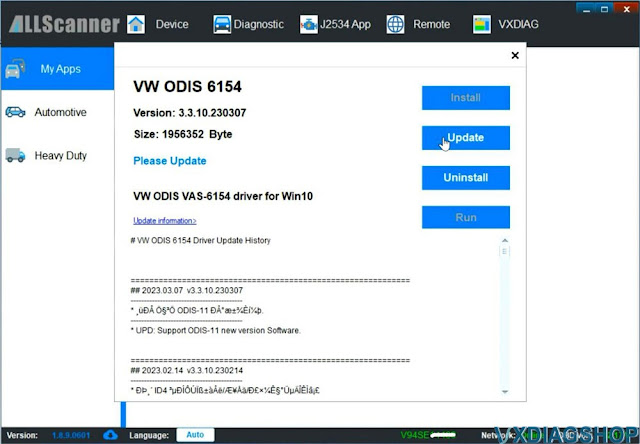
How to Install ODIS-E V17 for VXDIAG VCX SE 6154?
Latest ODIS offboard diagnostic engineering software V17.01 was tested working with VXDIAG 6154 scanners.
ODIS E V17.01 can be downloaded free here.
Keygen is not included. If need activation, buy the activation service here. It contains both ODIS-S V23 and ODIS-E V17. Both can be activated free for once.
https://www.vxdiagshop.com/wholesale/vw-audi-software-v23.html
Version: ODIS Engineering 17.01
Compatible device: VXDIAG VCX SE 6154, VXDIAG VCX NANO 6154 as well as other passthru devices (openport 2, vnci 6154a, godiag j2534 etc)
Operating system: Win10 or later O/S, RAM>4G. Win7 is not supported since this version.
Language: Multi-language
How to Install ODIS S V17 for VXDIAG 6154?
Step 1: Install ODIS-E V17 Setup
Open ODIS-E
17.0.1 folder
Open ODIS-Engineering_17_0_1
folder
Run OffboardDiagSetup-Engineering-17_0_1
Select
Setup language

Press Next
Select diagnostic interface as VAS 6154 and press Next

Then software will ask license for activation
Open license.dat from
ODIS-E 17.0.1/Patch & License folder


Select Create a folder in the start menu and create shortcuts for all
users
Installing Setup until finished

Step 2: Activate ODIS-E
Run Patch &
License folder, open 17.0.1 patch folder
Copy all three
files from 17.0.1 patch folder and paste to Win11ProW
X64/Program Files/OE folder


Send OffboardDiagLauncher_protected from Win11ProW X64/Program Files/OE to desktop

Rename OffboardDiagLauncher_protected desktop shortcut as ODIS E 17.01 and run it

ODIS-E will ask for an activation key
Send the hardware ID to
vxdiagshop.com engineer and we will send you back the activation key
Input
activation key and press Register

Step 3: Install PostSetup
Open
PostSetup_202300619.iso on ODIS-E 17.0.1 folder as Winrar
file
Extract PostSetup 202300619 file to Disk E

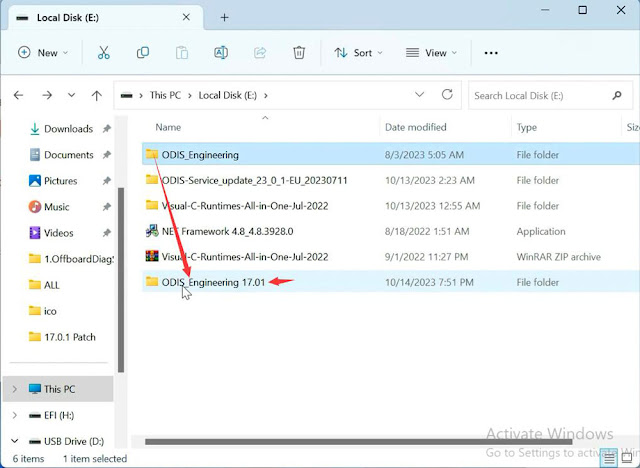
In ODIS-E 17.01 if we select file location to E:/ODIS_Engineering, it says no valid software configuration.
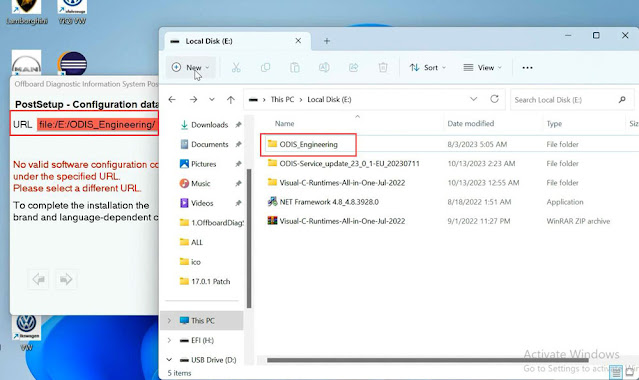
We do this.
Create a new ODIS Engineer 17.01 folder on disk E, copy ODIS
Engineering folder to this new folder.
Select local directory as file:E:/ODIS_Engineering 17.01/, it should be fine.
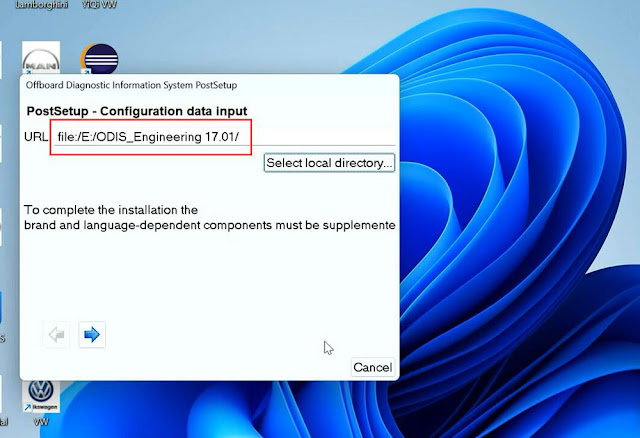
Select PostSetup language
Wait until postsetup installation finished

Step 4: Exyatct VWMCD
Unzip VWMCD file in 4.VWMCD folder
and
extract to C:/ProgramData/OE/MCD-projects-E/VWMCD folder

Step 5: Install Driver.
The U disk contains both ODIS-S and ODIS-E software. Drivers are in the ODIS-S 23.0.1 folder.
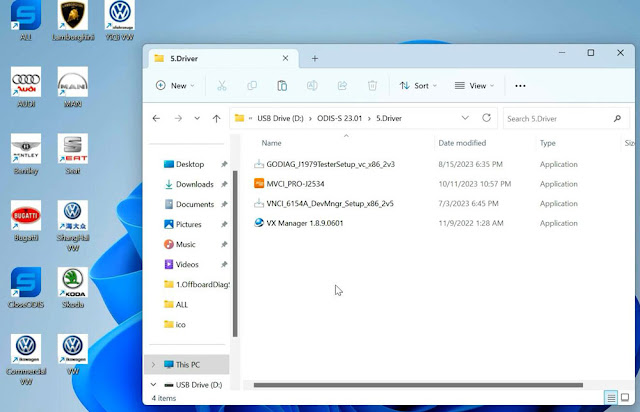
Install the corresponding driver like Step5 here.
If already installed driver for ODIS-S, don't need to install same driver for ODIS-E again.
Step 6: Run ODIS-E 17
Run ODIS-E 17.01 on desktop
Software is ready to use.

How to Install ODIS-S V23 for VXDIAG VCX SE 6154?
Latest ODIS offboard diagnostic service software V23.0.1 was tested working with VXDIAG 6154 scanners.
ODIS 23.01 can be downloaded free here.
Keygen is not included. If need activation, buy the activation service here. It contains both ODIS-S V23 and ODIS-E V17. Both can be activated free for once.
https://www.vxdiagshop.com/wholesale/vw-audi-software-v23.html
Version: ODIS-S 230001.105.130
License: Included License Standalone and License for all
brand
Brand: VAG (Audi, Bentley, Bugati, FAW-Volkswagen, Lamborghini,
MAN, Seatm Volkswagen, Skoda)
Compatible device: VXDIAG VCX SE 6154, VXDIAG VCX NANO 6154 as well as other passthru devices (openport 2, vnci 6154a, godiag j2534 etc)
Operating system: Win10 or later O/S, RAM>4G. Win7 is not supported since this version.
Language: Multi-language
How to Install ODIS S V23 for VXDIAG 6154?
Step 1: Install ODIS-S V23 Setup
Open ODIS-S
23.01 folder
Open OffboardDiagSetup-Service-23_0_1
folder
Extract OffboardDiagSetup-Service_VWMCD_23_0_1.rar
Install ODIS-S
setup
Select setup language
Wait until the setup installation is
completed


Step 2: Activate ODIS-S 23
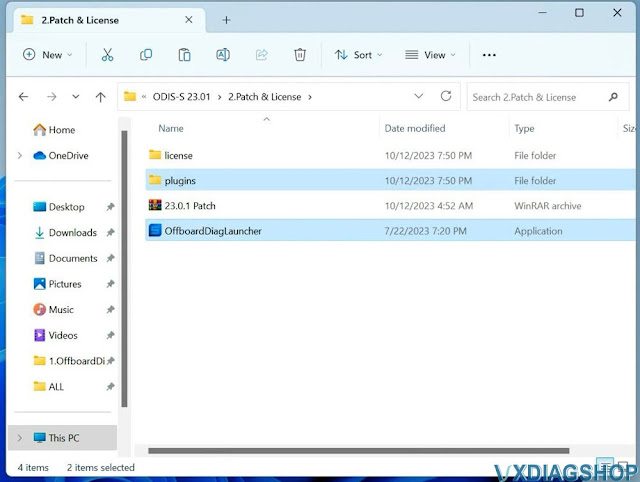
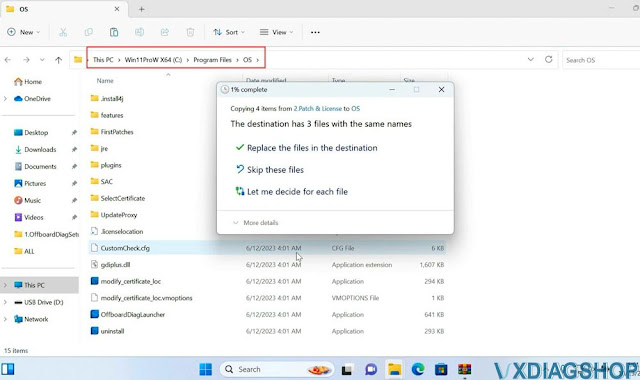
Open 2.Patch& License folder
Copy all files
from patch folder and paste them to Win11ProW X64/Program
Files/OS folder
Run OffboardDiagnostic on desktop as administrator
It will ask for an
activation key
Send the hardware ID to vxdiagshop.com, we will send you back the
activation key, press Register

Step 3: Install PostSetup
Open 2.ODIS-Service_update_23_0_1 folder
Open
ODIS-Service_update-23_0_1-EU_20230711 file with Winrar
Create a new folder
to E and extract file to disk E
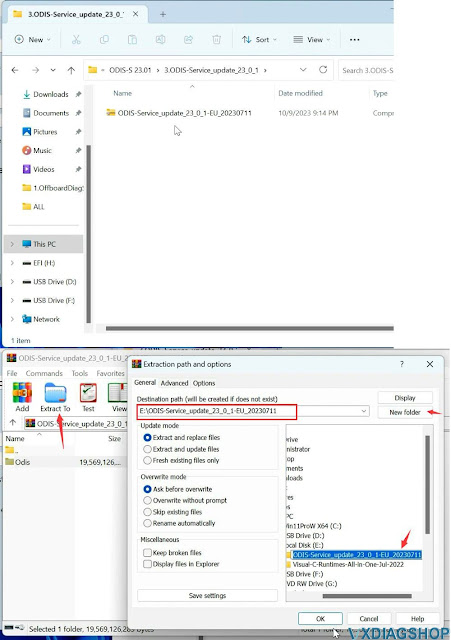
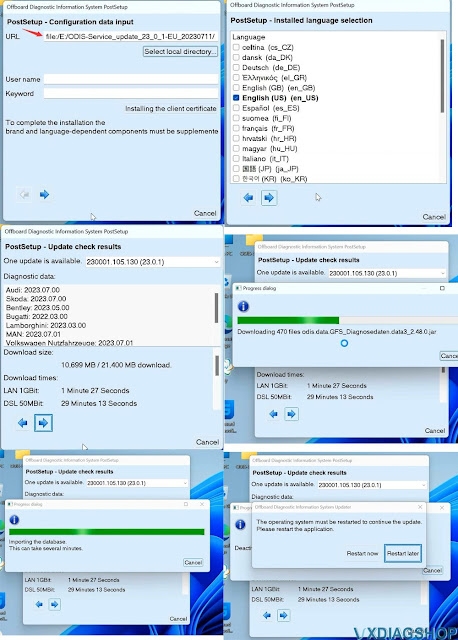
In PostSetup select from file:/E:/ODIS-Service_update_23_0_1_EU_20230711
folder
press Next (don't need to input user name and password)
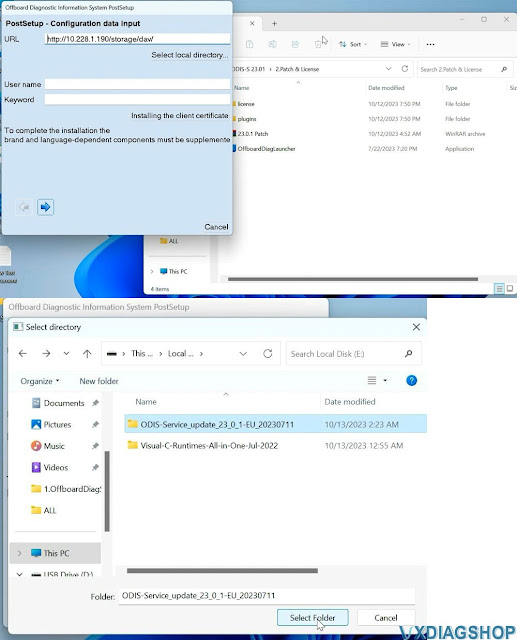
Select PostSetup language
Wait until postsetup installation finished
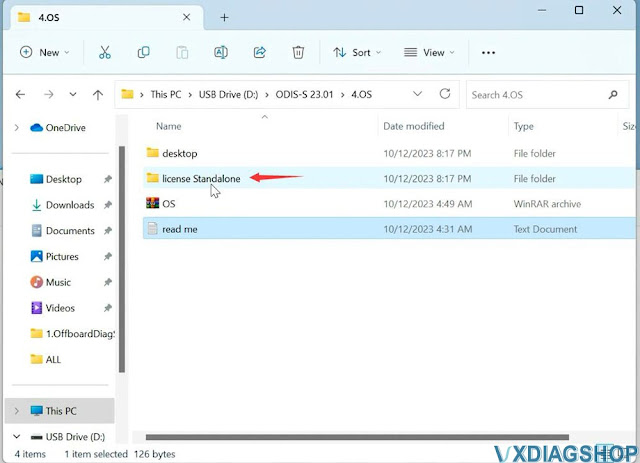
Step 4: Copy license
Copy the "license
Standalone" folder to C:/ProgramData/OS
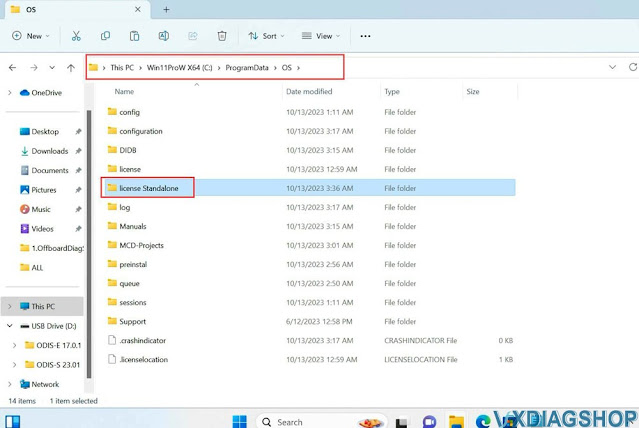
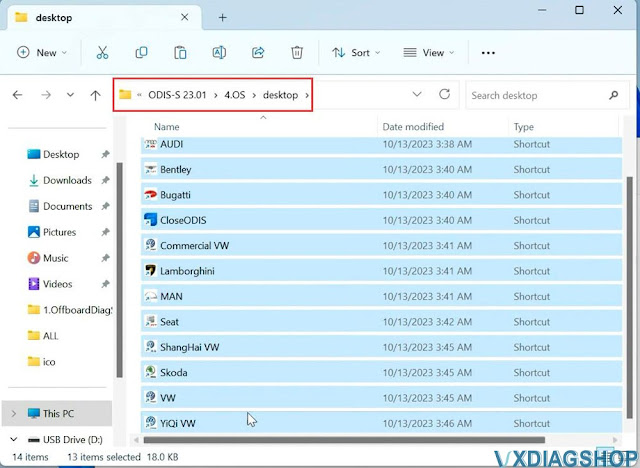
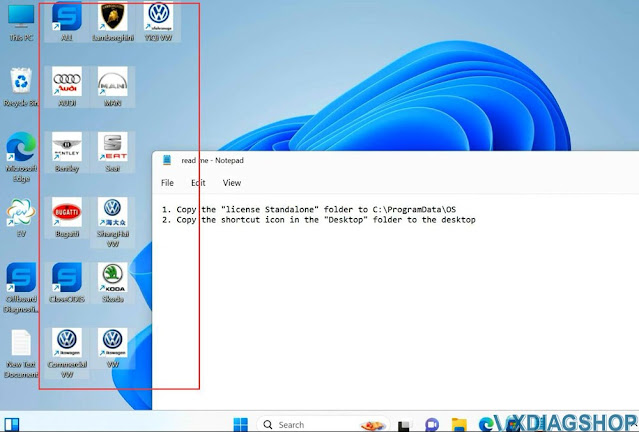
Copy shortcut icon in the "Desktop" folder to desktop
Step 5: Install Driver
Open 5.Driver
folder
Install driver for the corresponding device.

For example, install VX Manager driver for VXDIAG
VCX SE 6154
Connect the device with the laptop via USB

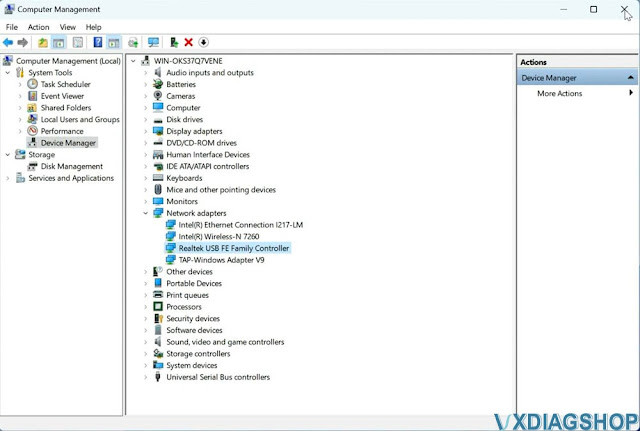
Check if the device is well connected in the Device Manager
Run VX
Manager, check device is detected
Install or update 6154 driver
Step 6:
Run the corresponding software icon on the
desktop, i.e VW ODIS-S V23
