VXDIAG Techstream Register Lexus LS460/ LS600 TPMS
Most cheap USB OBD2 VCI J2534 cables can only read data but can't write data into the ECU. You need a good quality OBD2 VCI connector for Techstream to register the TPMS sensors in the ECU. I bought several cheap USB OBD2 VCI cables but none of them allowed me to register TPMS sensor IDs into ECU (they could read data), until I bought a VXDIAG VCX Nano Toyota cable for approximately $85 (3 years ago). The VCX Nano cable/connector allowed me to use Techstream to write TPMS ID's into ECU. BTW, if you can, use Techstream 15 or newer version, which allows you to enter TPMS sensor ID's all at once on one screen. With earlier versions of Techstream, you need to enter the TPMS ID one at a time/screen within a short allowable time, or it will time out and you'll have to do it all over again. For registering TPMS sensor ID's, Techstream version 15 and above is a big improvement. I'm using Techstream version 17.
Here is an DIY tutorial on replacing and programming TPMS Sensors – 2007-2009 LS460/LS600 with VXDIAG techstream cable.
Symptom of a bad TPMS sensor: After the engine is started, the tire icon on the dash flashes for three seconds and then stays on solid with the message: "Check Tire Pressure System. Have your vehicle checked by a dealer", as shown in the photo below:

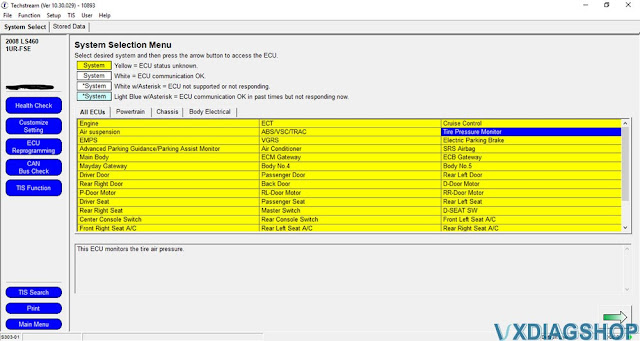
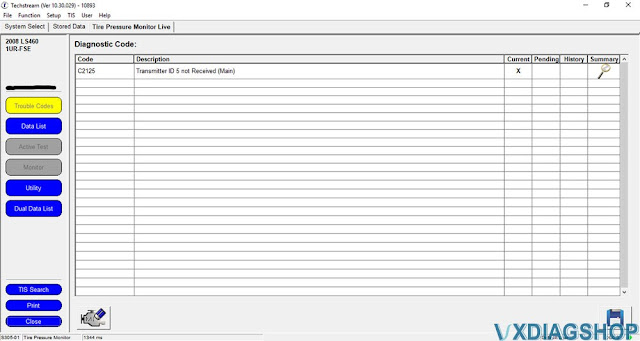
Verifying the bad TPMS sensor with Techstream: Connect Techstream to the car, double-click the "Tire Pressure Monitor" button, and then click the "Trouble Codes" button. It shows Code 2125 with the description "Transmitter ID 5 not received", indicating that TPMS sensor ID5 is not working. Double-click the "Data List" on the left-side of Techstream panel, and TPMS senor ID5 shows only 0.4 PSI, indicating a bad sensor. Screenshots of Techstream are attached below:


Identifying the bad TMPS sensor: While still on Techstream "Data List" screen, pump up each tire to 40 PSI. Techstream shows the rise of each tire's pressure as it is pumped up. The tire that does not show a rise of the tire pressure is the tire that contains the bad TPMS sensor. In this case, it is the front driver-side tire.
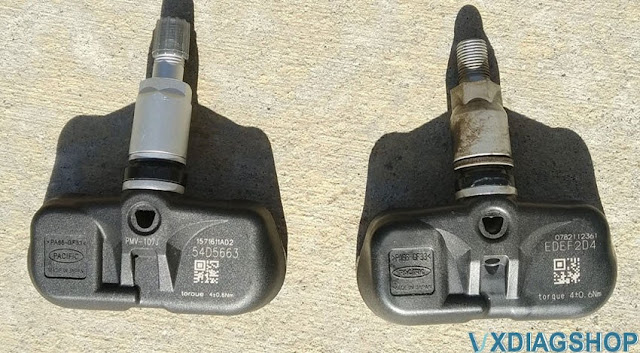
Choices of replacement TPMS sensors: I am amazed at the long lifespan of TPMS sensors on my LS460. The bad sensor has faithfully been working for 13.5 years on my car, and the remaining 4 original TPMS sensors on my LS460 are still working. For replacement TPMS sensors, there are basically three choices: (1) genuine Lexus/Toyota sensors from Lexus/Toyota dealers, (2) Denso OEM sensors, and (3) no-name replacement sensors on eBay/Amazon. The part number for 2007-2009 LS460/600 TPMS sensors is 42607-33022. At the time of this writing (May 2021), my local Lexus dealer's online website shows $71.47 per TMPS sensor for my LS460, and my local Toyota dealer's website shows $65.92 for the same TPMS sensor. The part number of Denso's OEM TPMS sensors is 550-0103 and RockAuto carries them at $31.79 each. No-name TPMS sensors on eBay/Amazon carry the part numbers of PMV-107J or 42607-33021 and their price runs anywhere from $7 to $15 each. Given the significant difference in prices among the three sourcing options, I decided to gamble a little bit and went with a seller of no-name TPMS sensors on eBay, who had very high ratings and received a lot of positive feedback. The seller guarantees the battery life of his TPMS sensors to be at least five years. This eBay seller's TPMS sensors for LS460/600 have an almost identical look of the original Lexus/Toyota TPMS sensors. I bought a set of 4 TPMS sensors from this eBay seller for $45, including sale tax and shipping. Below is a photo of the new no-name TPMS sensor on the left and the Lexus original TPMS sensor on the right:
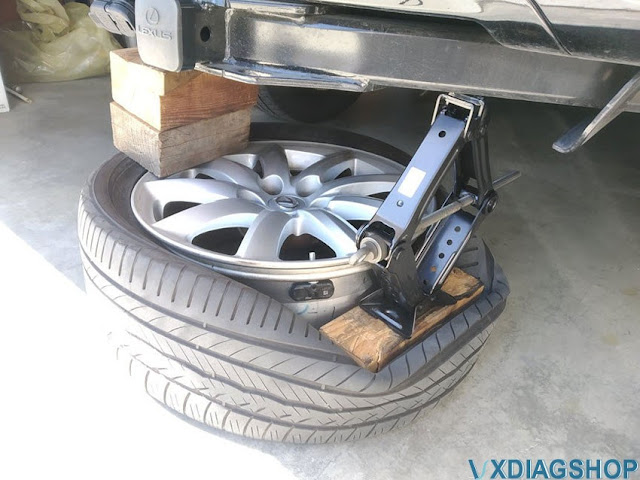
Breaking the tire bead and replacing the bad TPMS senor: I used my LS460's jack against the rear towing frame structure of my GX460 SUV to break the tire bead. It worked effortlessly and perfectly. With the open tire bead, I replaced the bad TPMS sensor with a new one in a few seconds and torqued the sensor stem to 4nm. See the photo below:
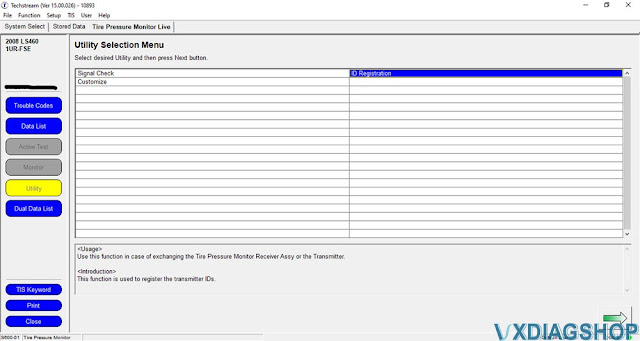
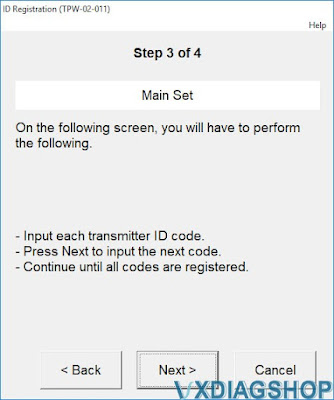
Registering (programming/relearning) the new TPMS sensor in the tire ECU: Inside Techstream's "Tire Pressure Monitor" screen, double-click the "Utility" button on the left-side panel, and then double-click the "ID Registration" button. Then, follow Techstream screens to complete the registration (programming/relearning) of the new TPMS senor in the tire ECU database, as shown below:


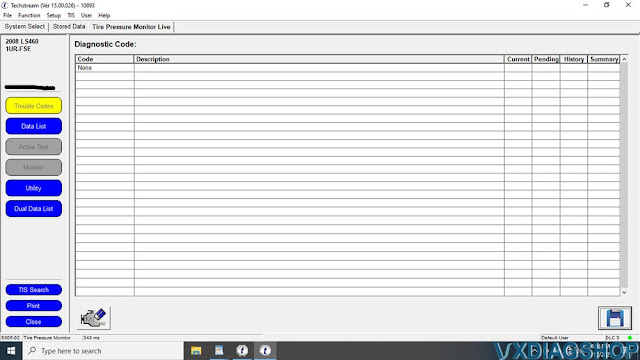
Clearing the trouble code and verifying that the new TPMS sensor is working: Inside Techstream's "Tire Pressure Monitor" screen, double-click the "Trouble Codes" button on the left-side panel and then clear Code C2125. Double-click "Data List" button on the left-side panel to verify that the new TMPS sensor (ID5 54D6465) has been registered (programmed/relearned) and is showing the correct tire pressure (i.e., 33.7 PSI in my case). Please see the illustrating photos below. Turn off the engine ignition and disconnect Techstream from the car. The replacement of the bad TPMS sensor has been completed.

Hope it helps.
Set up VXDIAG GM Tech2Win on Win10 32bit
It is always recommended to install vxdiag vcx nano gm tech2win software on Windows 7 32bit operating system. But if some only have Win10 laptop?
You cannot use a 64bit OS system it has to be a 32bit device. The newer units are 32bit and can't run from a Vm image that is 32bit OS.
People already figured out how to fix that problem.
Set up Tech2win on Win10 32bit:
Load VX manager first, plug in the Nano, and get it working in VX manager. Hence click on firmware icon to update the firmware, then click on licence icon to install the licenses.
Now with the VX manager open and the nano plugged in, now load that auto install.exe of Tech2win to load it to your machine. Hence the autoinstall.exe will need to over ride some VX manager files when it installs, so VX manager has to be open with the Nano connected/being seen in VX manager when you load tech2win auto install. Installing tech2win, with VX manager not open and the nano not plugged into the machine will end up with install problems every time with Win 64bit system.
Lastly, if you are loading in the Newer VX manager, you have to go in and install the needed programs from inside VX manager (no long load into VX manger from the white disc). So Tech2, GDS2 and SPS have to be installed from within VX manager. If you check in VX manager and these are loaded already, uninstall and reload them from VX manager again if you are having problems. When you have done these three reloads, go back in the licence tab in VX manager and make sure you are showing licences for all three of these. If not, then go back to the main page and click on the licence ion to update the licences on the refreshed installed. I bring this up, since if you are using the last right hand top tab in VX manager to download the lastest VX manager, you will have to install Tech2win/gds2/SPS from within VX manager (will still use the white disc to install Tech2win to the laptop to get the desktop icon.
Now the glitch with AC Delco TBS.
If you are using the older VX manager
and older firmware on the Nano, when you get the screen to install the
BoschTech2 win driver and GDS2 in TBS (will be a pop up screen), you want to
skip these installs each time you use TBS.
If you are using the latest VX manager and latest Nano firmware, then you want to install these two Bosch drivers from TBS instead.
Trust is, for TBS now, you want to be using the lastest VX manager and firmware. When you load the two Bosch drivers, it going to load another program that is needed to get the Nano to work (TBS changed about a year ago, and its this third driver that loads with the Bosch drivers that is needed to get the VXDIAG VCX Nano GM to work with the system.
2023 Updated:
Install VX manager, then go click on the VX manager license and firmware icons to install/update them so the Nano is showing up in VX manger and working.
Next, Install Tech2win using the auto.exe install with VX manager open and the VX nano attached to the machine, and watch for defenders to block something during the installs. If defenders blocks, the go into defender to allow the needed file to run, then go back and re run autoinstall again for tech2win..
Now go into VX manger, click on the top diagnostic tab, automative tab left
hand side, and install Passthru, GM gds2/tech2w one at time.
Note, if you
update VX manager, after the update, liscence and firmware updates, go back and
uninstall and reinstall these three again (don't just use the update
button).
Note, will get that a few items have already been installed during
the above steps, so just click and allow the installs to continue as needed.
Now at this point, do a restart of the entire laptop, and should have your problems solved.
As for tech2win, delete the quick start tech2win on the desktop since your never going to use it, and once you click the normal tech2win icon, select North America in the first screen, MDI1 in the second screen, then usb device in the third screen. If you do not get the third screen USB device with the nano connected, it because when you first went to install Tech2win on the machine, VX manger was not open with the Nano connectors, so the auto install could over write a few files needed in VX manager to make the software work. So start from the above steps with VX manager open and the VX connected to the machine, and nana showing up in VX manager.
As for once you are into Tech2win , pretty straight forward for the most
part, and the Vet is a Y body type.
For 2005 vet, use that year for all
modules, while if you need to get to the BCM setting for a 2006 to 2013 Vet, use
the 2013 year alone (the rest of the modules you can just use the car actual
year isntead).
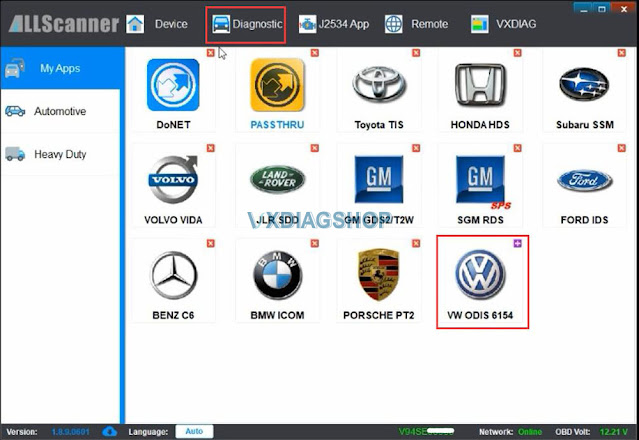
VXDIAG Update VW 6154 Driver for ODIS 11
VXDIAG released a new VW ODIS 6154 driver for ODIS 11.
Device affected: VXDIAG VCX SE 6154, VXDIAG VCX NANO 6154 WIFI, VXDIAG full etc
2023.03.07 v3.3.10.230307
Update: Support ODIS 11 new version software.

Update VW ODIS driver in vx manager.
ODIS 11 software comming soon.
ODIS V11 vs older version
| ODIS V11.0 | ODIS V7.21 | |
|
Latest Support For Cars |
until 2022.11 | until 2022.08 |
| Engineer Software Version | V 14.1 | V 12.1 |
| Hardware Devices Support | VAS 6154 & VXDIAG VCX SE 6154 | VAS 5054A, VAS 6154 & VXDIAG VCX SE 6154 |
PCM Update with VXDIAG and Chrylser J2534 Application
VXDIAG VCX SE can be used as J2534 passthru device for OEM software programs. Some users tested working with Chrysler J2534 application.
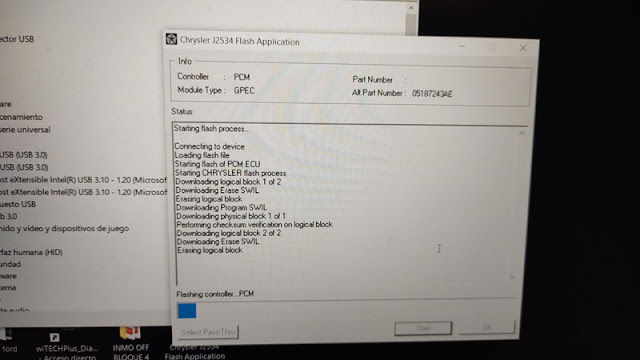
Chrysler GPEC module calibration example:
Change of calibration to GPEC PCM Dodge Avenger 2008 with the vxdiag vcx se pro/scantech interface.
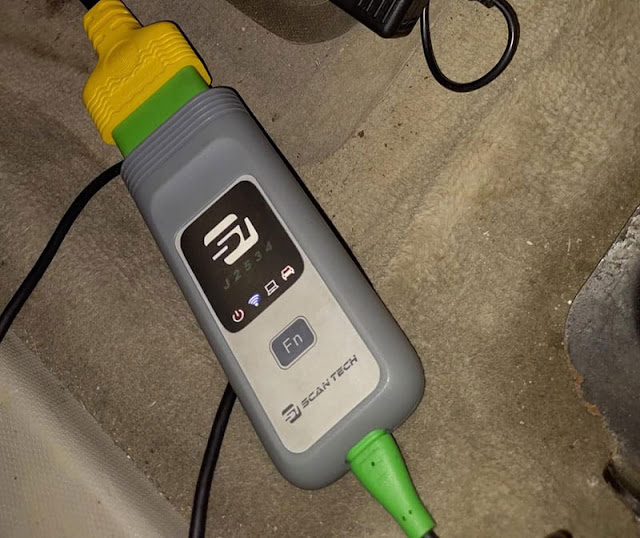

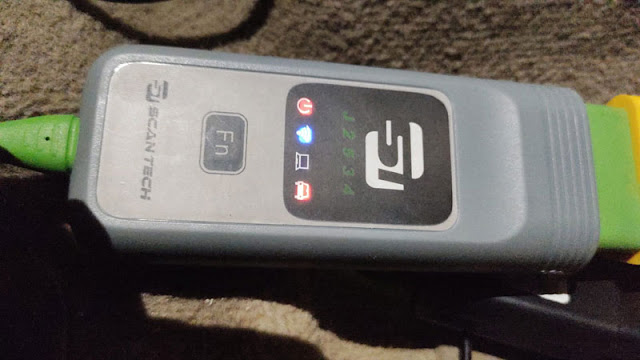


NOTE: scantech interface is the same as vxdiag vcx se j2534 passthru. It is customized by South American dealer.
Free to test by your side. You are at your risk.
2023 VXDIAG BMW Software: Complete List and Features
Latest 2023.03 BMW software has been tested and verified working with VXDIAG VCX SE and VCX DoIP scanners.
Software is in 1TB HDD or SSD format, based on Windows 10 operating system.
ISTA-D 4.39 requires latest version BMW ICOM Driver.
Do update BMW ICOM driver first.
Then update firmware and license in vx manager.

What's included?
BMW ISTA+ ISTA-D 4.39.20

ISTA+ has English only
ISTA-P Programming 68.0.800
ISTA-P is multi-language

Comes with other engineering software as well.
Ncs-expert
BMW Coding Tool
KSD2
E-sys
INPA
Ncs Dummy etc
