VXDIAG VCX SE vs Scanmatik Pro 2
Question:
I was confused between vxdiag vcx se and scanmatik pro 2 (SM2). Which one should I incline towards because i will have pcm flash as plus for reading and writing ecu's?
.jpg)
Answer:
We're going to explain the difference between Scanmatik and VCX SE (with pcmtuner 67 module). Used for Tuning by reading OBD both give the same performance, but VCX cannot be used for reading Boot or Bench (module 71). We recommend buying the original Scanmatik for Tuning, if you are going to read Boot or Bench, if you want to install different programs for the diagnosis, VCX is clearly superior because its drivers can emulate any of those original testers used for diagnosis (JLR SDD, GM GDS2, Honda HDS, Toyota Techstream, Subaru SSM3/SSM4, VAG ODIS etc).
We have several options with licenses. if you choose a programmer with the name BMW, it means that he has a license for BMW. If it has the name BMW+Mercedes it means that it has a license for these two brands. The price differs depending on which option you choose.
It has licenses valid for life time from the moment you buy it, you don't pay anything annually and you can update the Firmware and licenses for free.
As for openport, it is the same as vcx se, it read and write ECU via OBD only, and cannot do bench or boot mode. Openport clone price is cheaper than vcx se, but firmware need modification to work.
VXDIAG ODIS 9.1.0 Trial Has Expired Solution
Problem:
My vxdiag vcx se 6154 odis 9.1.0 was working fine. But it says the trial period has expired when I try to update VCI to new version today.
How to register software to remove trail limitations?
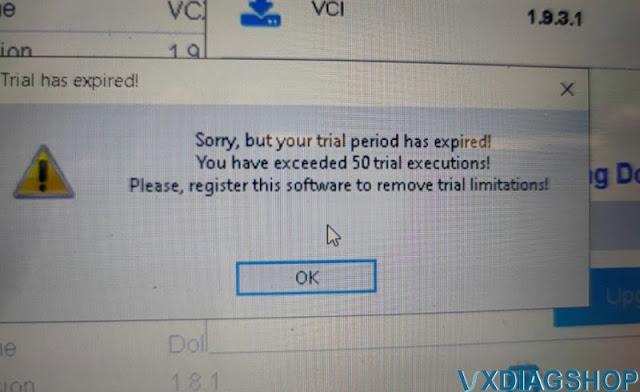
Solution:
Don't need to register software.
Download VW ODIS 9.1.0 unlimited.exe
Download and save file to the desktop, then double-click to run this program.
It will remove trial limitations.
VXDIAG GM GDS2 License Invalid Update VCI Solution
Problem:
I got the vxdiag vcx se pro 3 in 1 with GM Ford and Subaru license. When i use gm software and try to update license in vx manager 1.8.9. It says "License invalid, please update VCI". Any solution?
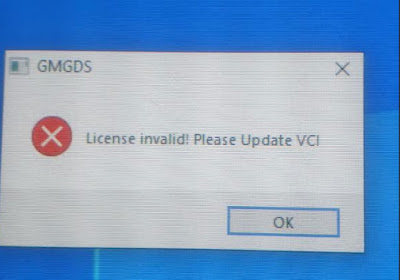
Solution:
The error is usually caused by missing license. Check available license in 'Licenses' area
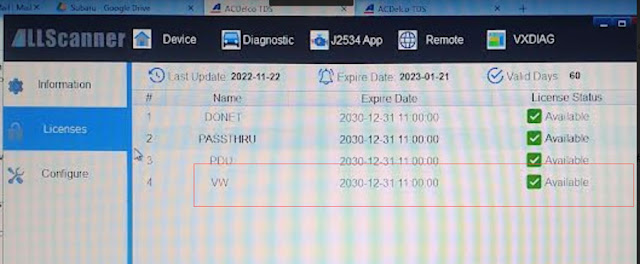
If cannot see your license, contact your dealer to add license to your vcx se.
If your device is not a 3-in-1 device, purchase brand license separately.
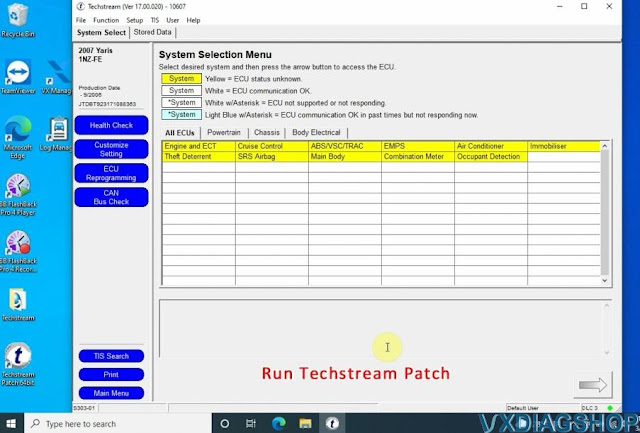
How to Install VXDIAG Toyota Techstream V17 on Win10?
Free download and install vxdiag vcx nano Toyota Techstream software V17.00.020 on Windows 10 64bit system.
Free Download Techstream for VXDIAG VCX NANO
Techstream Setup v17.00.020.exe
https://mega.nz/file/XmhhkYRB#HYmk2DV_m0-J174T_vWPddBFhctjZmJgZp5cax5urK0
Free download Techstream Patch
https://mega.nz/#F!7VZzBQgZ!wO9Fjk0gfZF-tfv6zQAqzw
Password: NO PASS!!! With Patch does not require activation.
How to install:
Step 1: Install Setup and Framework
Step 2: Install VX Manager
Step 3: Run patch
Step 4: Run software
Download Techstream software above
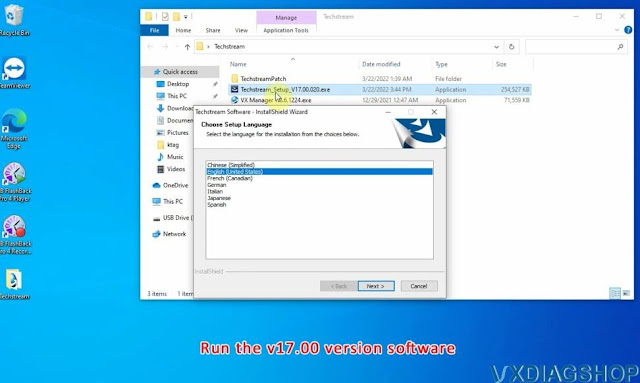
Run Techstream_Setup_v17
Select Setup language
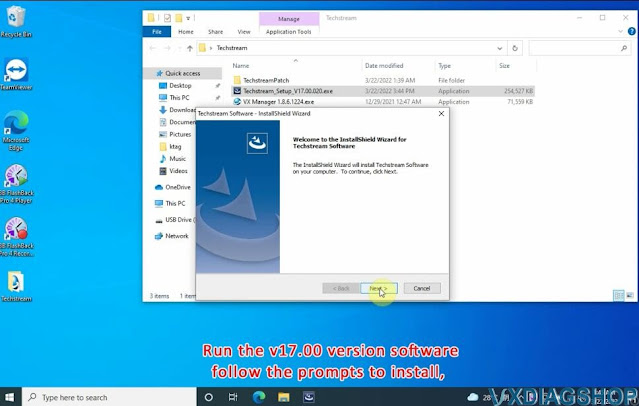
Install Techstream
software setup
Accept license agreement

Enter Techstream user name and company name in random
Press Install

Wait until Techstream setup installation finished
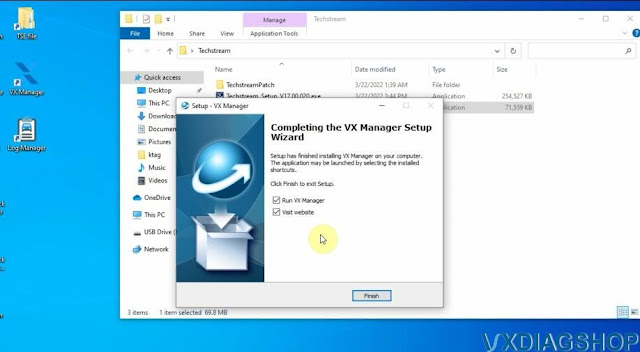
Run Latest version VX Manager
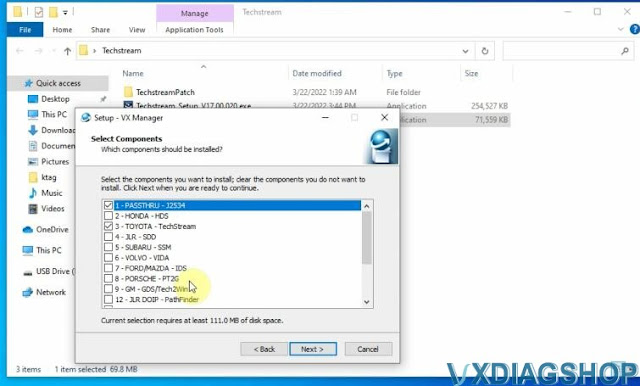
Install Passthru and Toyota techstream driver
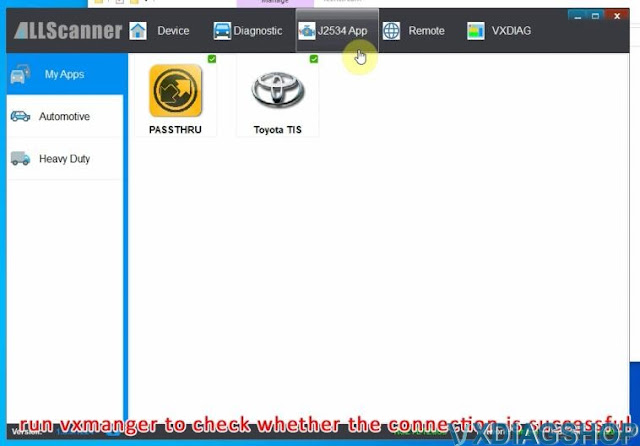
Run VX Manager, make sure well connection is built and drivers are installed.
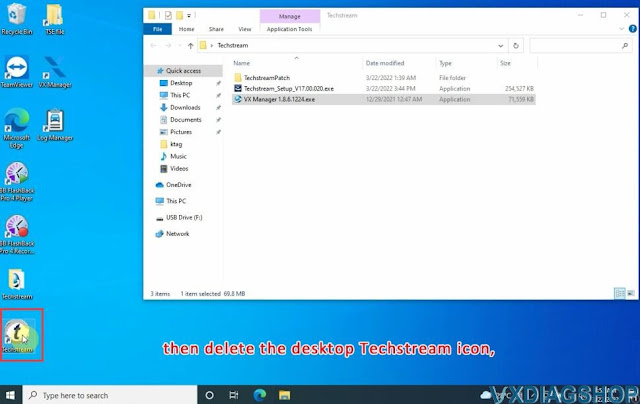
Delete Techstream desktop icon
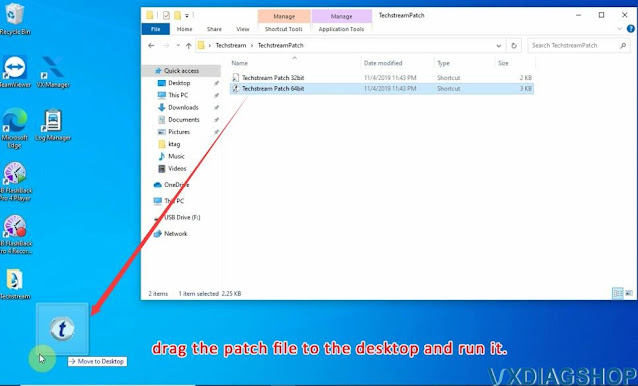
Drag the corresponding path file (32bit or 64bit) to the desktop
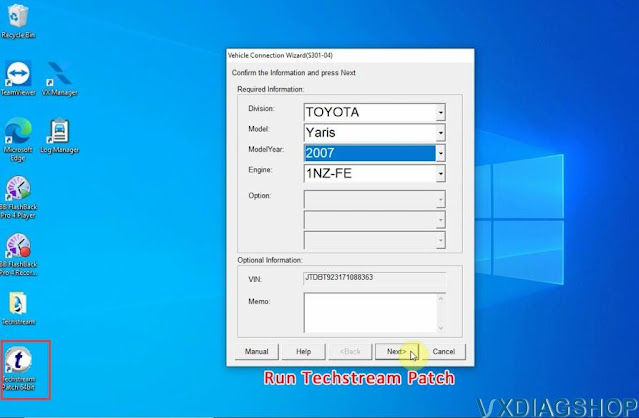
The run Techstream patch from desktop
Software is ready to use.
Manually input vehicle information and continue.
https://www.vxdiagshop.com/service/install-vxdiag-vcx-nano-toyota-techstream-v17.html
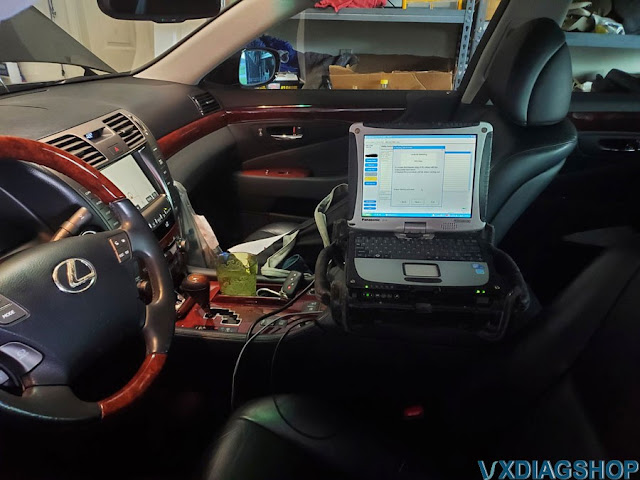
VXDIAG Techstream Lexus LS460 2008 Brake Bleeding Guide
I tried several cheap Mini VCI J2534 simulated USB cables (about $25 each) on Lexus LS460. I found that they could perform some basic Techstream functions but were often unreliable (lost communication, etc.) when performing more advanced functions such as programming TPMS sensors. Eventually, I settled with a VXDiag VCX NANO Toyota Techstream connector (about $89), which performed all the advanced Techstream functions that I needed to do. So, check your VCI/OBD2 interface and make sure that it can communicate with your car reliably and consistently.
I want to share my experience with the brake bleeding on my 2008 LS460 with 82K miles. I was doing this as maintenance and to get rid of the slight "squak" noise when applying the brake. I replaced all the fluids when I bought the car and this was the latest fluid to replace.
So prior to doing this job I did a LOT of research and reviewed the manual. The manual was unusually confusing so I decided to mostly follow the DIY instructions from forums.
The basics of the DIY were as follows:
1. Zero down accumulator
2. Disable EBD
3. Bleed front right
4.
Bleed front left
4. Bleed right rear
5. Bleed left rear
6. Reset
Memory
7. Relearn Linear Offset Memory
The manual listed the following for replacing only the fluid (no parts replaced)
1. Bleed front right
2. Bleed front left
3. Bleed rear
3. Disconnect
accumulator connectors
4. Zero down
5. Disable EBD
Then while not listed you would presumably:
1. Reset memory
2. Relearn Linear Offset
BOTH of those procedures are wrong, especially IF you are just replacing the fluid. Here's my ordeal.
I used the Techstream to select ABS/VSC/TRAC -> Utility-> Brake Bleeding -> Adjust Fluid Only -> All Lines
I followed the prompts and everything worked fine. The fronts were bled using my pneumatic bleeder and the rears were bled using my wife and the accumulator to push the fluid. Everything was good and I just needed to reset the memory and linear offset.
This is where I screwed up.
I noticed both the DIYs and manual both mentioning doing a zero down of the accumulator. So I decided I would reset the memory, zero down the accumulator, disable the EBD, and relearn the linear offset in that order.
This was mistake. The result was the accumulator pressure went to 0 (.45 V) and it was unable to build pressure as the accumulator wouldn't turn on to pressurize the system. This resulted in a low pressure code (Code C1256) which caused linear offset learning to fail (Code C1345). Also as i tried to fix the issue, my battery voltage went low causing the tests to fail. I tried bleeding everything again using the "Adjust Fluid Only" and the EBD 2.0/2.5 Utilities and no fluid would come out of the rear brakes (either side). Jumping the battery and running the car for 30 minutes would see the accumulator pressure rise to 2.19 V (minimum threshold is around 2.4) and immediately go to 0 when the brake pedal was pressed. Nothing worked and I thought I damaged the accumulator or it failed during the bleed. I googled the code and tried numerous attempts to fix, which didn't help.
I tried one last attempt at repair which worked perfect. I simply used the procedure for brake bleeding from "Actuator Replaced." I followed the prompts which leads you to this procedure:
1. Bleed front right
2. Bleed front left
3. Bleed accumulator via right
rear caliper
4. Bleed rear left
5. Bleed rear right
6. Disconnect
accumulator connectors
7. Zero down accumulator, shut off ignition, turn on
ignition, let accumulator run until it stops (builds pressure).
8. Repeat #7
four more times (total of five)
9. Reconnect accumulator connectors.
10.
Reset memory
11. Relearn Linear Offset.
During step 3 it took nearly 3 full seconds for fluid to come out which means there was a TON of air. After this, all my codes cleared and everything worked PERFECT! Keep in mind that steps 3, 4, and 5 dump a LOT of fluid very fast. Because of my screw-up I ended up replacing over 75 ounces of fluid and totally flushed the entire system. Total cost was approximately $23, a few trips to the parts store (because I ran out of fluid twice while trying to solve the problem), and the cost of my time and sanity while I thought a $1500+ part had failed.
If I had just never done a zero down after my initial bleed, everything would have been fine.
Hopefully my experience can help someone who screws up like I did.
Toyota Techstream is required for brake bleeding on an LS460. Use the brake bleed utility under ABS/VSC/TRAC -> Utility-> Brake Bleeding and follow the prompts for your type of bleed exactly.
If replacing fluid only go to ABS/VSC/TRAC -> Utility-> Brake Bleeding -> Adjust Fluid Only -> All Lines
If bleeding after replacing a hard part or if you screwed up, go to ABS/VSC/TRAC -> Utility-> Brake Bleeding -> Actuator Replaced
If bleeding after replacing a sensor, go to ABS/VSC/TRAC -> Utility-> Brake Bleeding -> Stroke Sensor Replaced.