Audi Virtual Cockpit Sport Layout Activation by ODIS
Here we share a tutorial on Audi Virtual Cockpit Sport Layout Activation. It is only available for S models and RS models.
Credit to PopDog from MHHAUTO.
A sample photo

Depending on the engine, the display also looks different.
What is needed:
ODIS-E 12.2 or higher
VAS5054A or VAS6154A
or VXDIAG
VCX SE 6154
An Audi model (A3 8V, A4 B9, A5 F5, Q5 FY, Q7 4M, TT 8S) up
to 2019 (Gen1 VC)
Virtual Cockpit Version 1 with at least SW 0300(for A4, A5,
Q5 and Q7) or highest possible update. (Updates are available on the net)
No
errors should be stored in the ECU 17. Delete or fix them beforehand.
The lap
in control unit 17 via the long coding > byte 01 > bit 3 to 1 must be
activated beforehand.
Limitations / Errors:
No errors are stored in the error
memory as a result of the change.
No mileage manipulation (checksum error) or
other errors like this will be shown with this solution. Everything
original.
The Boost feature (below left) is known to be non-functional. This has
something to do with the engine or the engine control unit.
There is no
A-Sport layout. Only the S and RS Sport layouts exist. If you use the A-layout
(classic), the S sport layout will be shown when you change the layout to the
sport layout. In order to change the Sport layout in RS, the coding must be
changed for this.
A layout and S sport layout
S layout and S sport layout
RS layout and
RS Sport layout
Recommended guide:
We recommend the instructions with macro
script, as this can be carried out easily and also safely against incorrect
entries.
1. Download the attachment, unzip it and save the file called
"sport_layout_vc.py" in Odis under:
sport_layout_vc.zip
enable_sport_layout_vcp.zip
C:/ProgramData/Offboard_Diagnostic_Information_System_Engineering/macros/
or C:/ProgramData/OE/macros/ (depends on ODIS-E Version, since 15.0 it should be
OE)
With default windows setting, you will not find the C:\ProgramData folder in Windows Explorer. To open it, you have to paste C:\ProgramData in the Windows Explorer Address Bar and press enter. Then you can search the right ODIS-E folder and can go into the macros folder to extract / save the file into this folder.
2. The car only has to be on ignition (do not leave the engine running!) and
open the bonnet if necessary.
3. Start ODIS-E 12.2
4. Connect Odis-E and
VAS5054A/VAS6154A/VXDIAG
VCX SE to car and open an engineer session / with the right project for your
car.
5. Select macros on right side and select the file "sport_layout_vc.py"
and press play.
6. The display restarts and the Layout should now be
changable.
7. Delete all error memories. (Is normal because VC was
restarted).
Hope it helps.
How to Fix VXDIAG VCX NANO Toyota License Invalid?
Problem:
I try to update license of vxdiag vcx nano Toyota scanner, but it failed me. Says the license is invalid and asks to contact dealer to confirm it is a valid device. vx manager is up to date but cannot see Toyota license. Error image attached. Any solution?

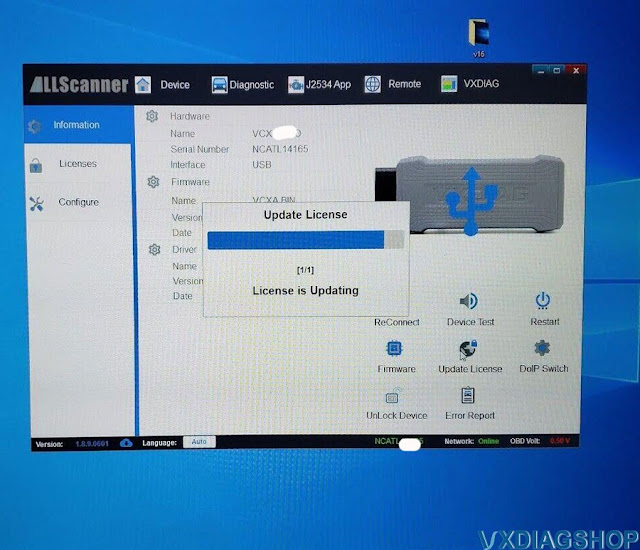


Solution:
Make sure you have latest version vx manager installed.
Always update firmware before update license.
Update Firmware->Update license. Don't mess up the order。

How to Solve VXDIAG Ford VCM USB Communication Error?
Problem:
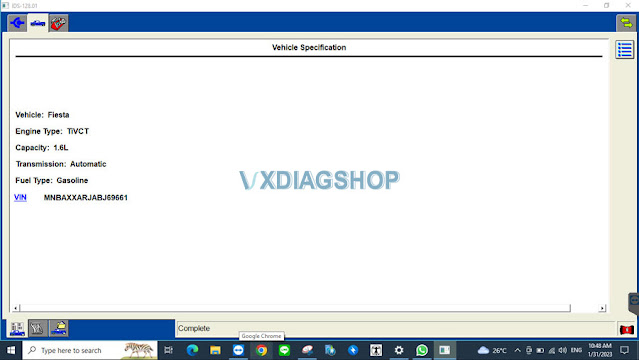
I had a problem running IDS V128.01 with the vxdiag vcx nano Ford interface. VCI and Ford drivers were installed. Start IDS from patch but scanner has no communication with my Fietsa.
Error:
VCM USB Cable Communication Error
IDS to VCM cable not detected.
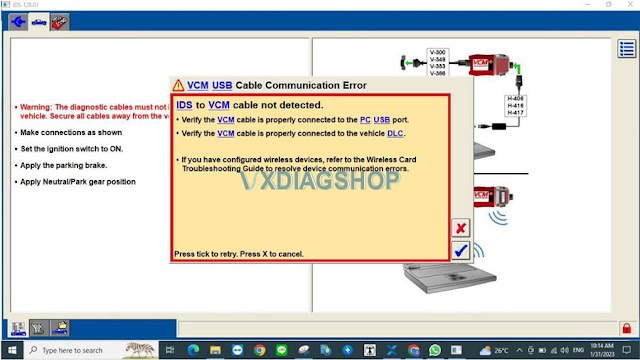
Solution:
Always keep your vx manager version up to date.
1.Update VCI and DoIP firmware in vx manager
2. Uninstall Ford IDS driver and reinstall again.
Run IDS from patch. It works fine.
VXDIAG GM Win7 32bit Setup Review for GMC Sierra
You will find no cheaper alternative compatible with Tech2Win. Rest assured, if you install it exactly as described below you will find success – in fact, I just completed an automatic ABS bleed today with my GMC Sierra 2500HD!
Disclaimer:
As indicated by others, viruses and hidden software may lurk
in the required files. However, my own scan with Kapersky did not flag any.
Regardless, it is recommended to perform a fresh OS install on spare/burner PC
for three reasons:
1) No personal files or info to worry about
2) Windows
7 Professional 32-Bit is required. If you don't already have it, you will need
to get it and perform a fresh install. There are many documented failures from
attempting to use Windows 10, Win 7 64-bit, etc -I prefer Win7.
3) Lastly if
you think you can get away with running Windows 7 Pro 32-bit inside a Virtual
Machine, think again – Tech2Win will crash while establishing vehicle connection
(ask me how I know).
Okay, on to the guide…
1) Perform fresh install of Windows 7 Professional 32-bit (x86).
2)
Install drivers on your machine and all that good stuff.
3) Fully update
windows via Windows Updates (skipping this step may result in cryptic "missing
.dll"
errors during install).
4) Install Microsoft Visual C++
Redistributable 2010 to avoid more .dll errors.
5) From VXdiagshop.com, download the latest
versions of the following (do NOT use the USB key):
-VX Manager
-VXDIAG GM
GDS2
-VXDIAG GM Tech2Win
6) Unzip/extract as necessary. Inside the
Tech2Win folder, run AutoInstall.exe.
7) Inside the GDS2 folder, run
AutoInstall.exe. Expect long wait times. Note that GDS2 may not strictly be
required for Tech2Win but I installed it anyways.
8) Install VX Manager –
select PassThru & GM.
9) Plug in VCX
Nano GM. Windows will automatically find and install the USB driver as long
as step (8) has
been completed
10) Launch VX Manager. VCX Nano should now
be recognized. If not, unplug and re-plug back in, restart VX manager, restart
the computer, etc. It will show up eventually. Note that an OBD connection is
not required at this time.
11) Go to Diagnostic tab at top. Double click "GM
GDS2/T2W" and hit Install. Do the same to PassThru if it doesn't already have a
green checkmark.
12) Plug in to your vehicle.
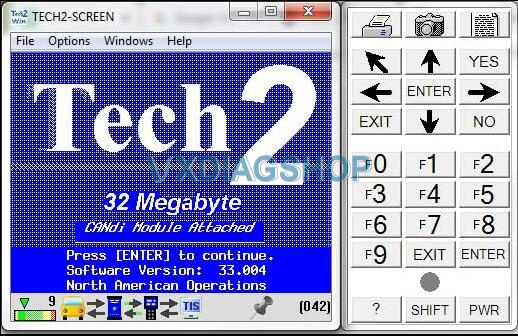
13) Launch Tech2Win with VX
Manager still open in the background. Tech2Win It should prompt you to select
your communication tool in a popup window – pick GM MDI (not MDI 2). It should
then pause and prompt you again, this time with one option – a string of numbers
and "USB". If it does not prompt twice, close Tech2Win and try again.
14) Hit
OK at the second prompt. That's it – Tech2 emulation is running and you should
be able to communicate with your vehicle.
I've had fairly good luck pulling data and performing special functions with this since I got it working.
Good luck to you – hope the guide was helpful.
VXDIAG 2TB HDD Web Browser in Chinese Solution
Problem:
I got the VXDIAG 2TB HDD for full brands. But all my web browsers turn to Chinese language. How do you get rid of it?
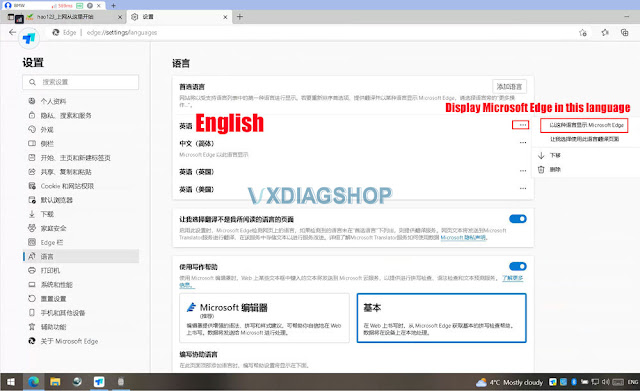
Solution:
1. Click on "…" setting icon on the right top of the
browser.
2. Select Settings
.jpg)
3. Go to language setting (Time & Language)
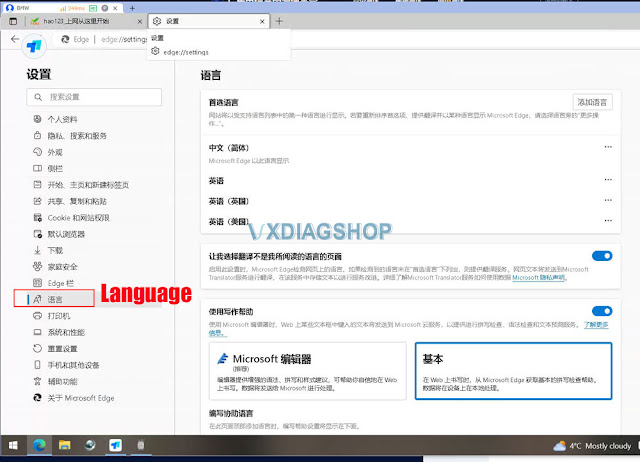
4. Select English and display Microsoft Edge in this language.
Save setting.